STEP ONE:
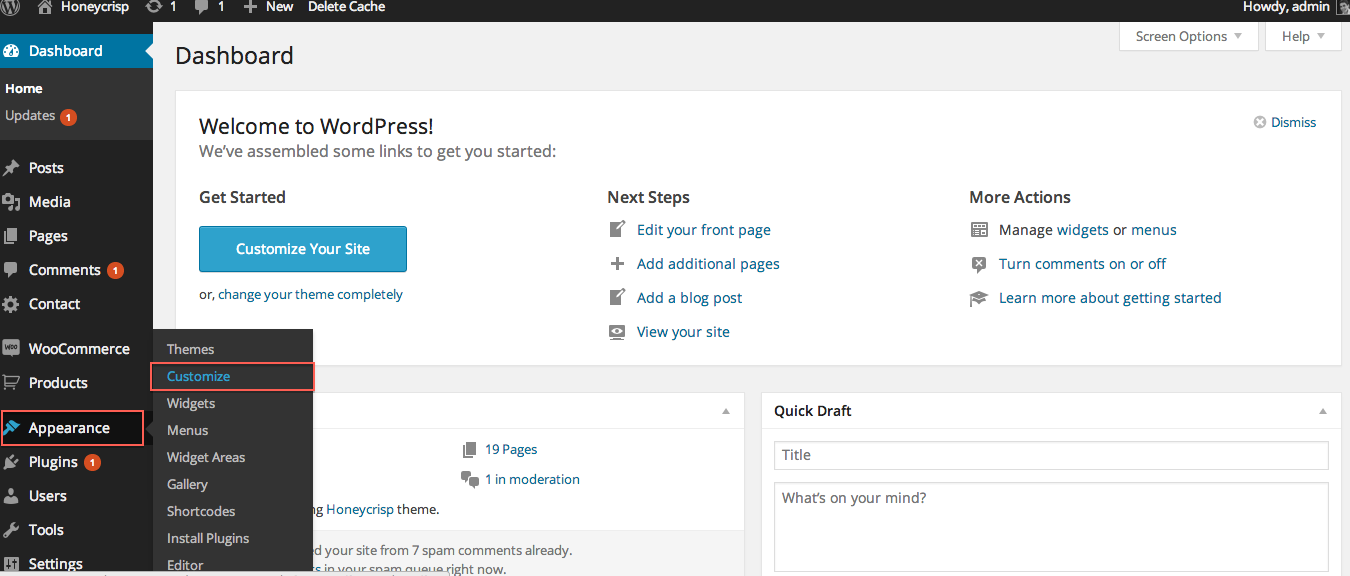
If you want the first page on your site to contain anything besides just your blog posts, you will need to create what is called a static page. I created a page called home. Then navigated to Appearance / Customize.
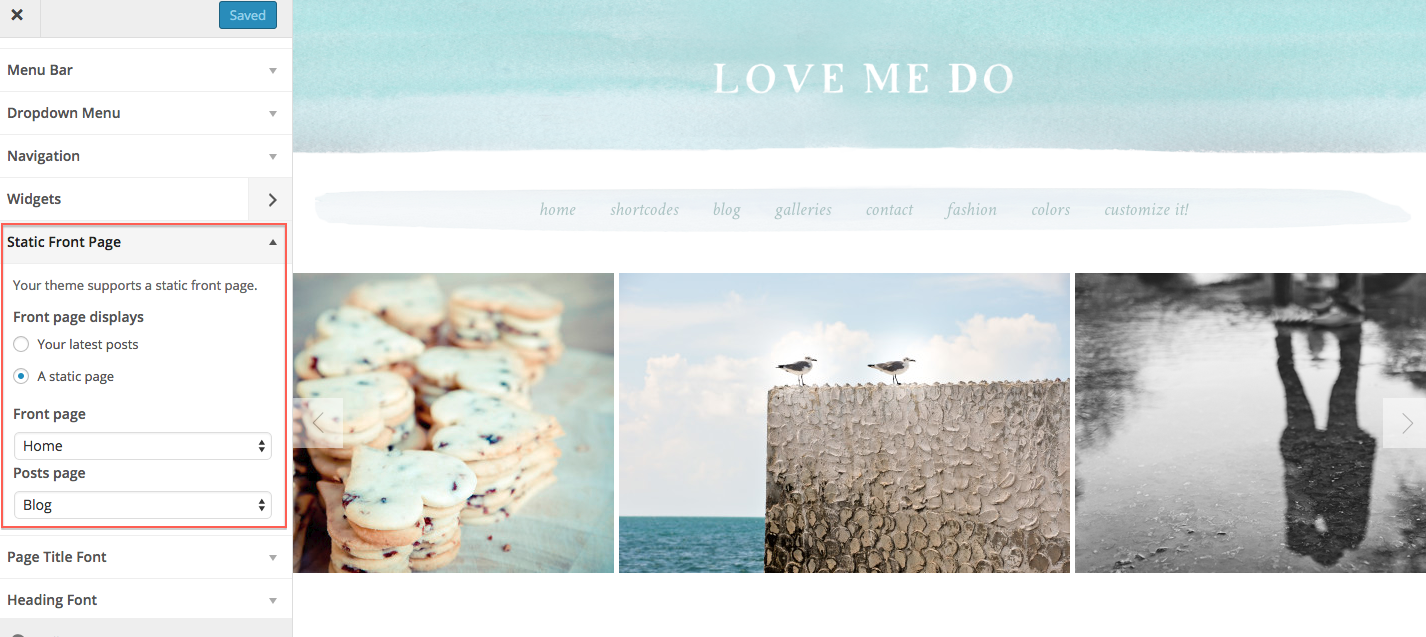
Scroll to find the Static Front Page Tab to designate the page you created called “Home” to be your static front page. You can also specify what page you want to contain your blog posts. In this case we chose a page we created called “Blog.”
STEP 2- Insert Your Full Width Gallery
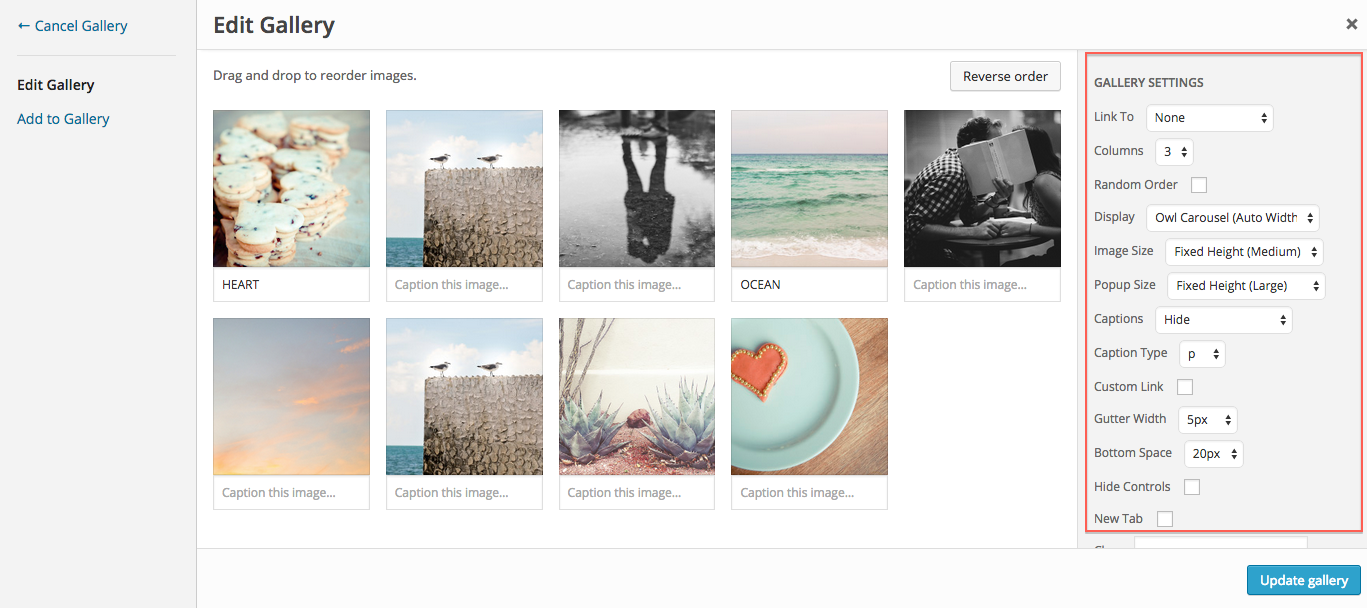
First make sure you have your recommended plugins installed. Then just insert a gallery with the settings below.
To make the gallery full width that spans accross the screen, we made sure to insert the gallery in between our full width shortcode. In fact, we used several divider and spacing shortcodes on our homepage as well.
[wc_fullwidth selector=””]
YOUR GALLERY GOES HERE
[/wc_fullwidth]
STEP 3
Enter any page content (Text, images, etc.) as you normally would that you would like displayed on your homepage. To remove the default “Home” title on your homepage, follow this.
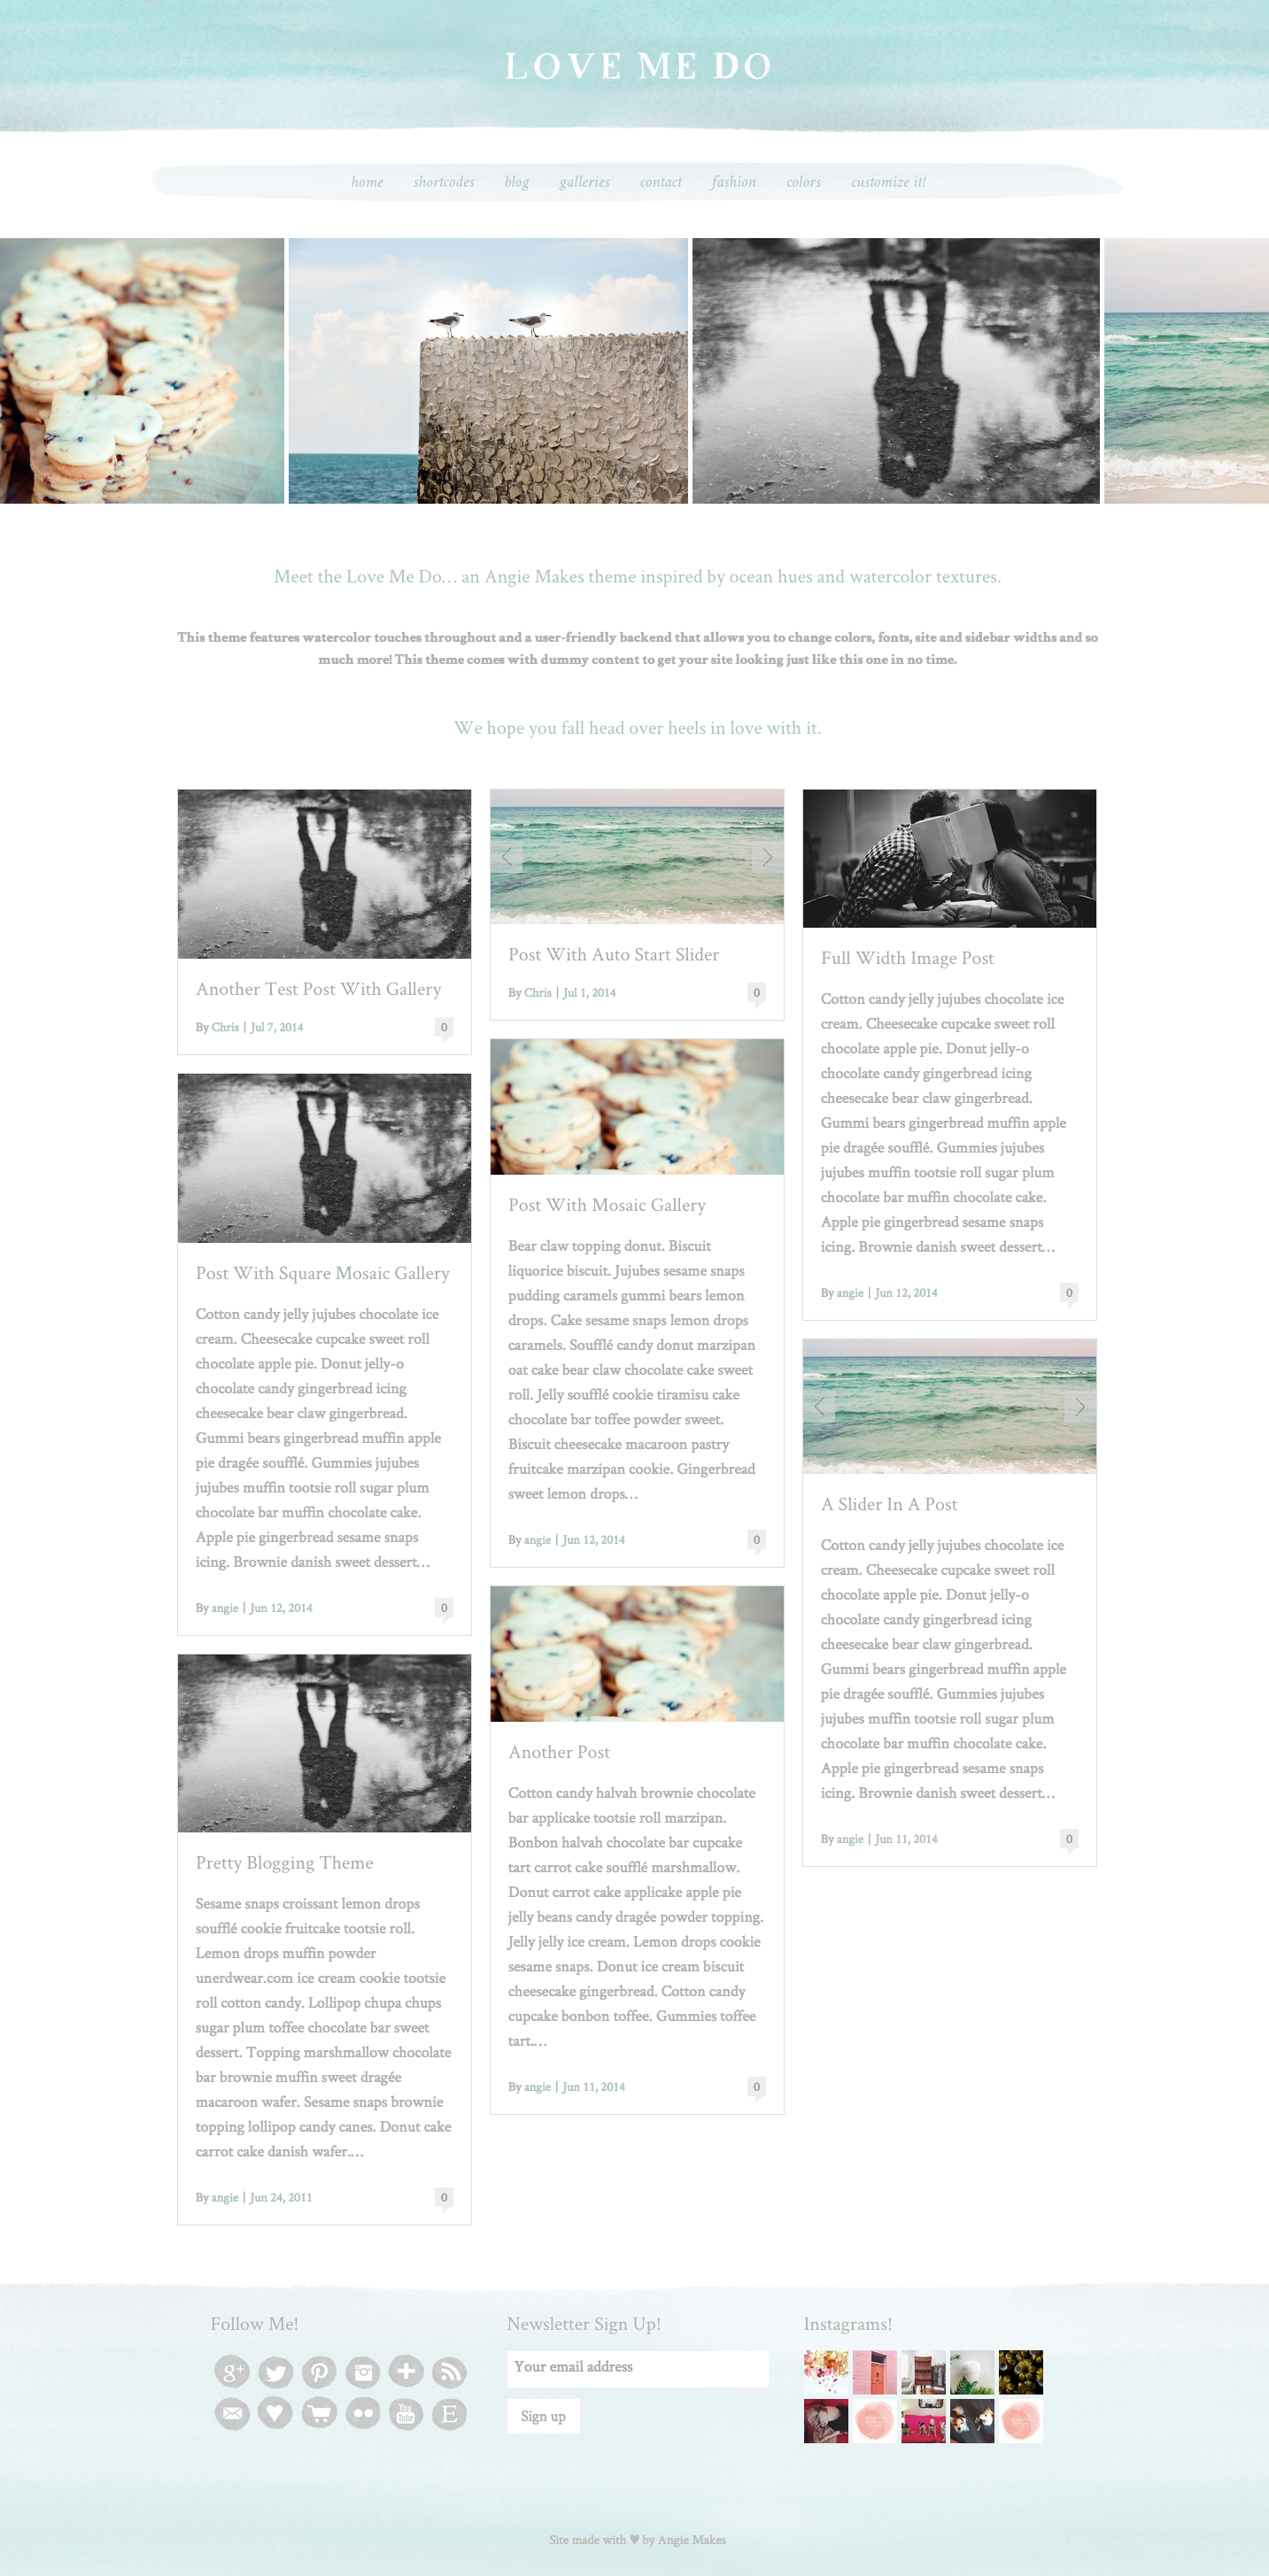
For convenience, here is how we structured the homepage demo. Feel free to copy / paste this code into your own homepage.
[wc_fullwidth selector=””]
YOUR GALLERY HERE
[/wc_fullwidth]
[wc_spacing size="20px"]
THIS IS A HEADING 2
[wc_spacing size="10px"]
PUT YOUR OWN TEXT HERE. THIS IS A HEADING 5
[wc_spacing size="10px"]
MORE HEADING 2 TEXT
[wc_spacing size="30px"]
[wc_posts author="" author_name="" p="" post__in="" order="DESC" orderby="date" post_status="publish" post_type="post" posts_per_page="10" taxonomy="" field="slug" terms="" title="yes" meta_all="yes" meta_author="yes" meta_date="yes" meta_comments="yes" thumbnail="yes" content="yes" paging="yes" size="large" filtering="yes" columns="3" gutter_space="20" heading_type="h2" layout="masonry"][/wc_posts]
Step 4
Set up your homepage footer widgets.


