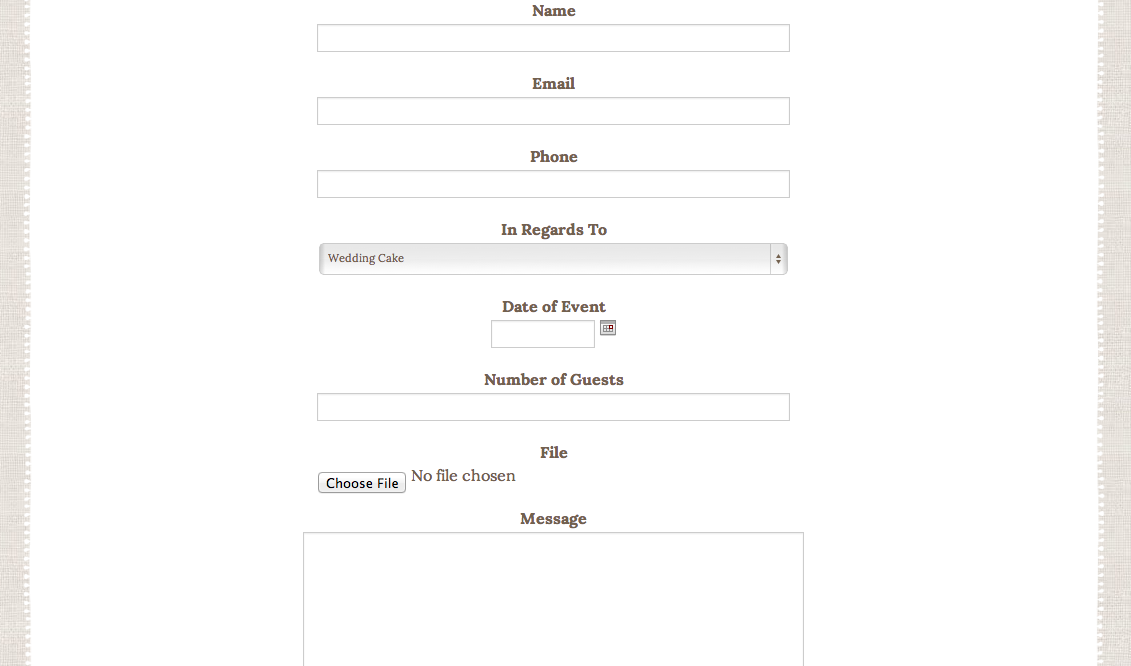
Many times, you need a custom contact form. Here is one Ariane at the Spilled Milk Cakery is using for her customers. Here’s how to do this with our themes.
1. In your dashboard go to Plugins. Make sure that the Contact Form 7 plugin is activated.

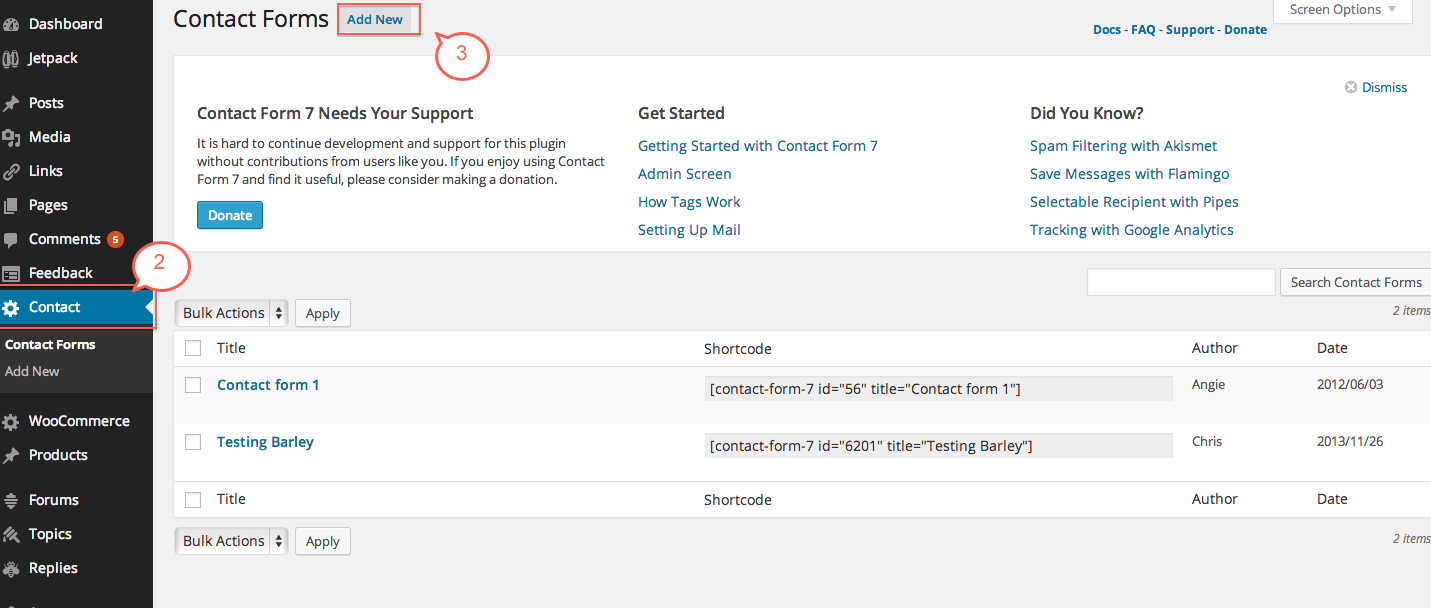
2. Then navigate in your dashboard to the Contact tab.
3. Click Add New at the top to create a new contact form.
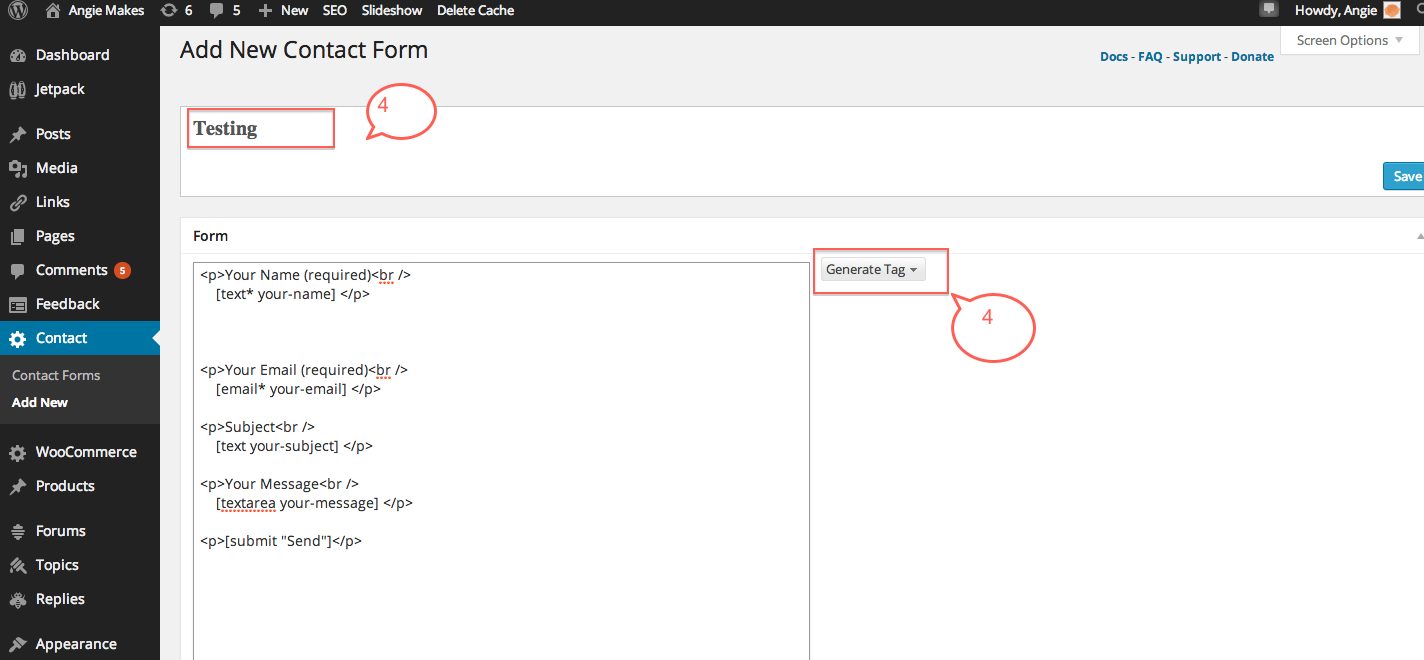
4. Give your Contact form a title then click generate tag. This will have a dropdown with various options that you can insert into your contact form such as questions with text fields, radio buttons, etc.
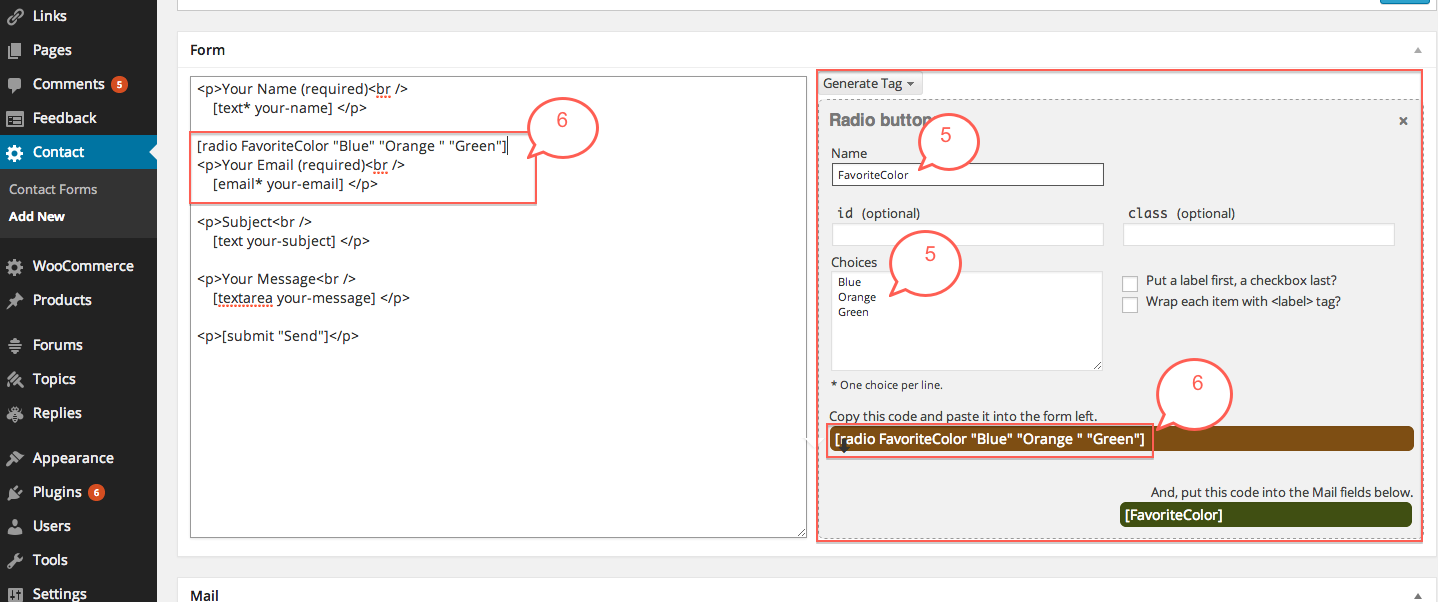
5. From the generate tag dropdown, I chose radio button to generate a question I titled “Favorite Color.” I then input my selection choices, blue, orange, and green.
6. It will auto generate the shortcode you will need to copy/paste into your contact form. I copied and pasted this tag under the Name field in my contact form.
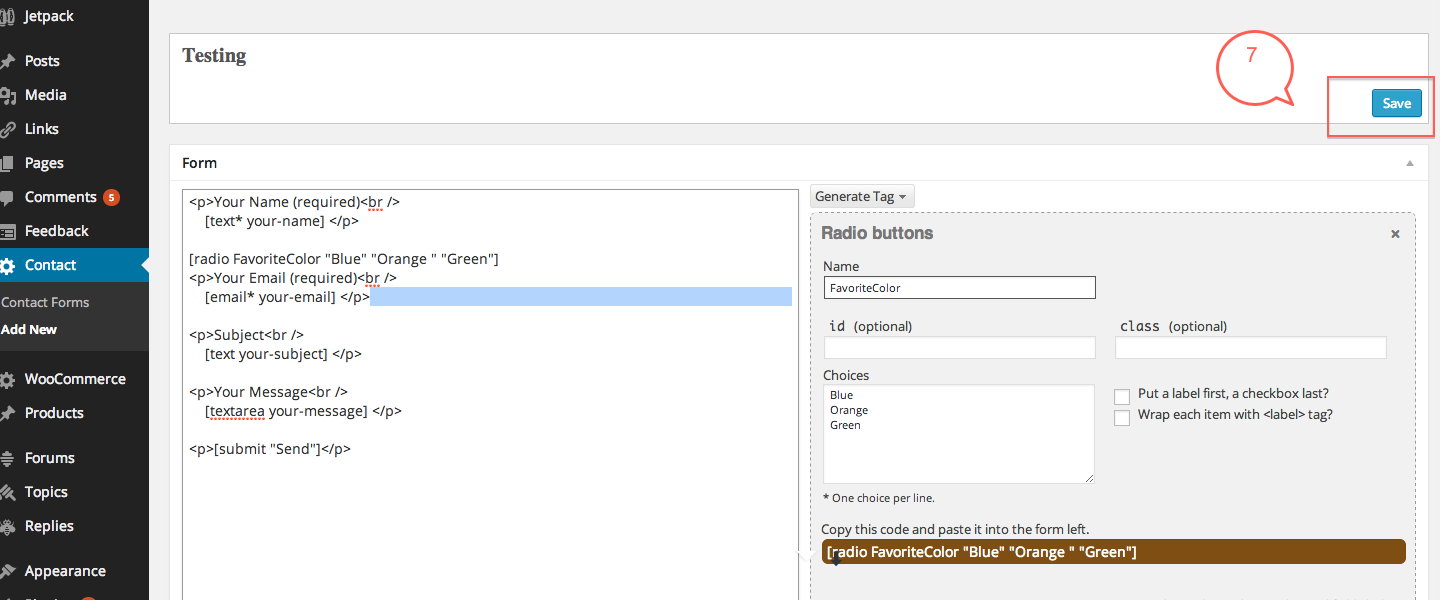
7. Save your form when you are done generating your custom tags and configuring options. You can add many other custom questions to your form.
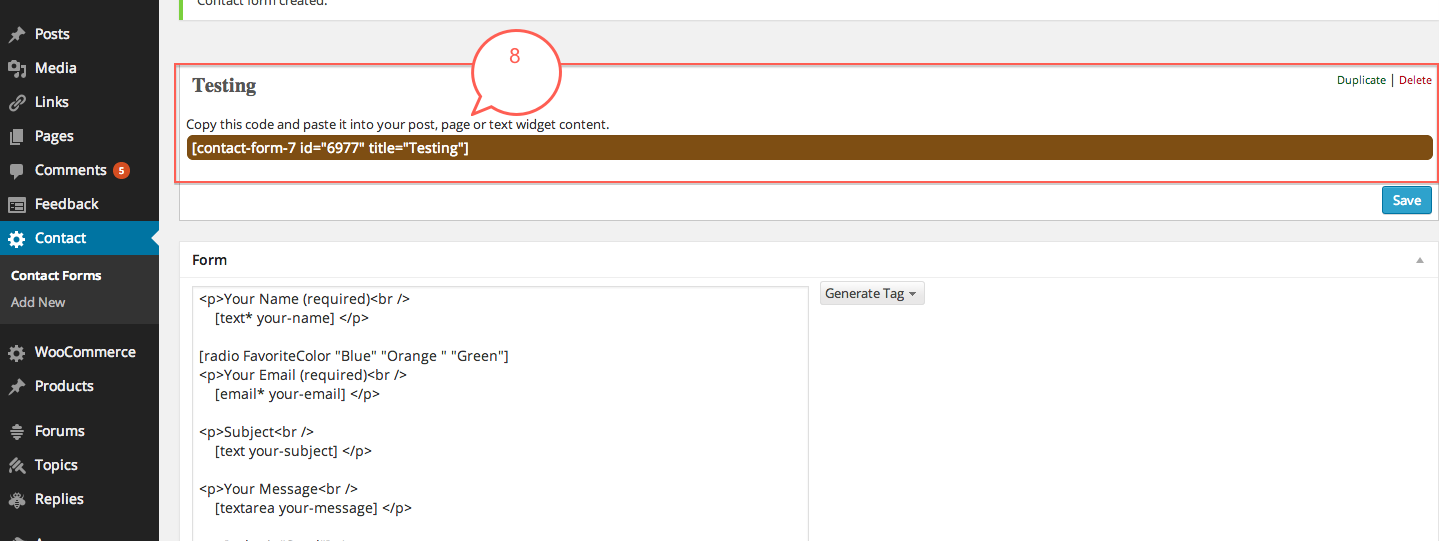
8. After saving your contact form, a shortcode will be generated. Copy / Paste this shortcode into the page or post where you would like your form to appear on your site.