
1. Navigate in your WordPress Dashboard to Appearance/Menus.
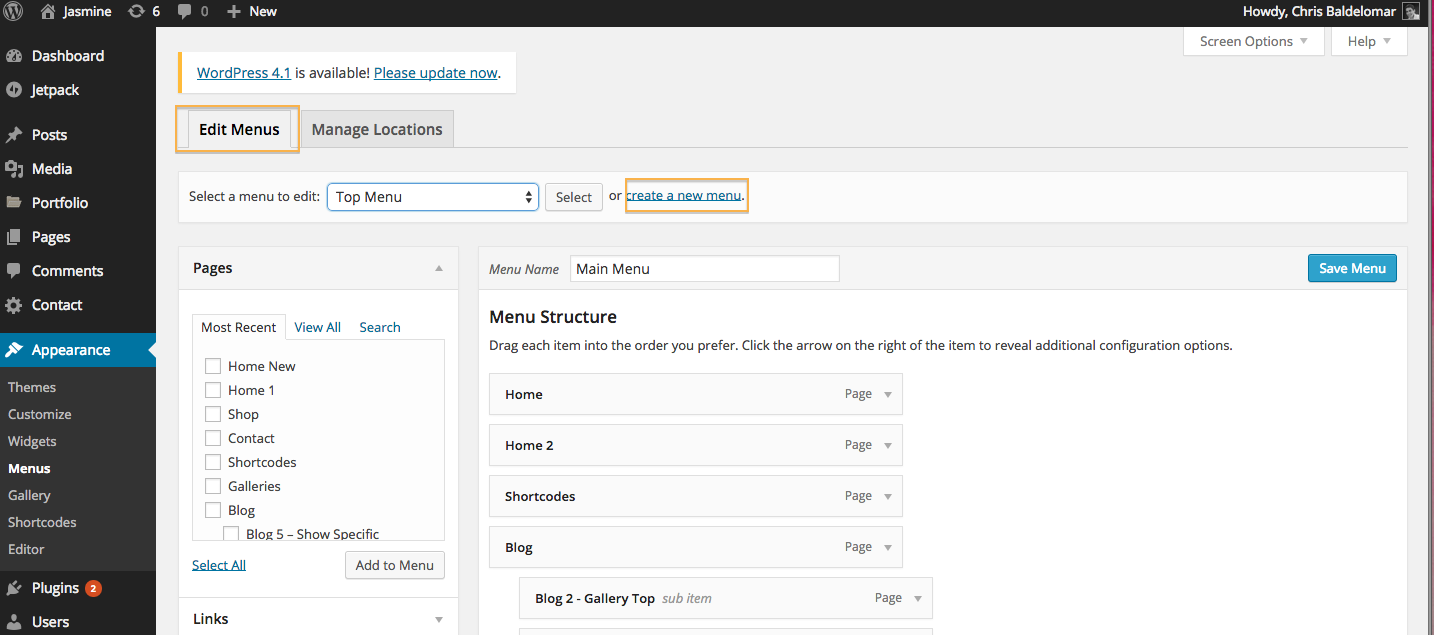
2. Make sure the Edit Menus tab is selected. Then click the link to create a new menu.
2. Name your Menu. It’s a good idea to choose a name that is specific so that you can recall what menu is for what. This is especially important in our themes that support multiple menus. I’ve named my menu “Main Navigation.” Then click “Create Menu.”

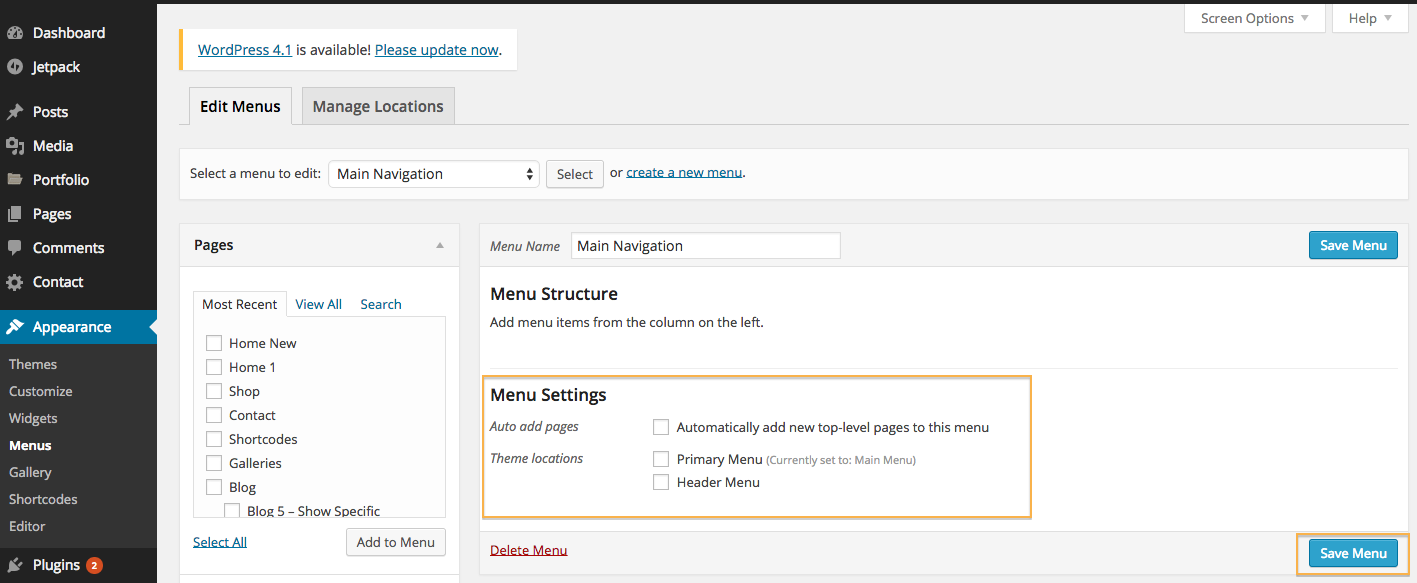
4. Notice that you can tick the box for automatically add top level pages to my menu. This will auto add any new pages you create in the future to your menu. I’ve left this unchecked because I create many hidden pages on my site.
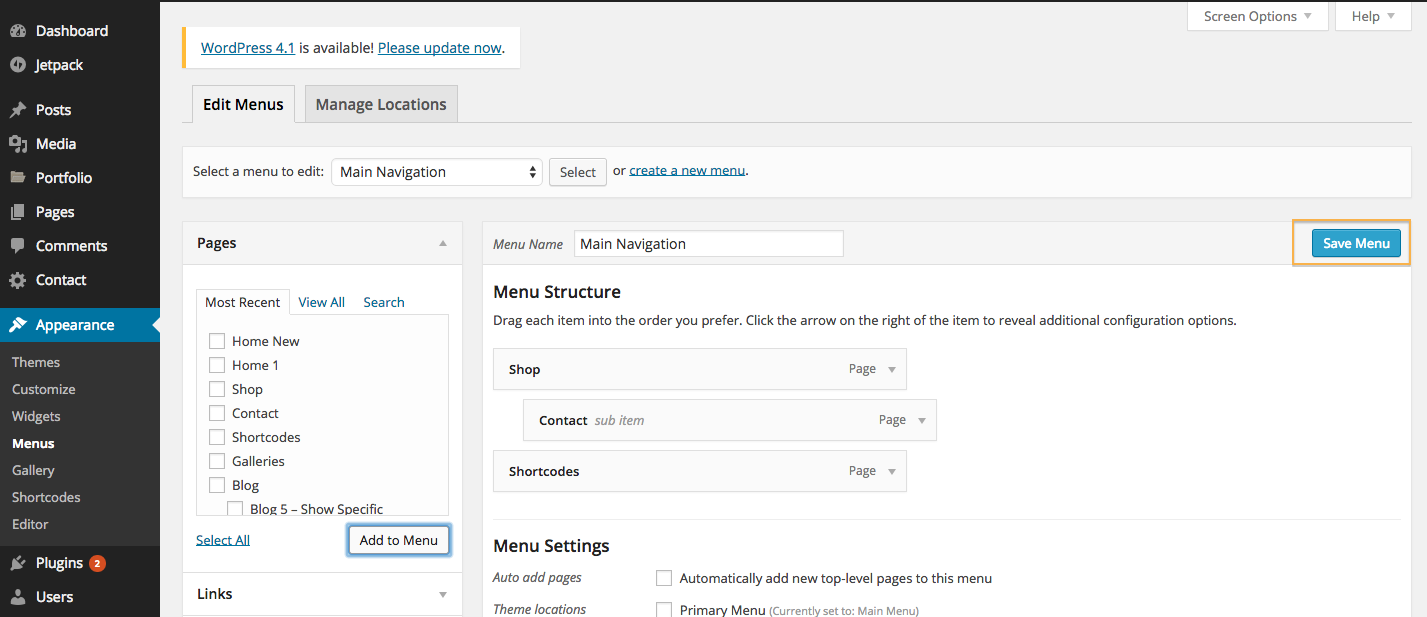
5. Select the pages on the left that you want to add to your menu.You can also add categories and links to your menu. Drag the pages by grabbing the rectangles to reorder them, and even move them under other pages to create sub (dropdown) pages. I did this just by dragging the sub page slightly to the right under its parent page.
Woah! You’ll love how easy it is to order your pages.
6. Click the “Save Menu” button to save your changes.
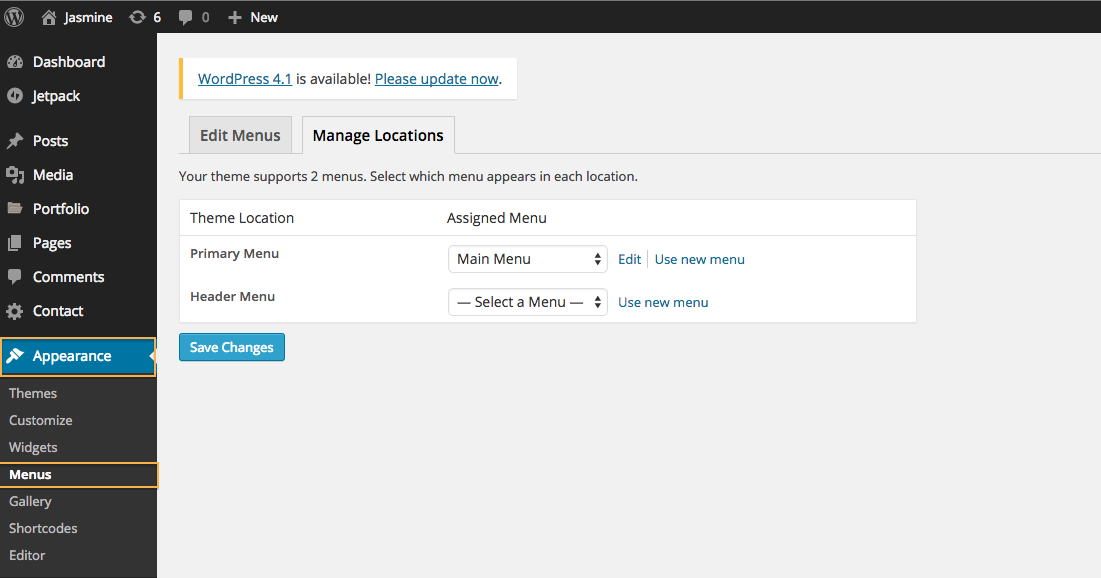
Now this is the important part. You will have to declare what menu you want as your main menu or it won’t show.
7. Navigate to the second tab that says “Manage Locations”
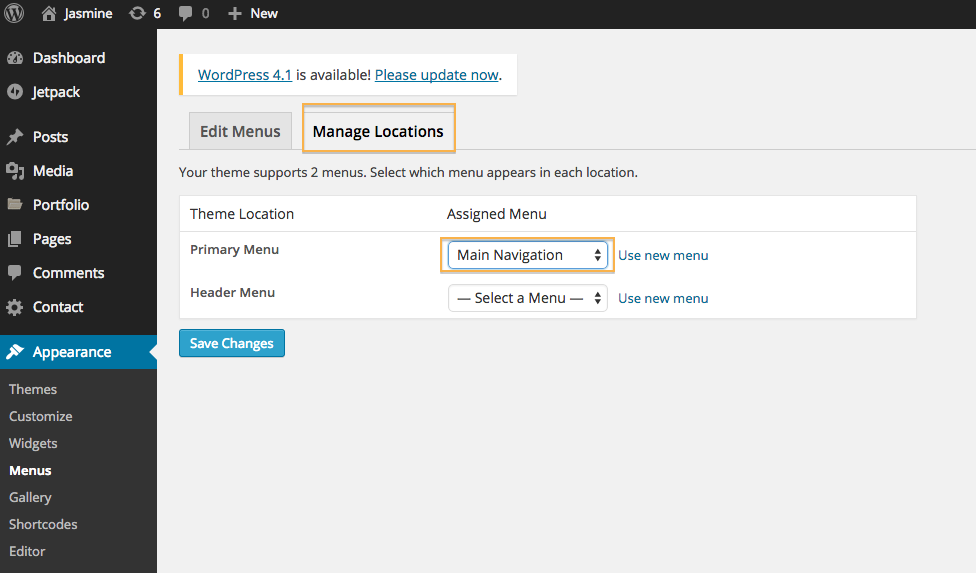
8. Select the dropdown to choose between the custom menus you’ve created. Choose the menu you want to serve as the main menu.
9. Click Save. Your newly created custom menu should be visible on the front end of your site.
Again, see here for how to add external links to your custom menu and here for a bit on how to display your blog categories as pages.