STEP ONE:
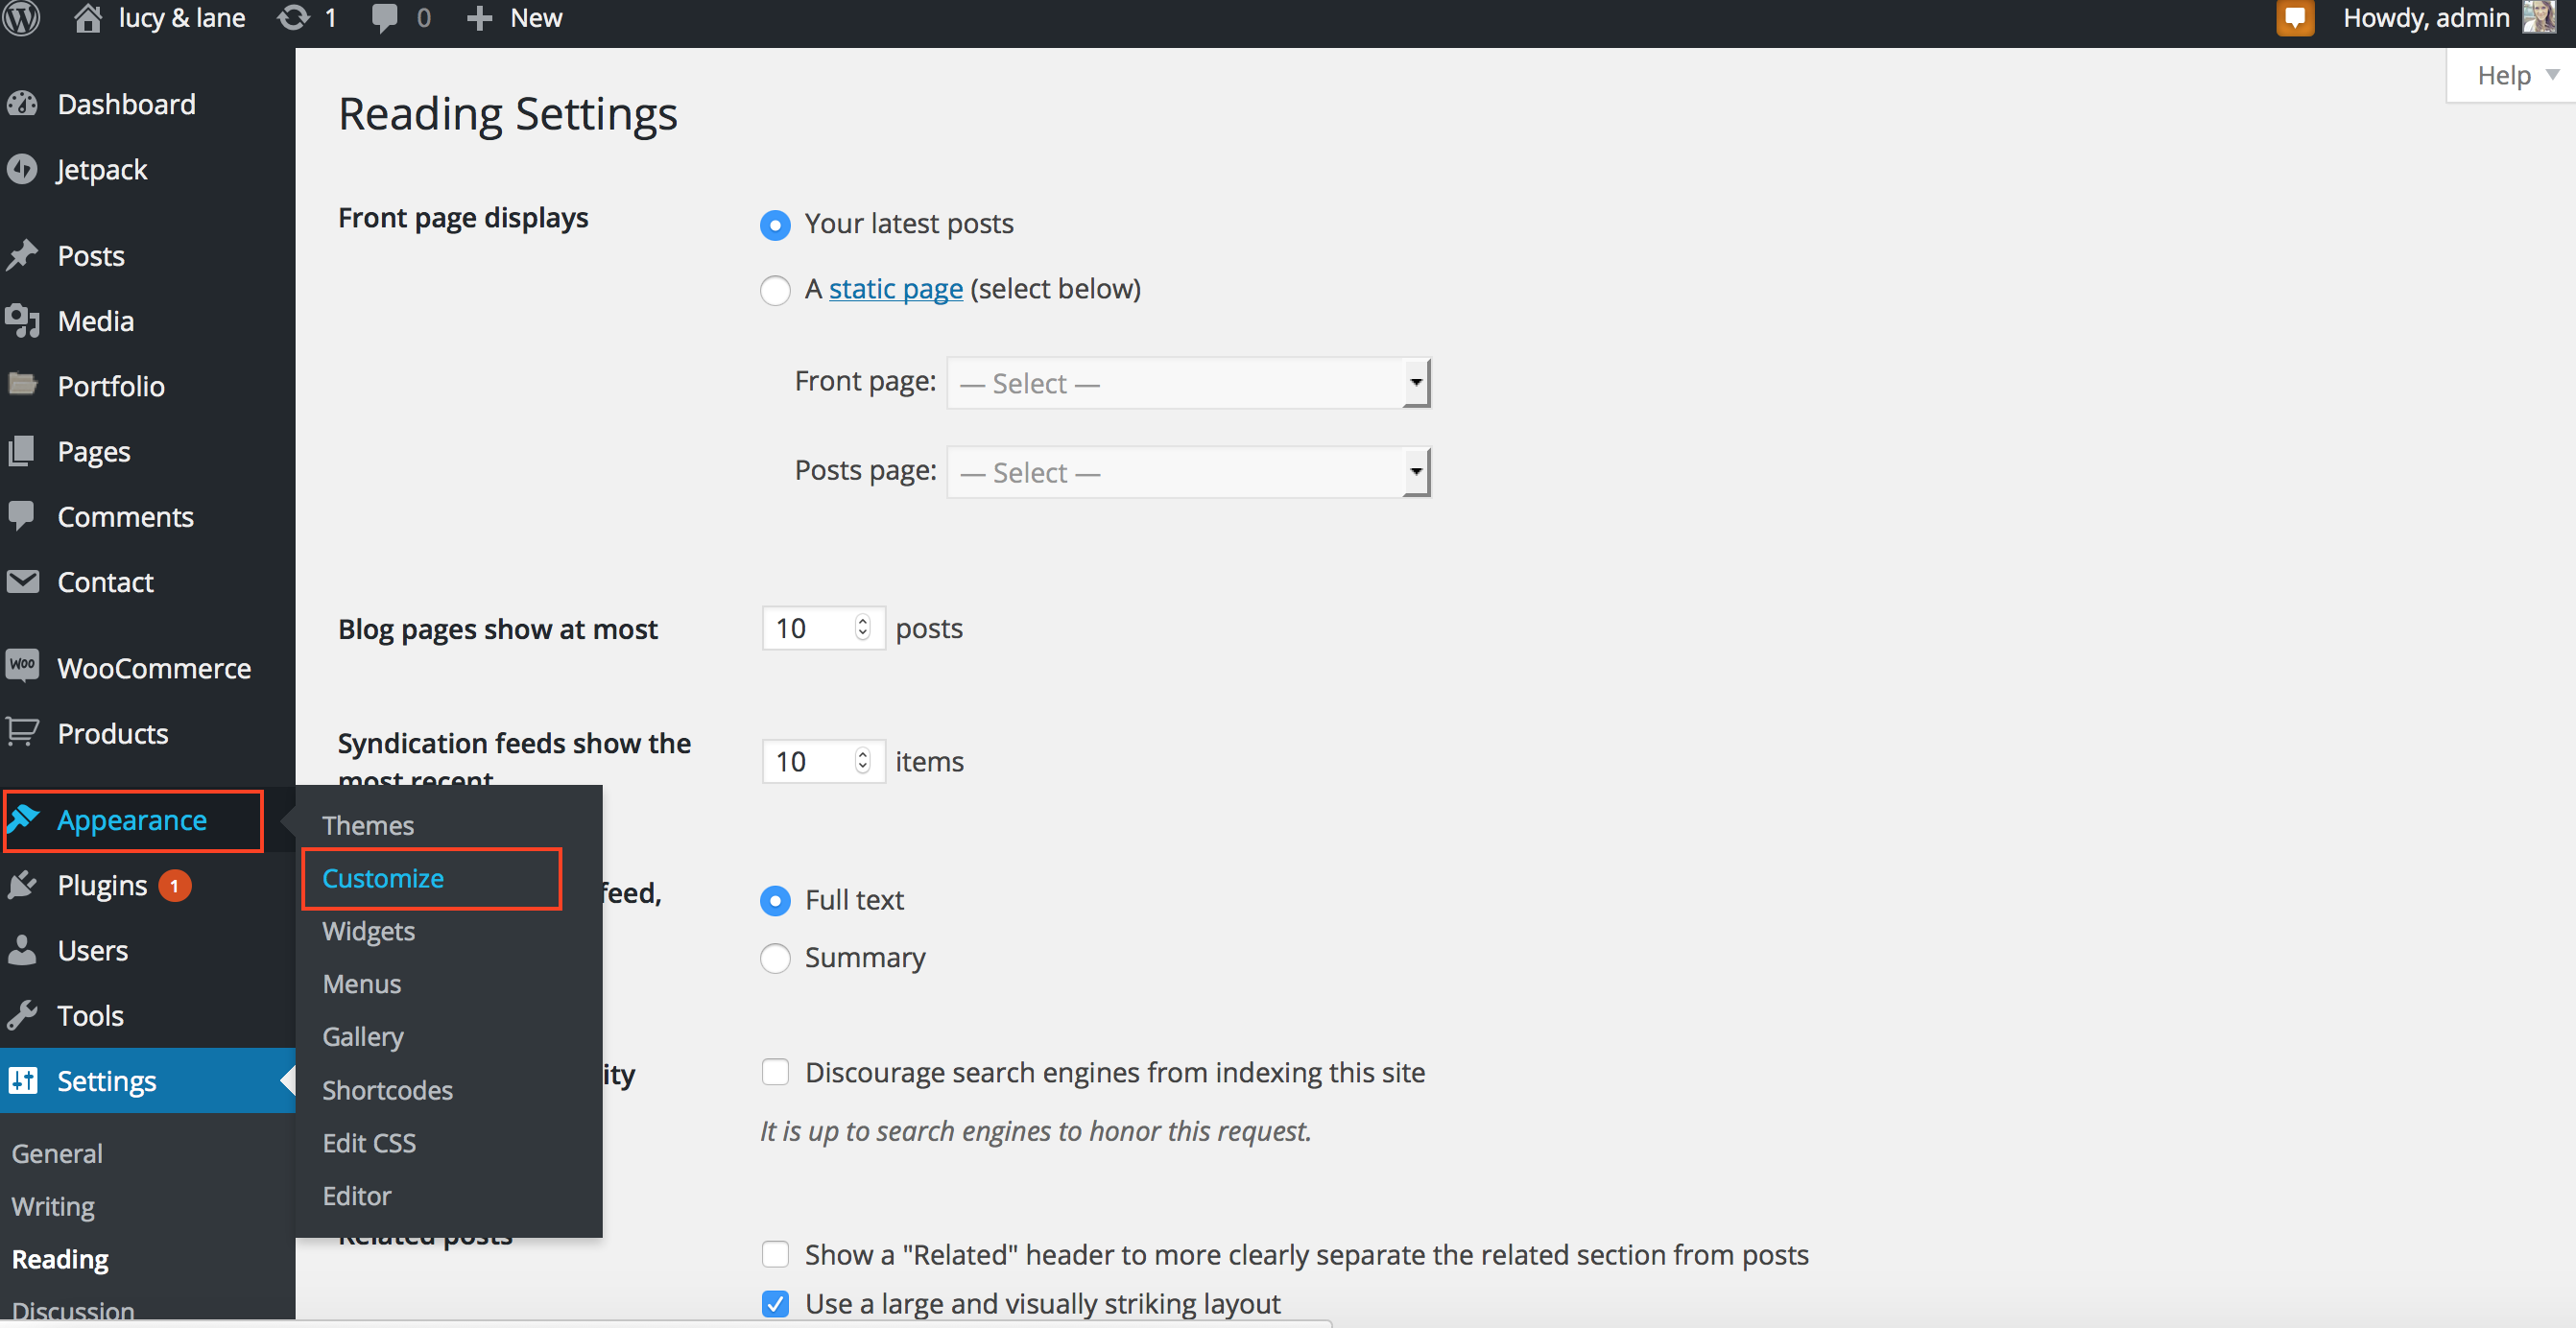
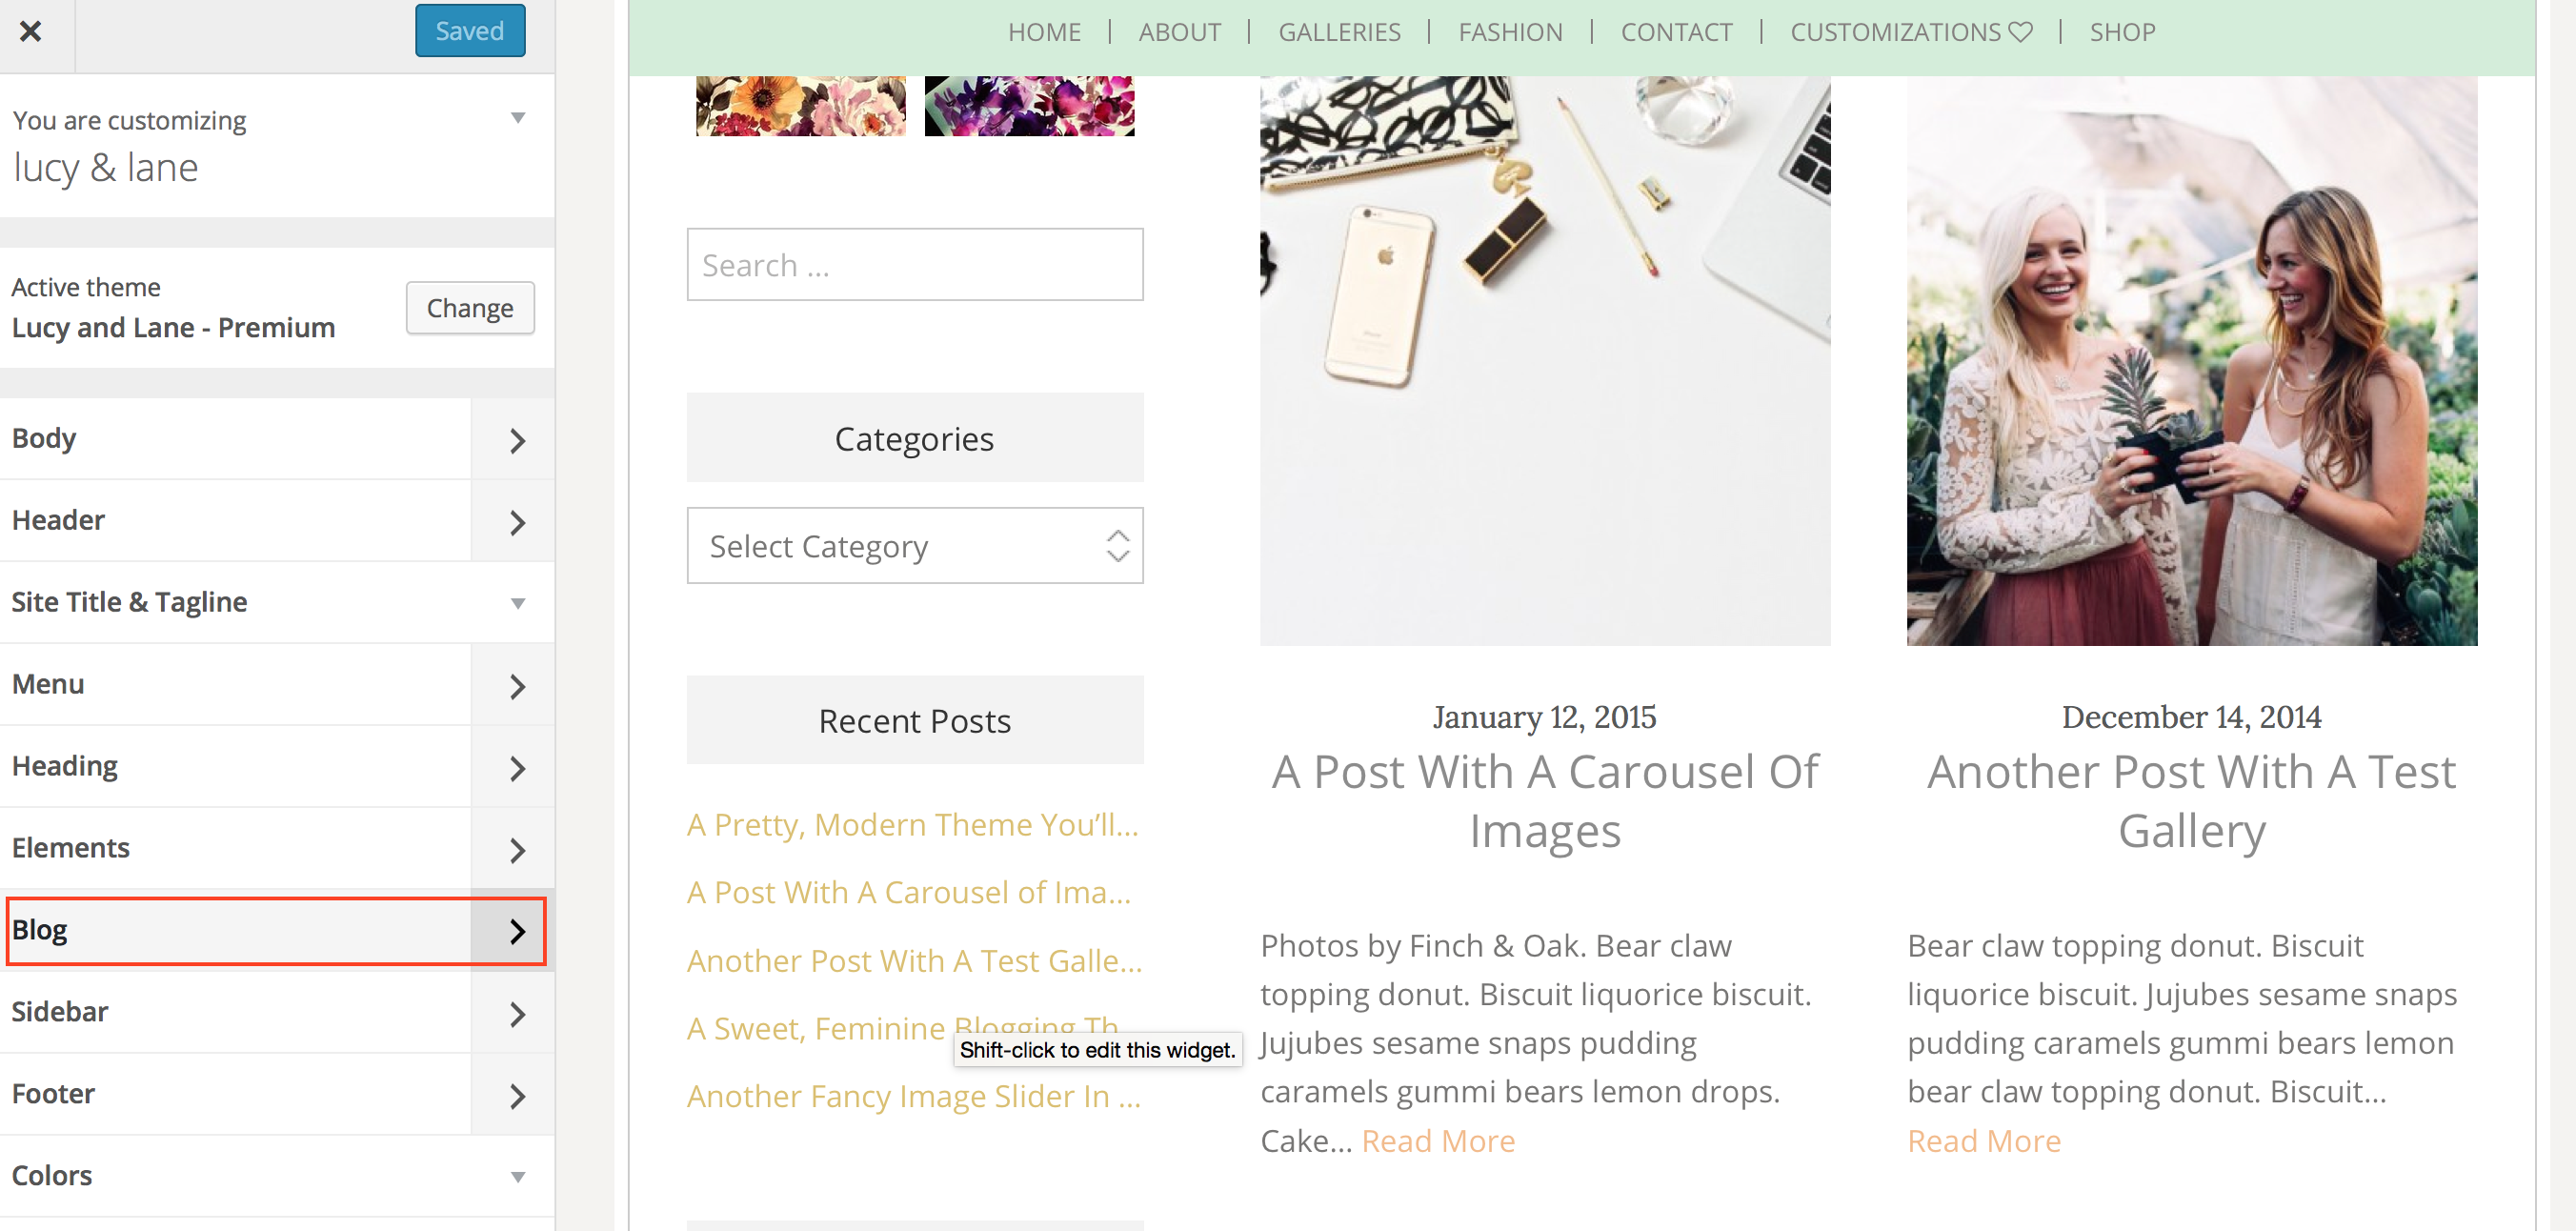
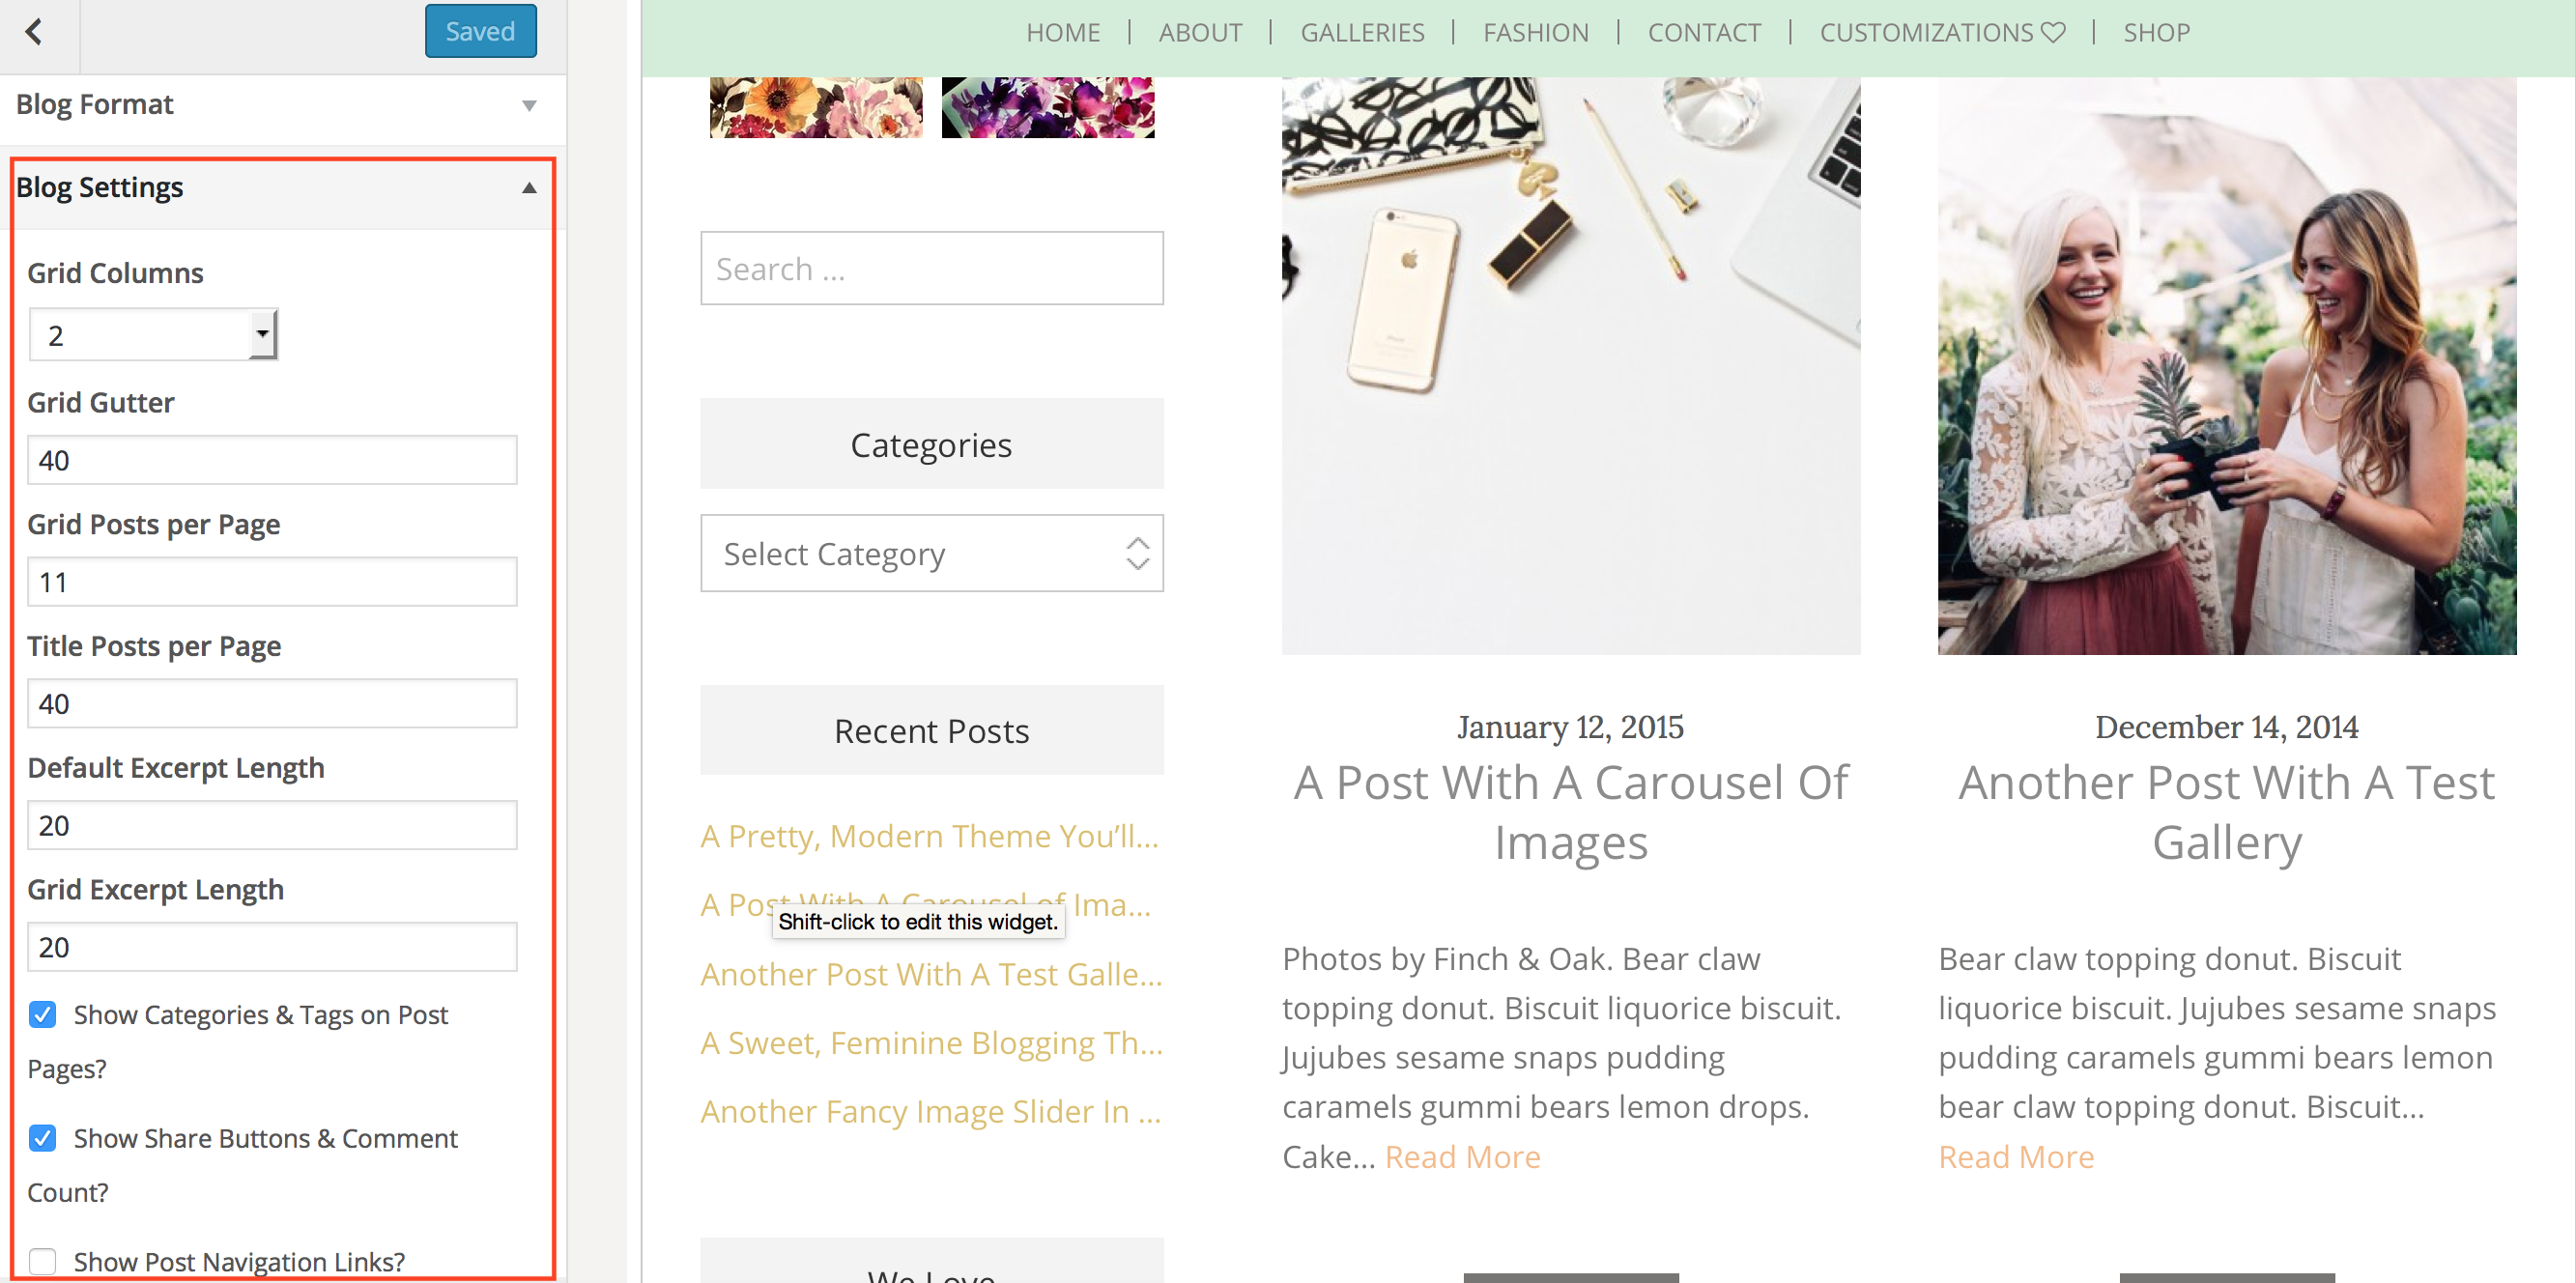
Go to appearance / customize. Go to your blog flyout tab.
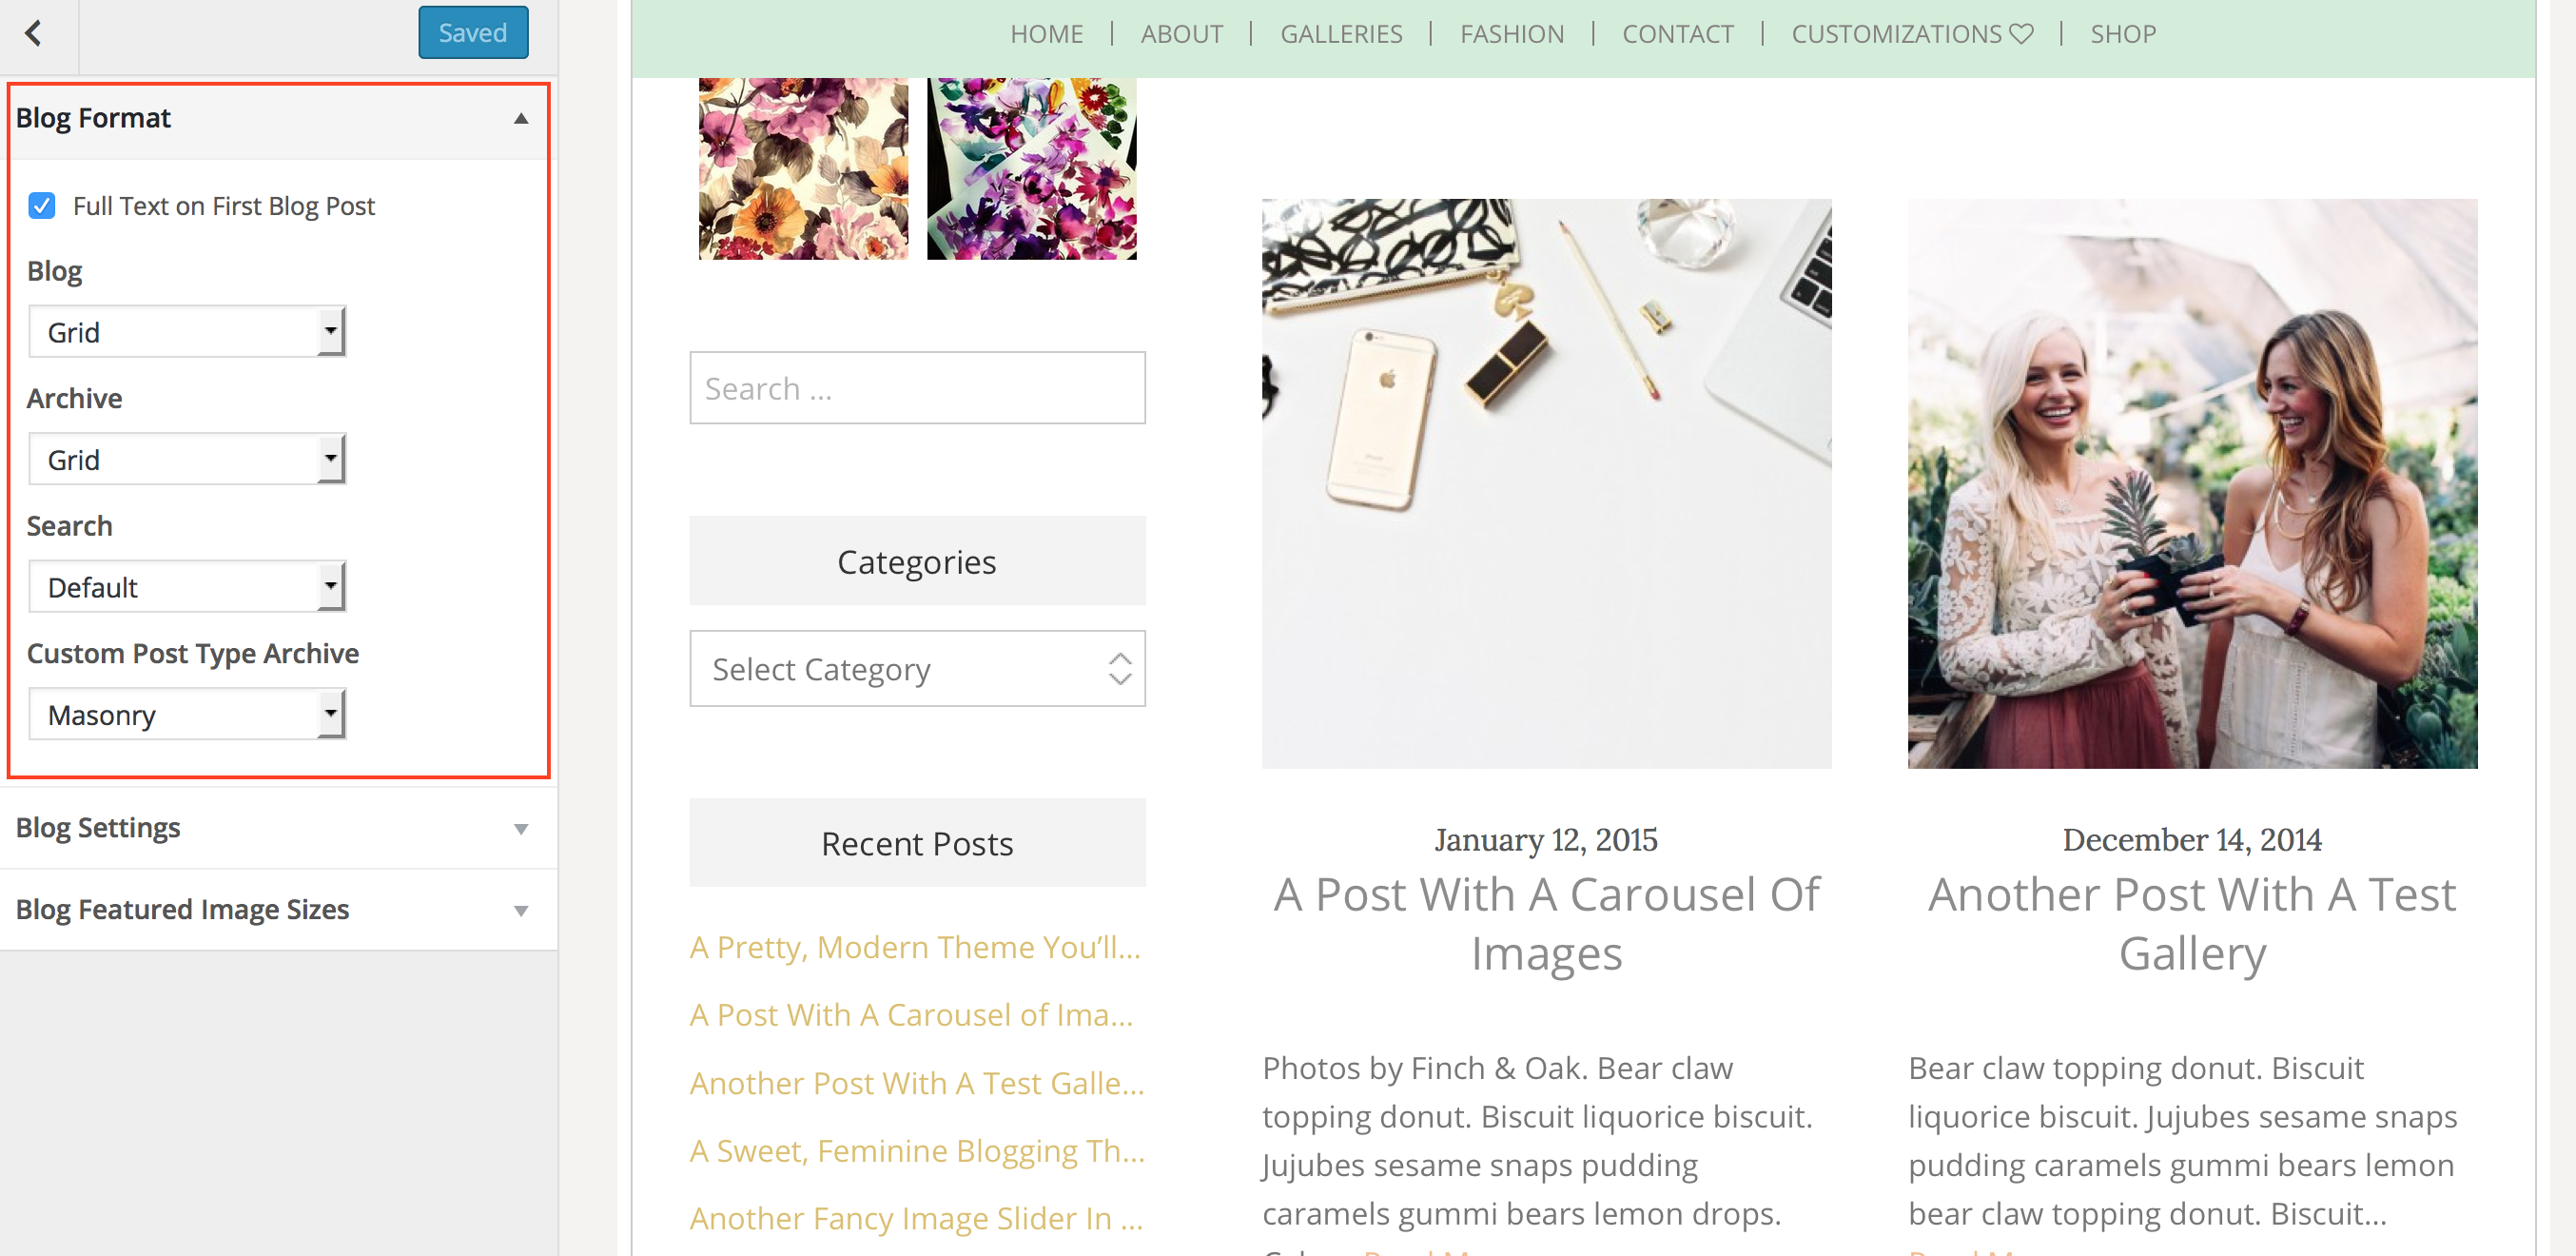
Make sure you set the settings to what we have below. Under the Blog Format Tab, choose grid. You can choose to display the full text of your first blog post if you like.
Under the next tab, Blog Settings, you can choose the number of columns you like, set your margins, number of posts per pages, and more.
Save your changes
STEP 2
Now is time to insert the slider at the top of the homepage.
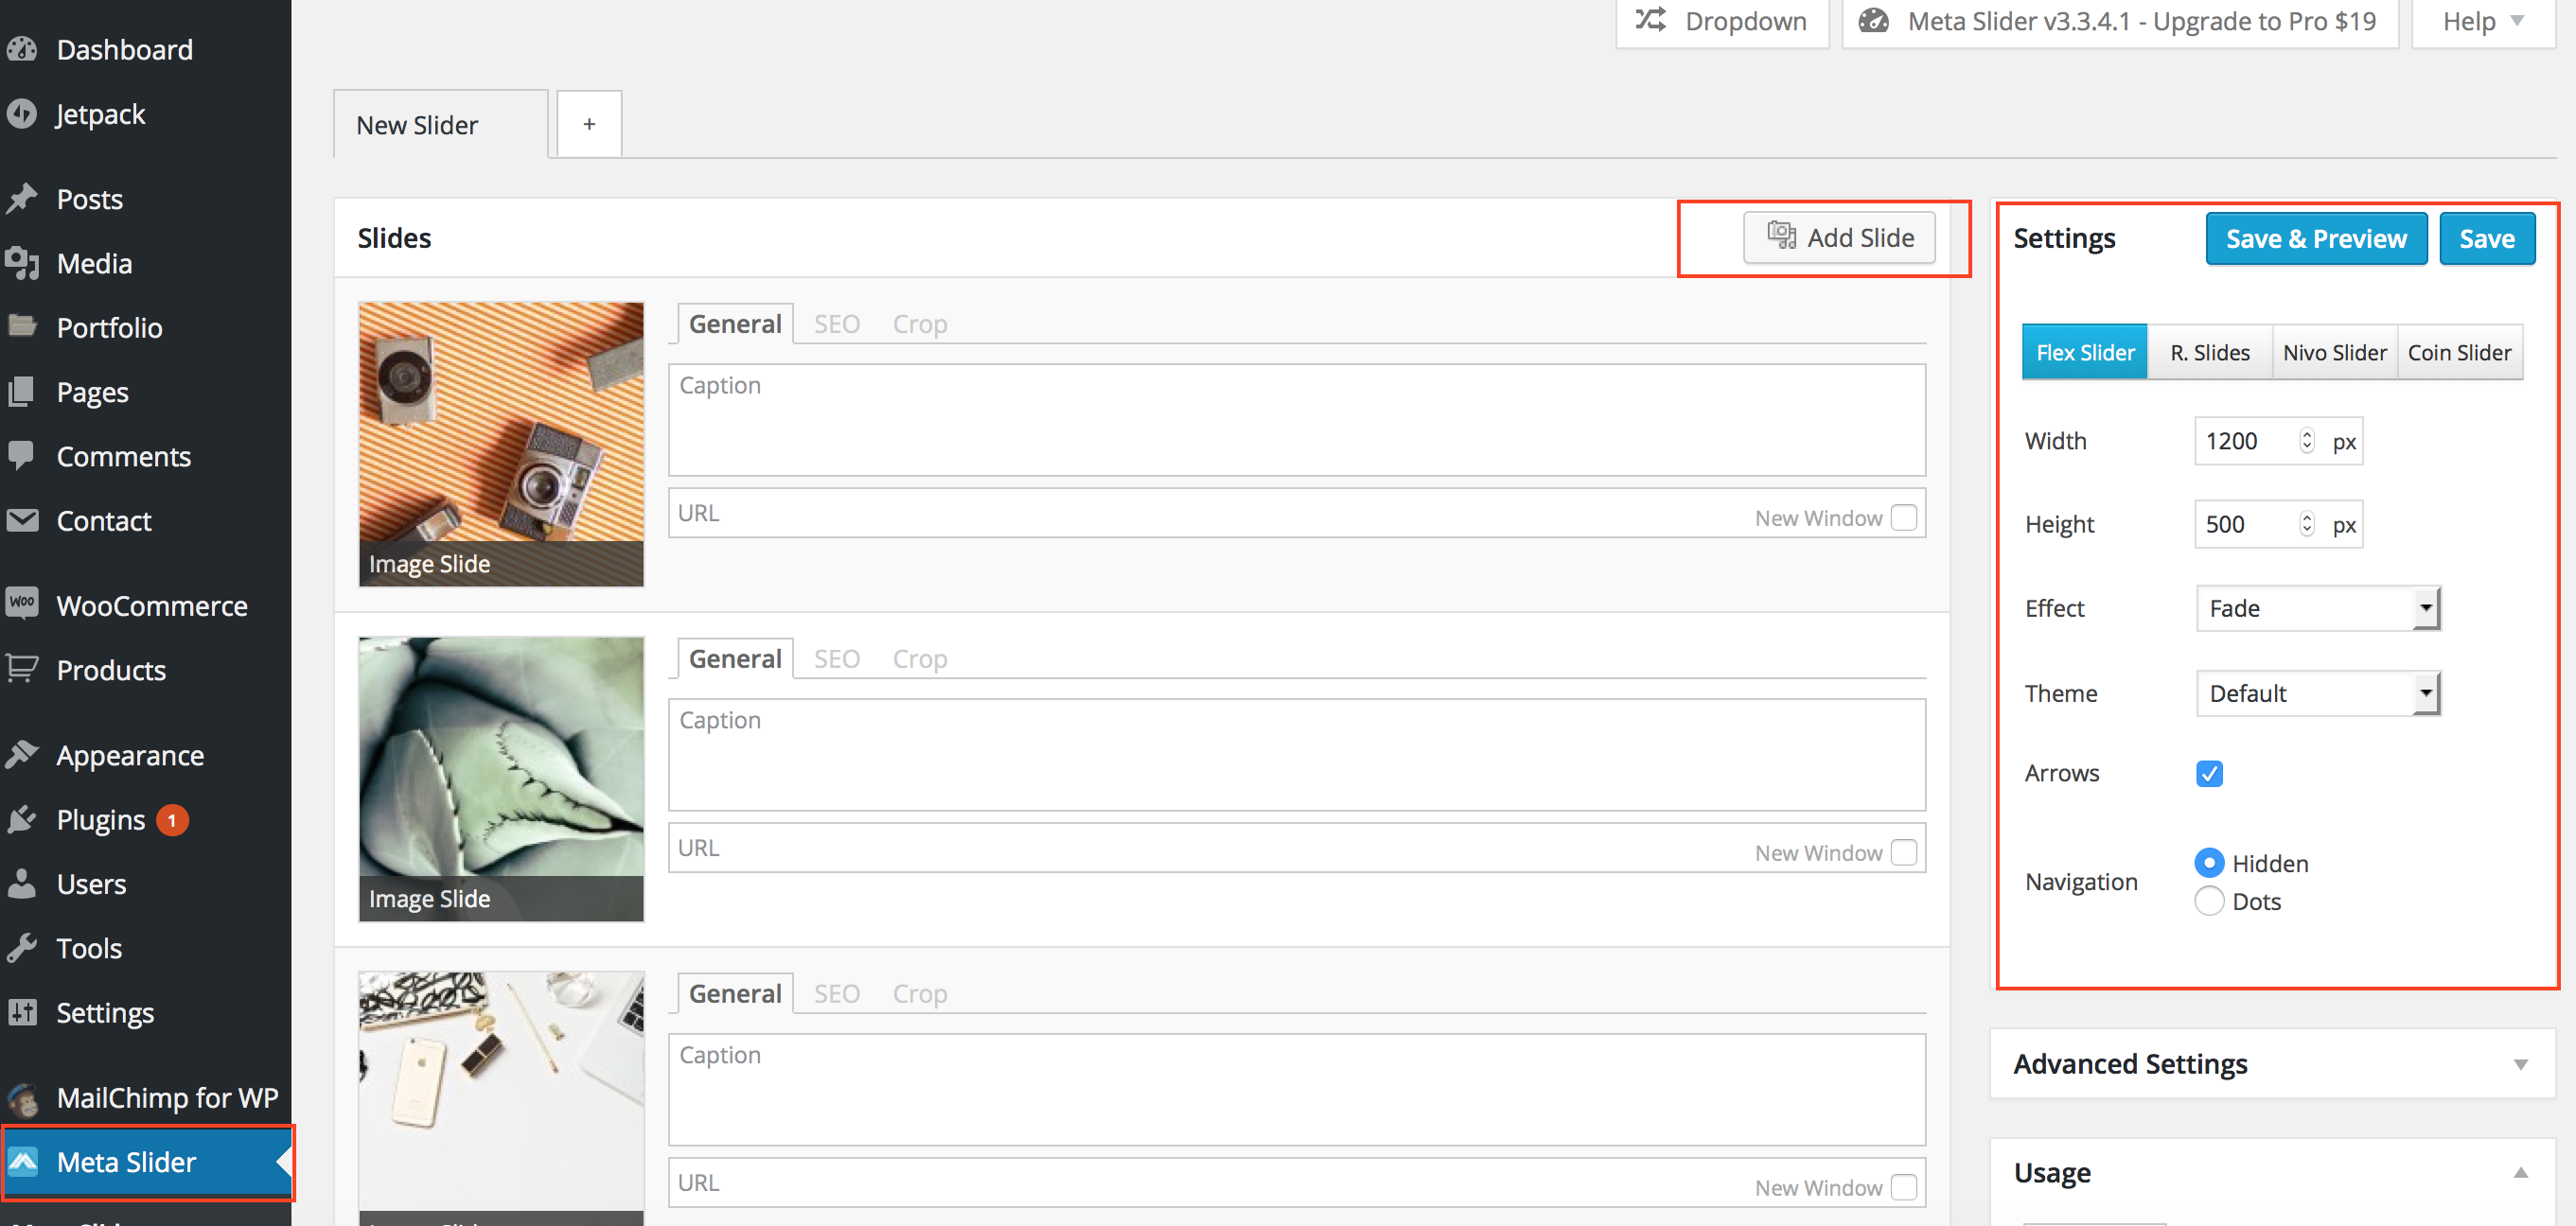
Scroll to the very bottom of your dashboard and create a new slideshow under the Meta Slider Tab. If you don’t see this tab, make sure you have the recommended plugins installed. You can drag your slides up / down to order them. Copy the settings we used on the right. Save your slideshow.
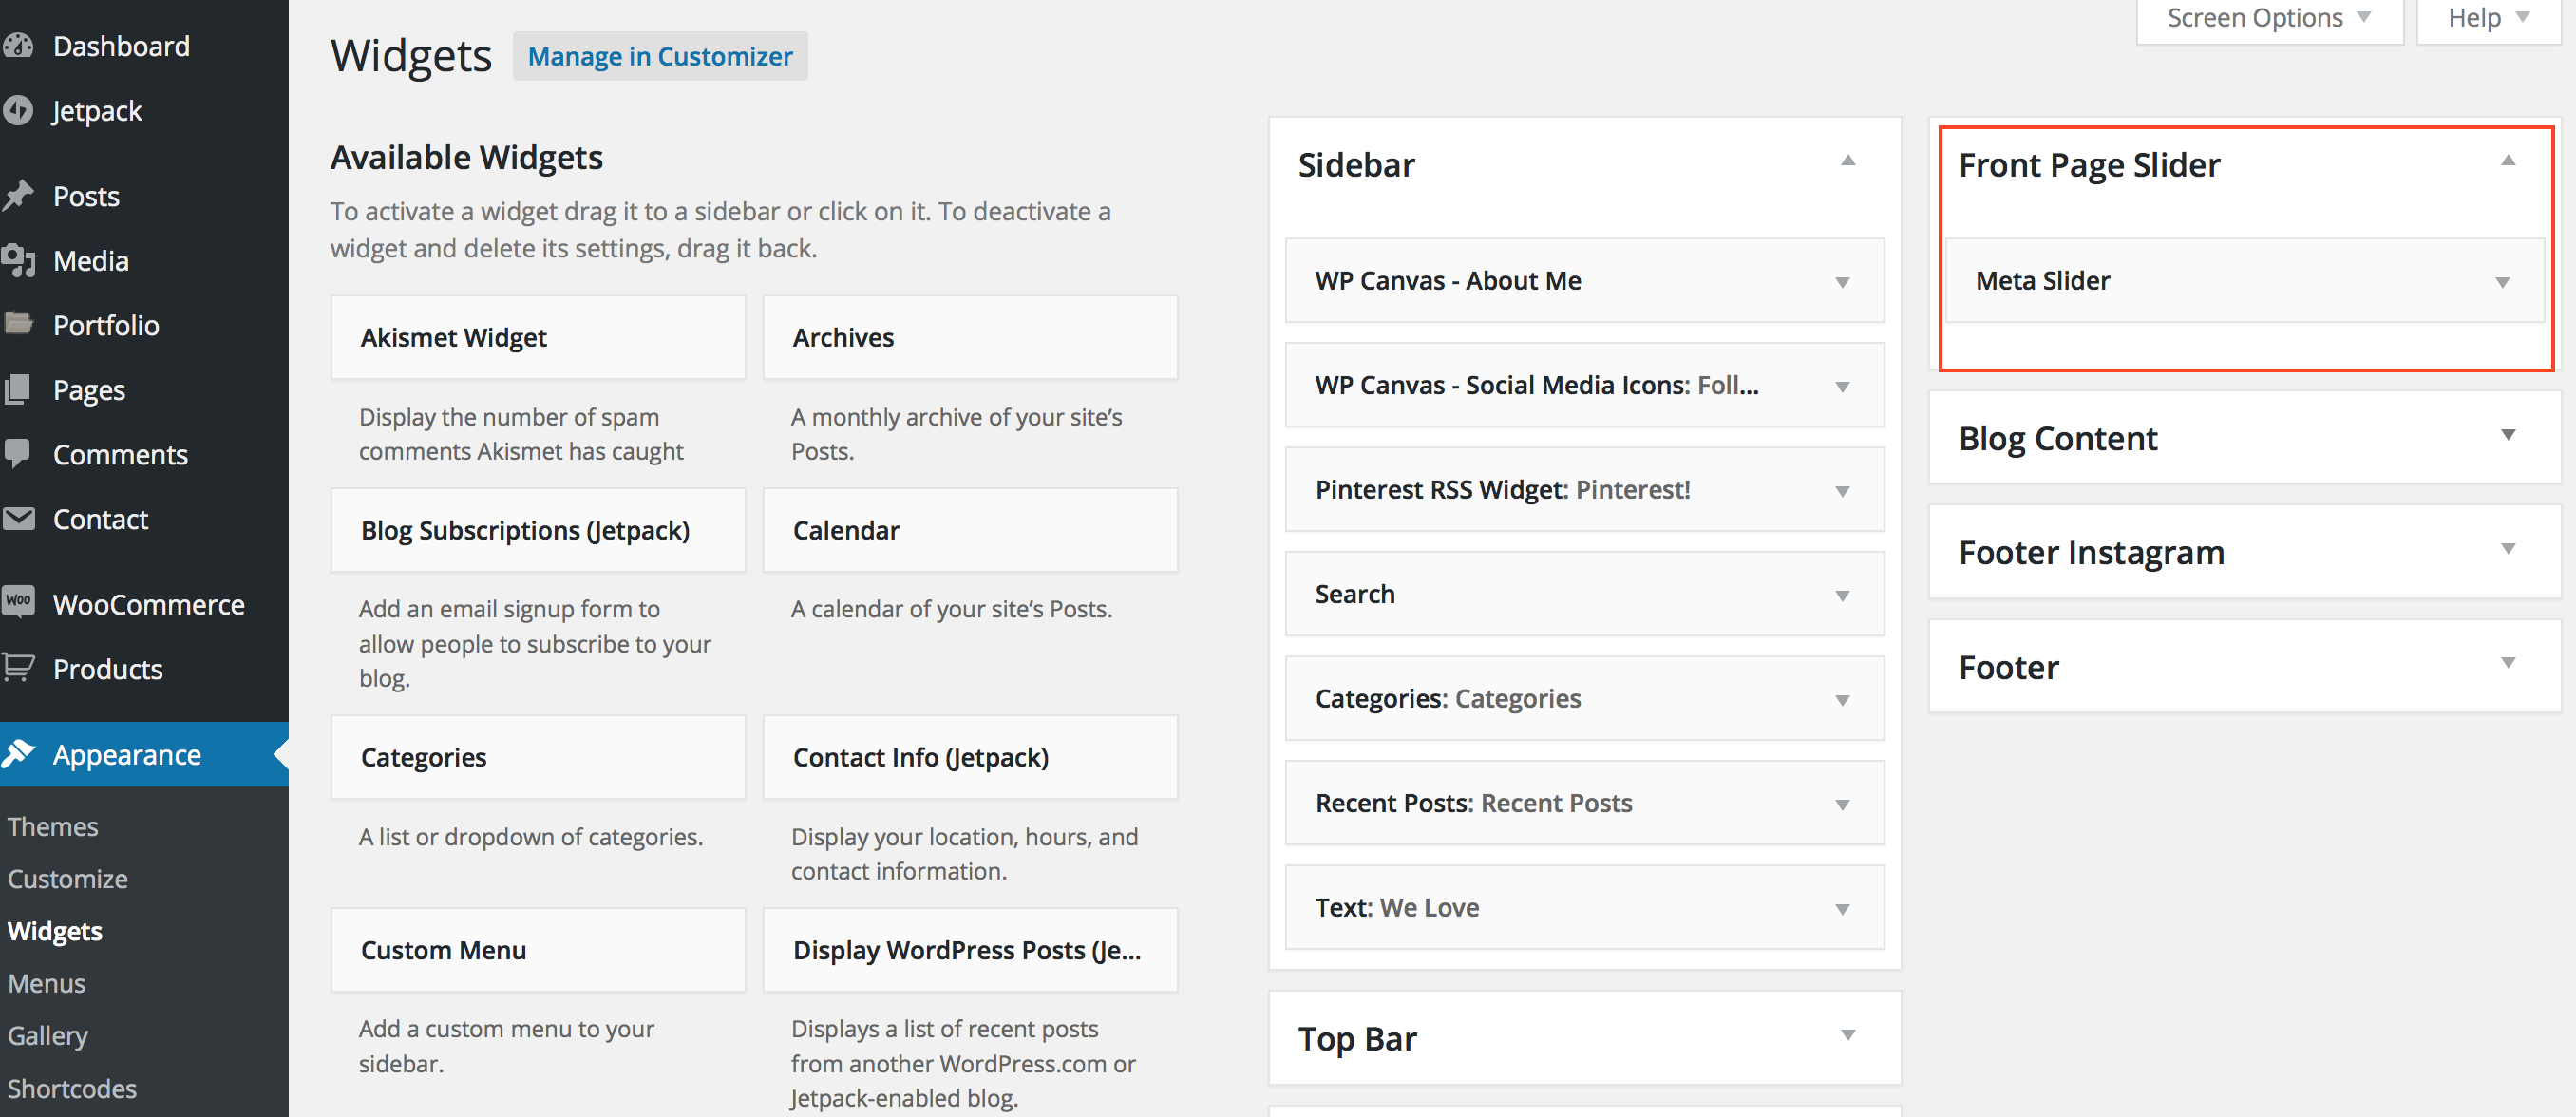
Now navigate to appearance / widgets in your WordPress dashboard. Look for the box marked “Front Page Slider” on the right. Drag your meta slider widget into this box.
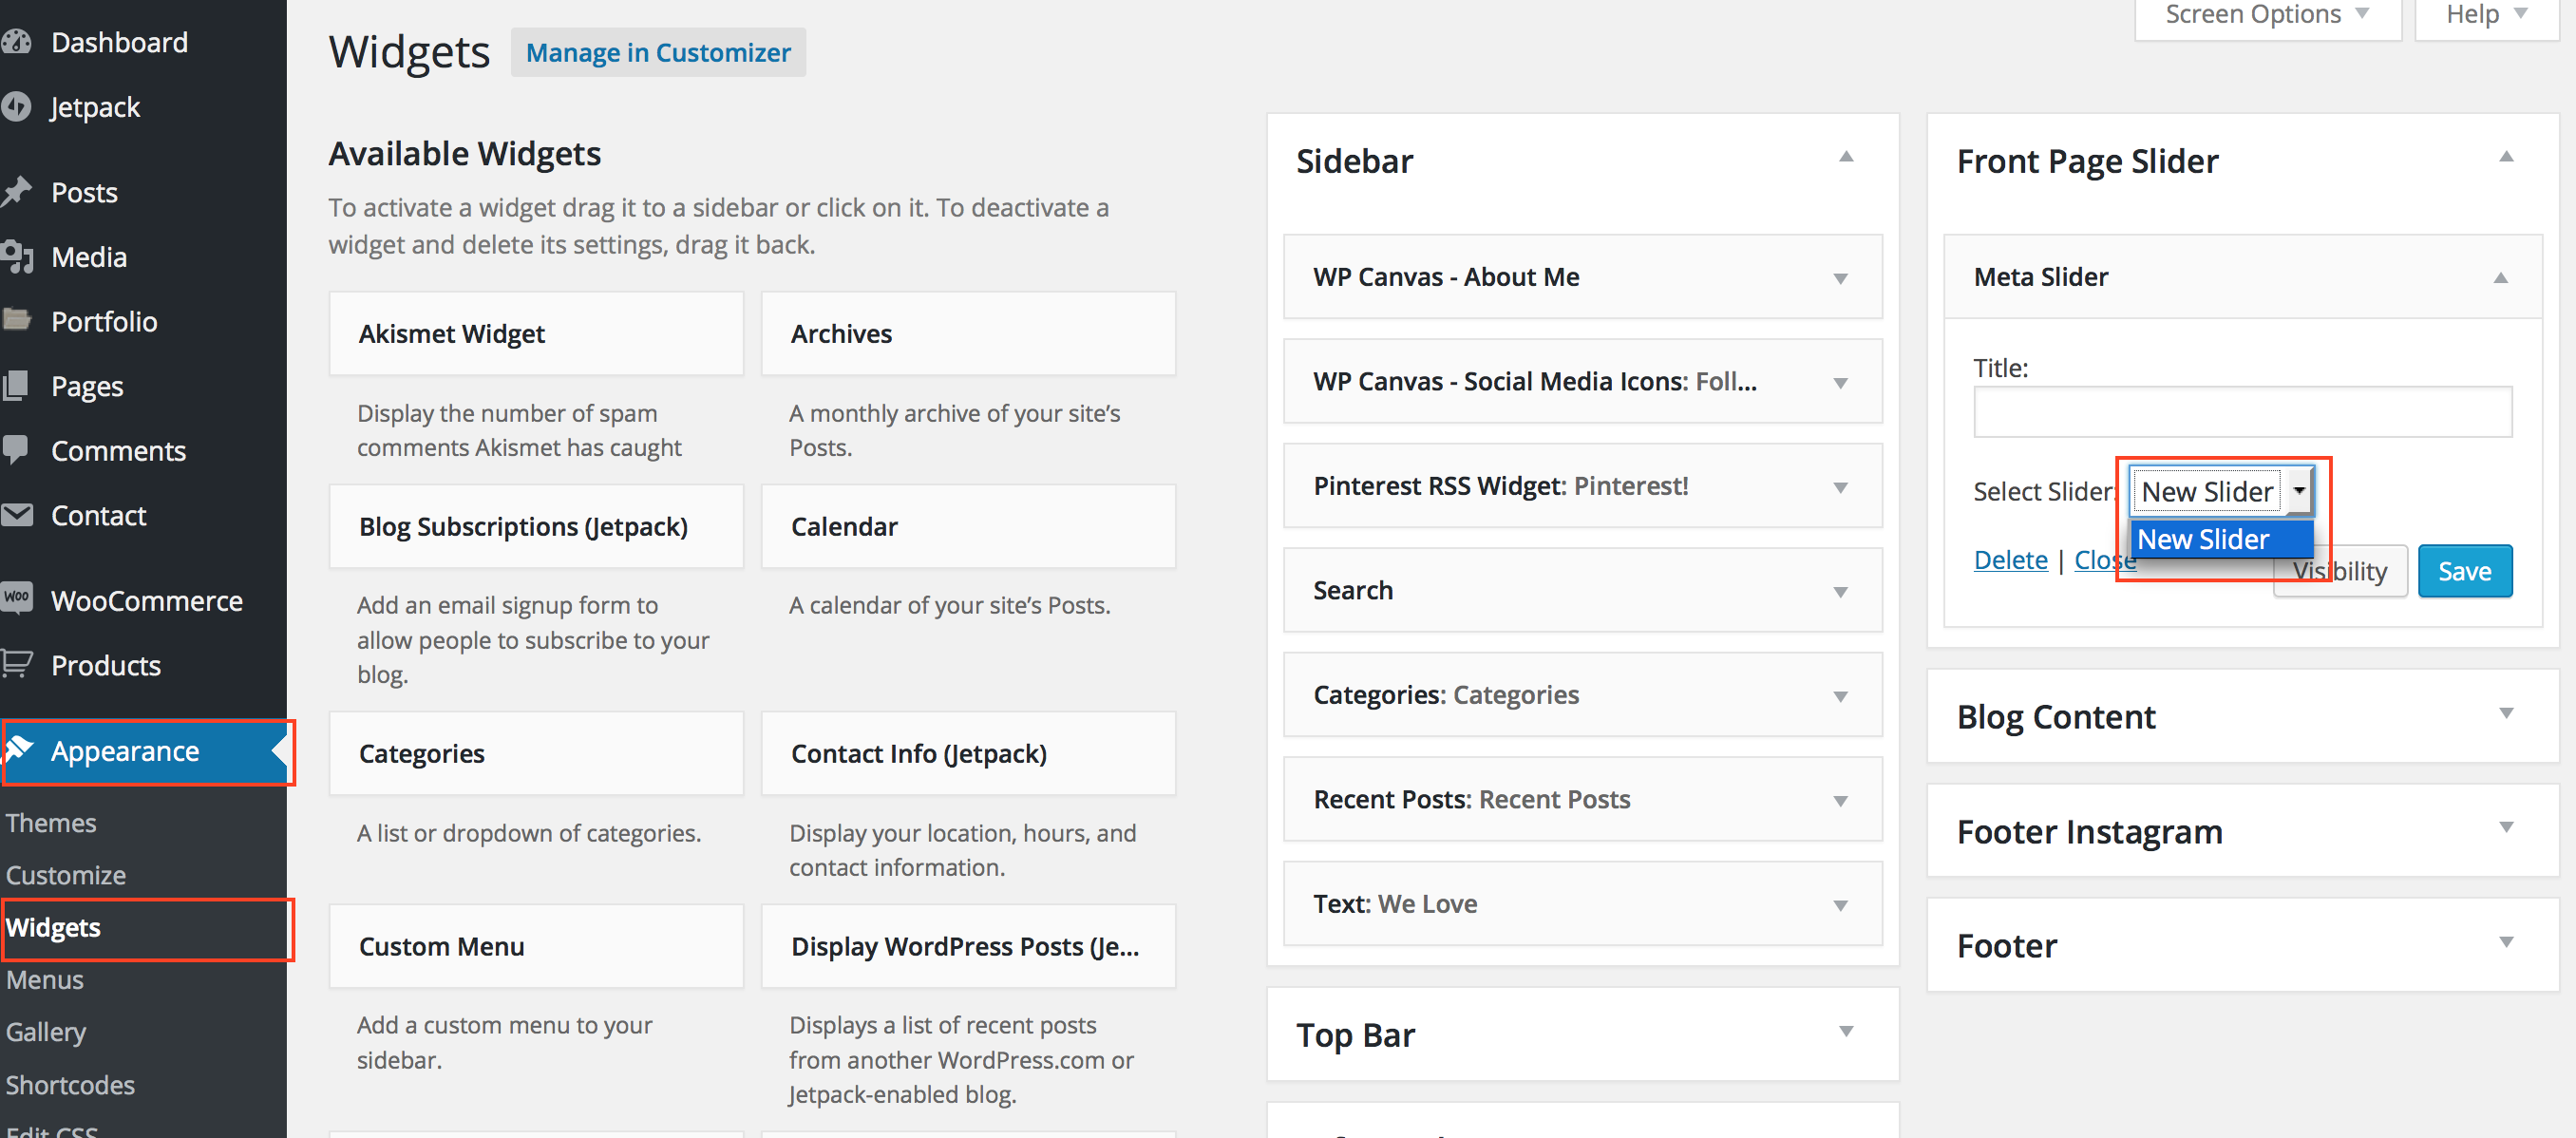
Now, choose the slideshow you just created. Hit Save.
Step 3
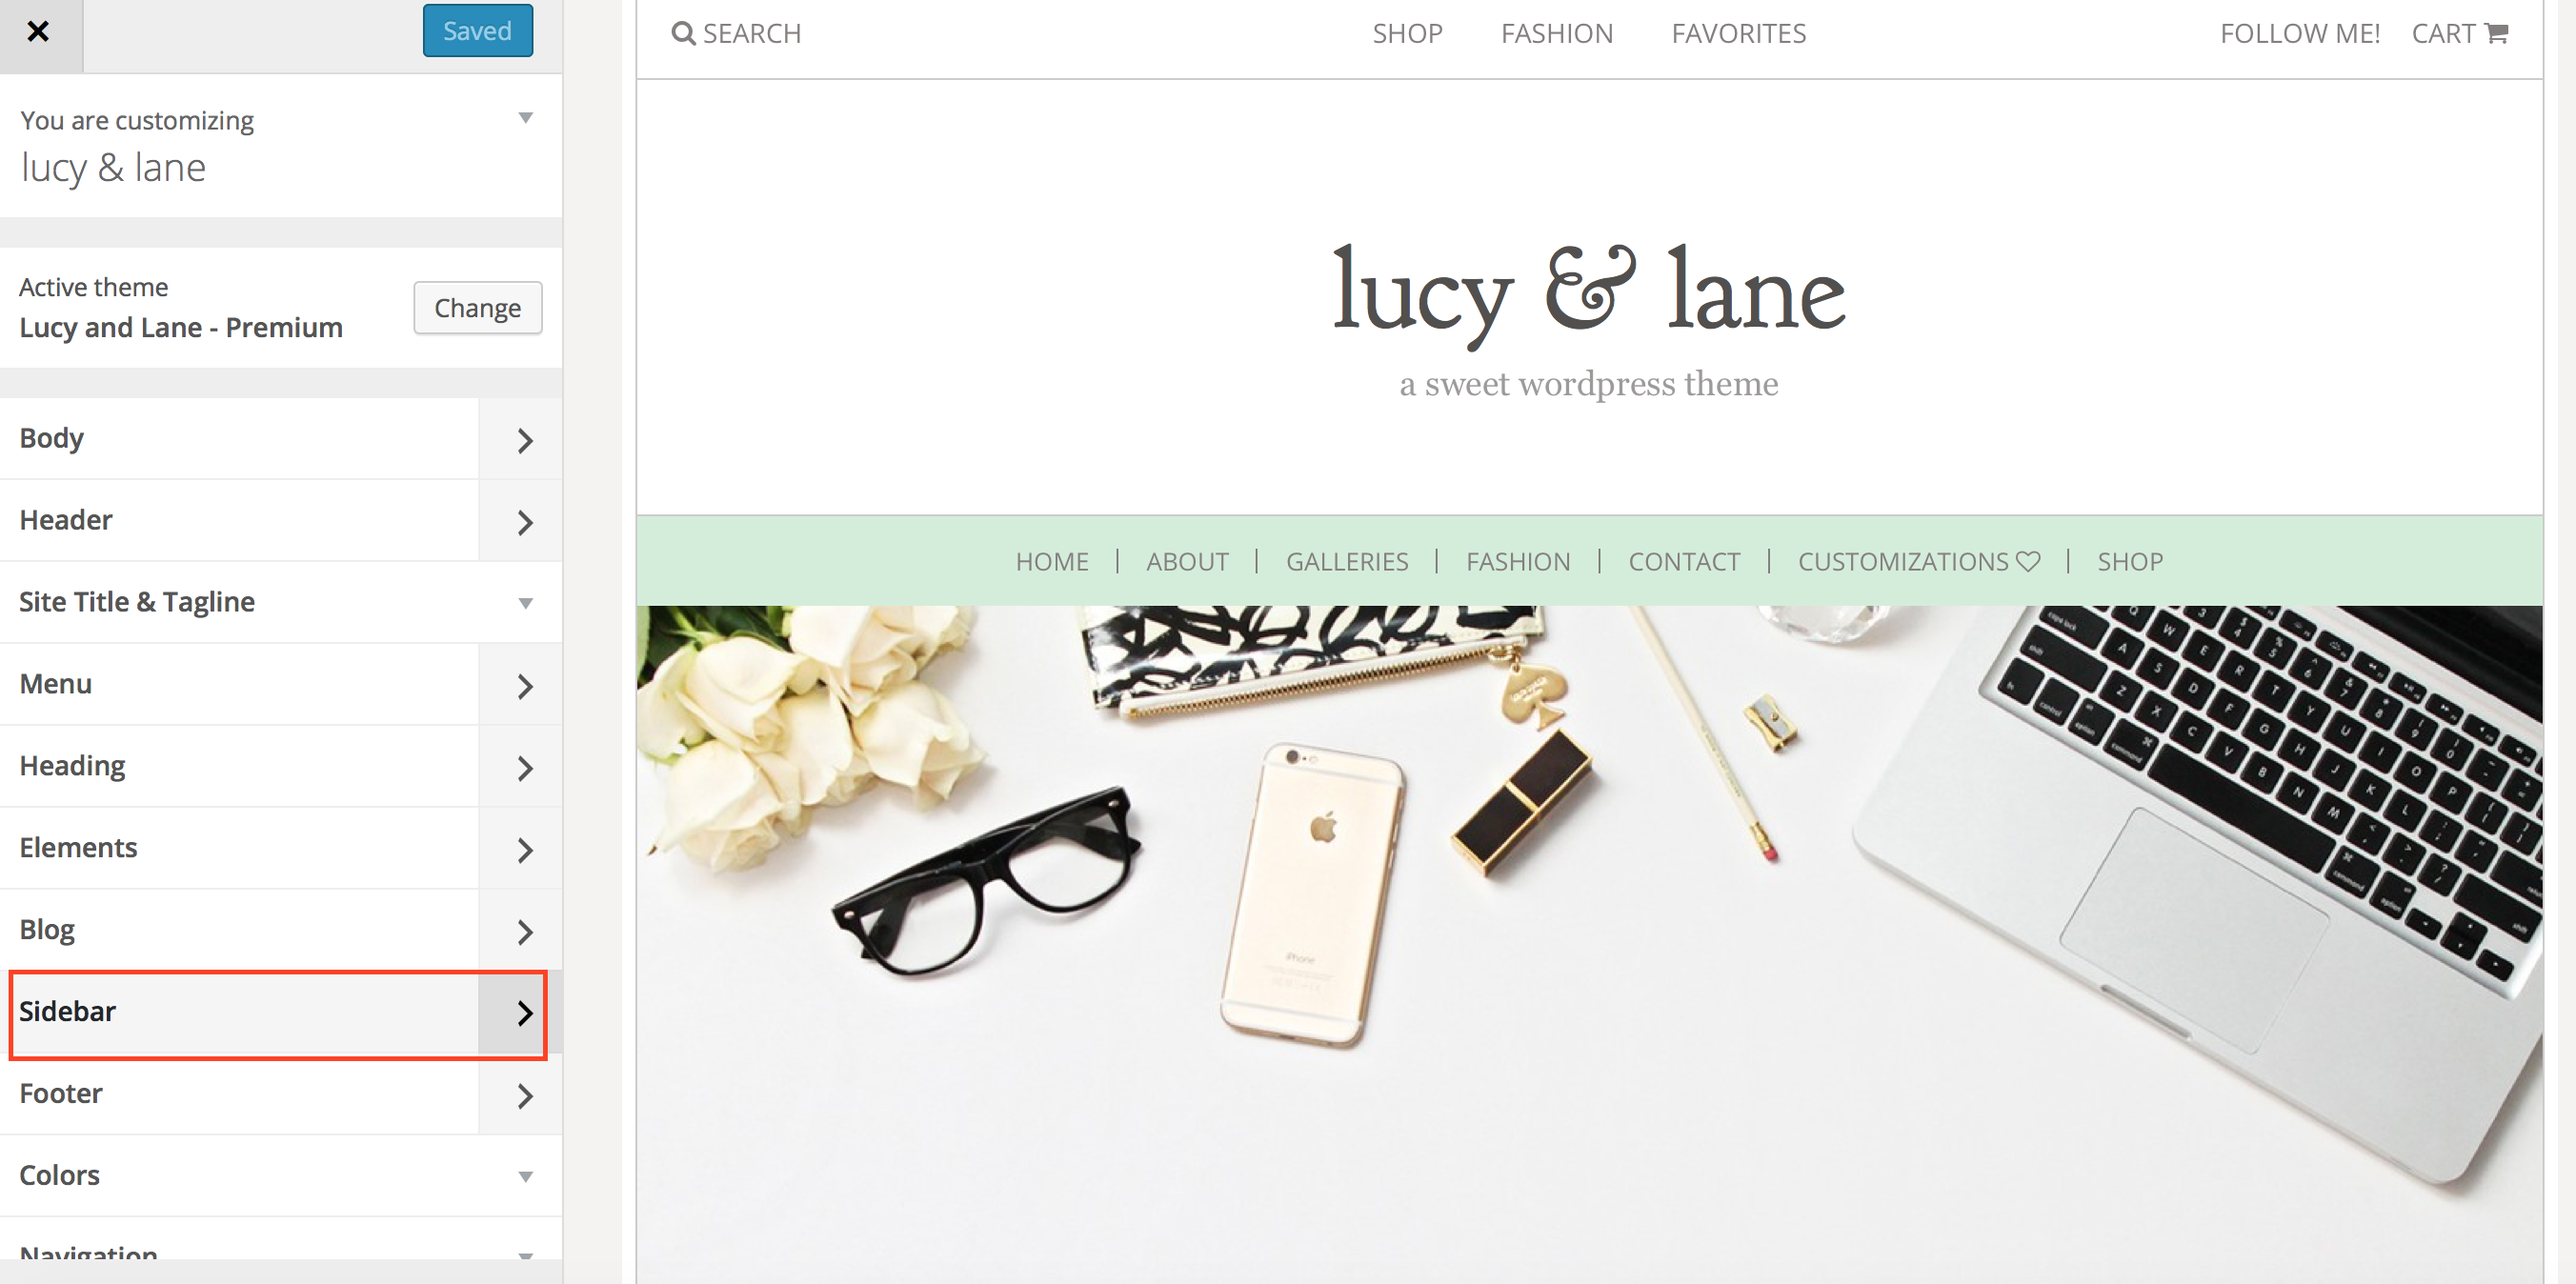
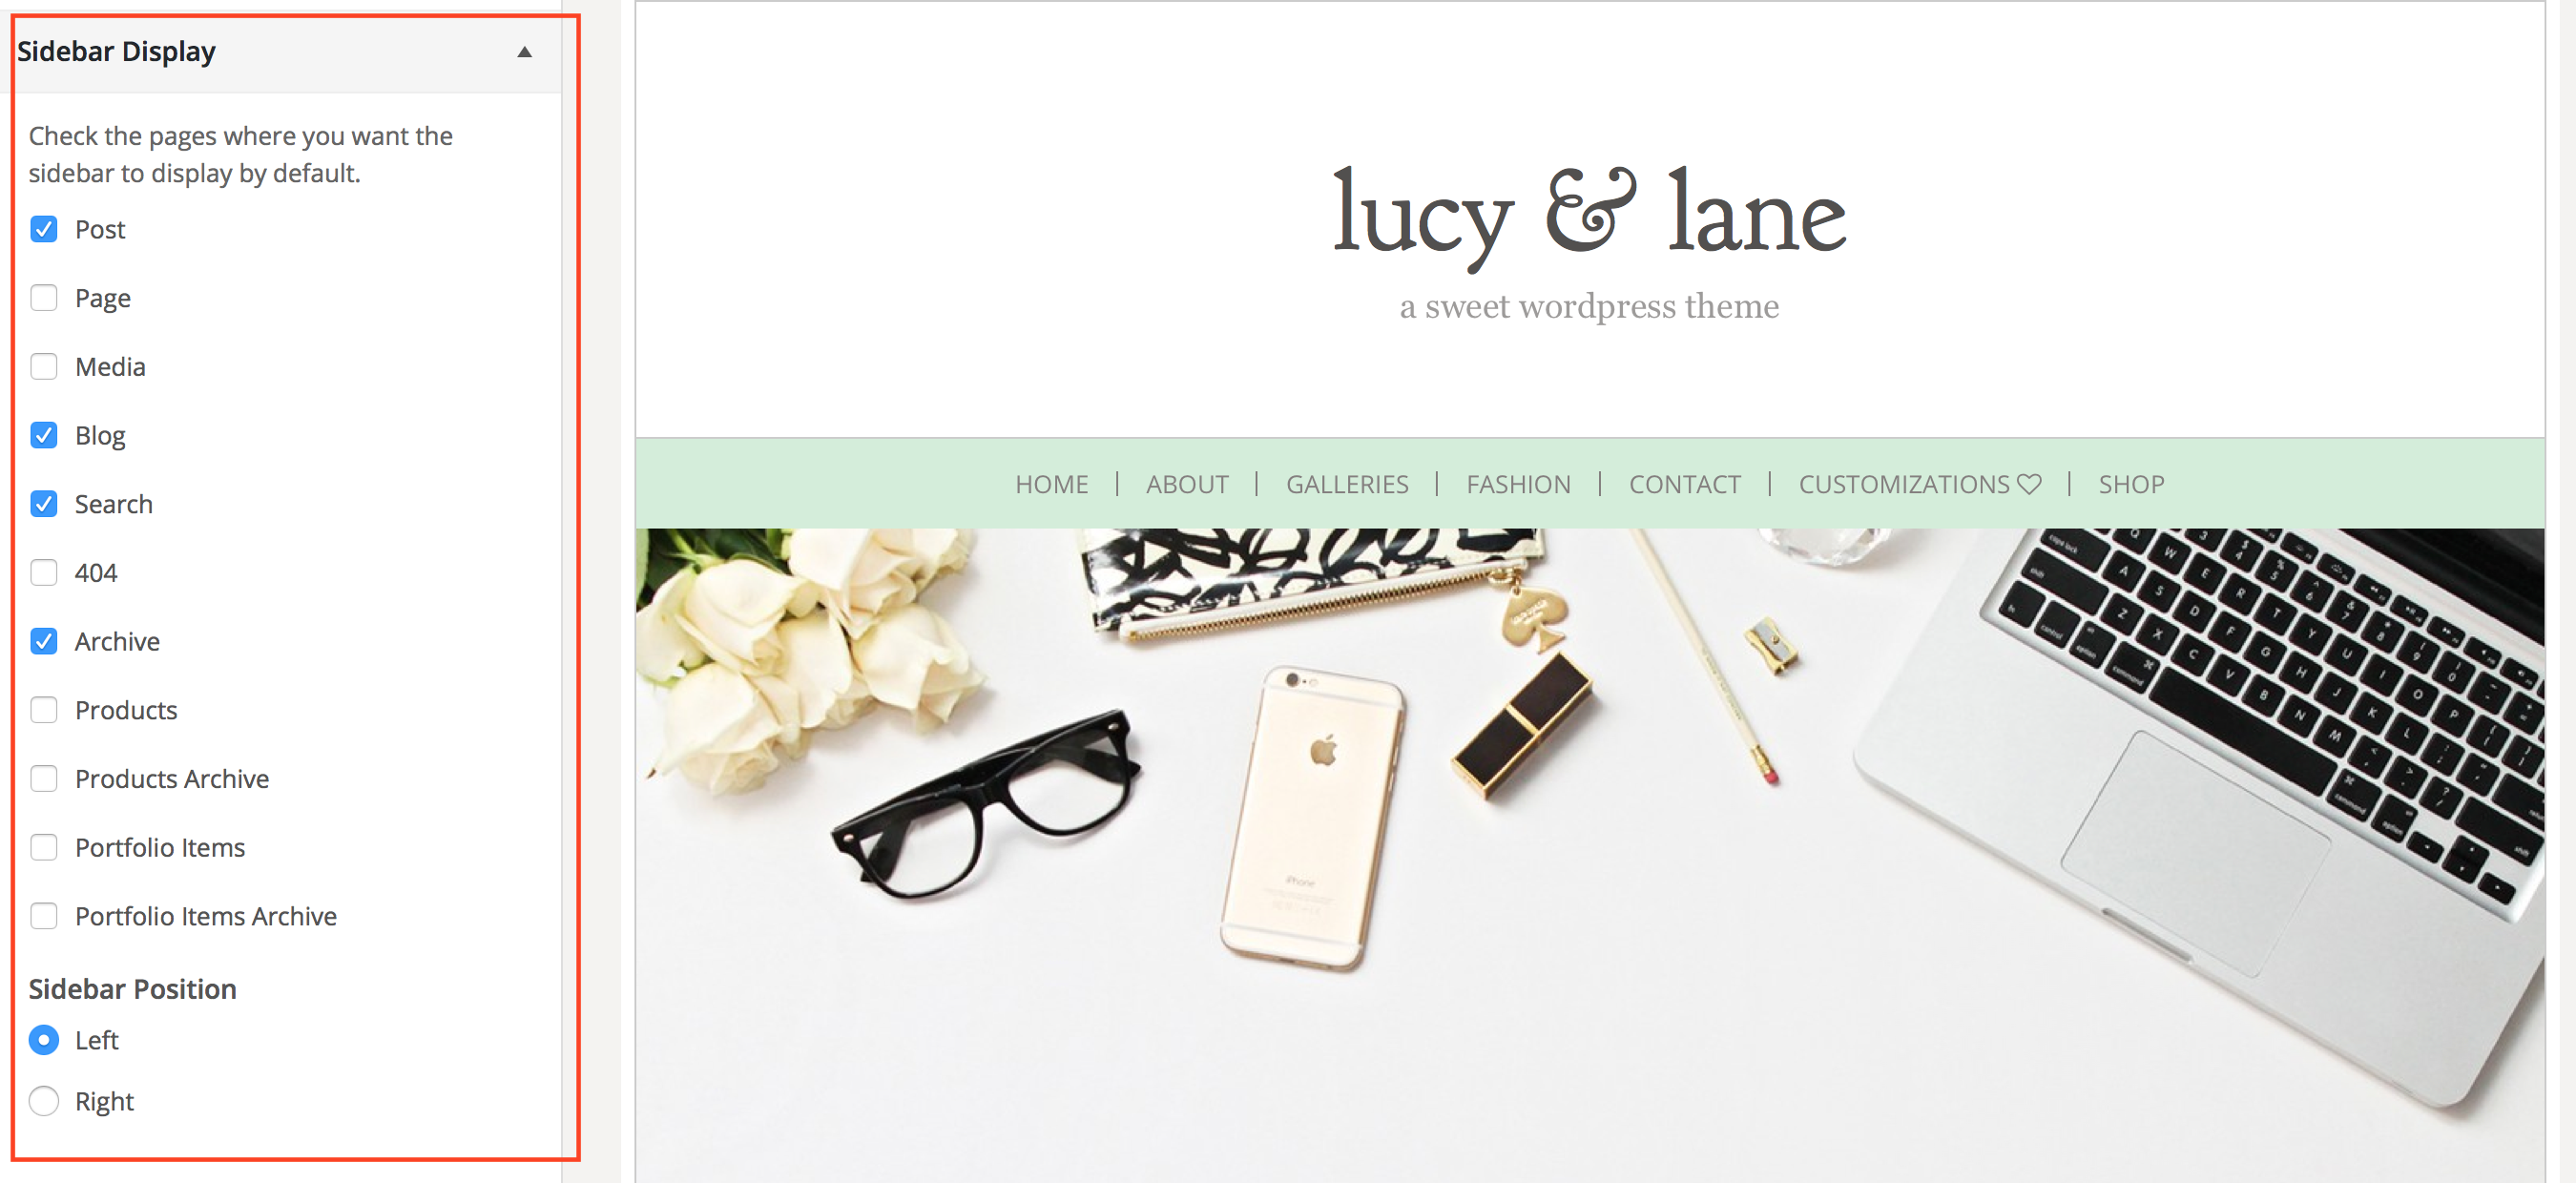
Make sure you have your blog sidebar set to display on the left or right. Go to appearance / customize. Select the Sidebar flyout menu option.
You can choose what pages to display your sidebar on. You can also choose to display your sidebar on the right or left of your site.
Step 4
Set up your homepage footer widgets.

