Step 1
Add your own site title to the header.
Go to Appearance / Customize / Header to set your site title or add a logo image. Click the arrow to the right to see all of your header options.
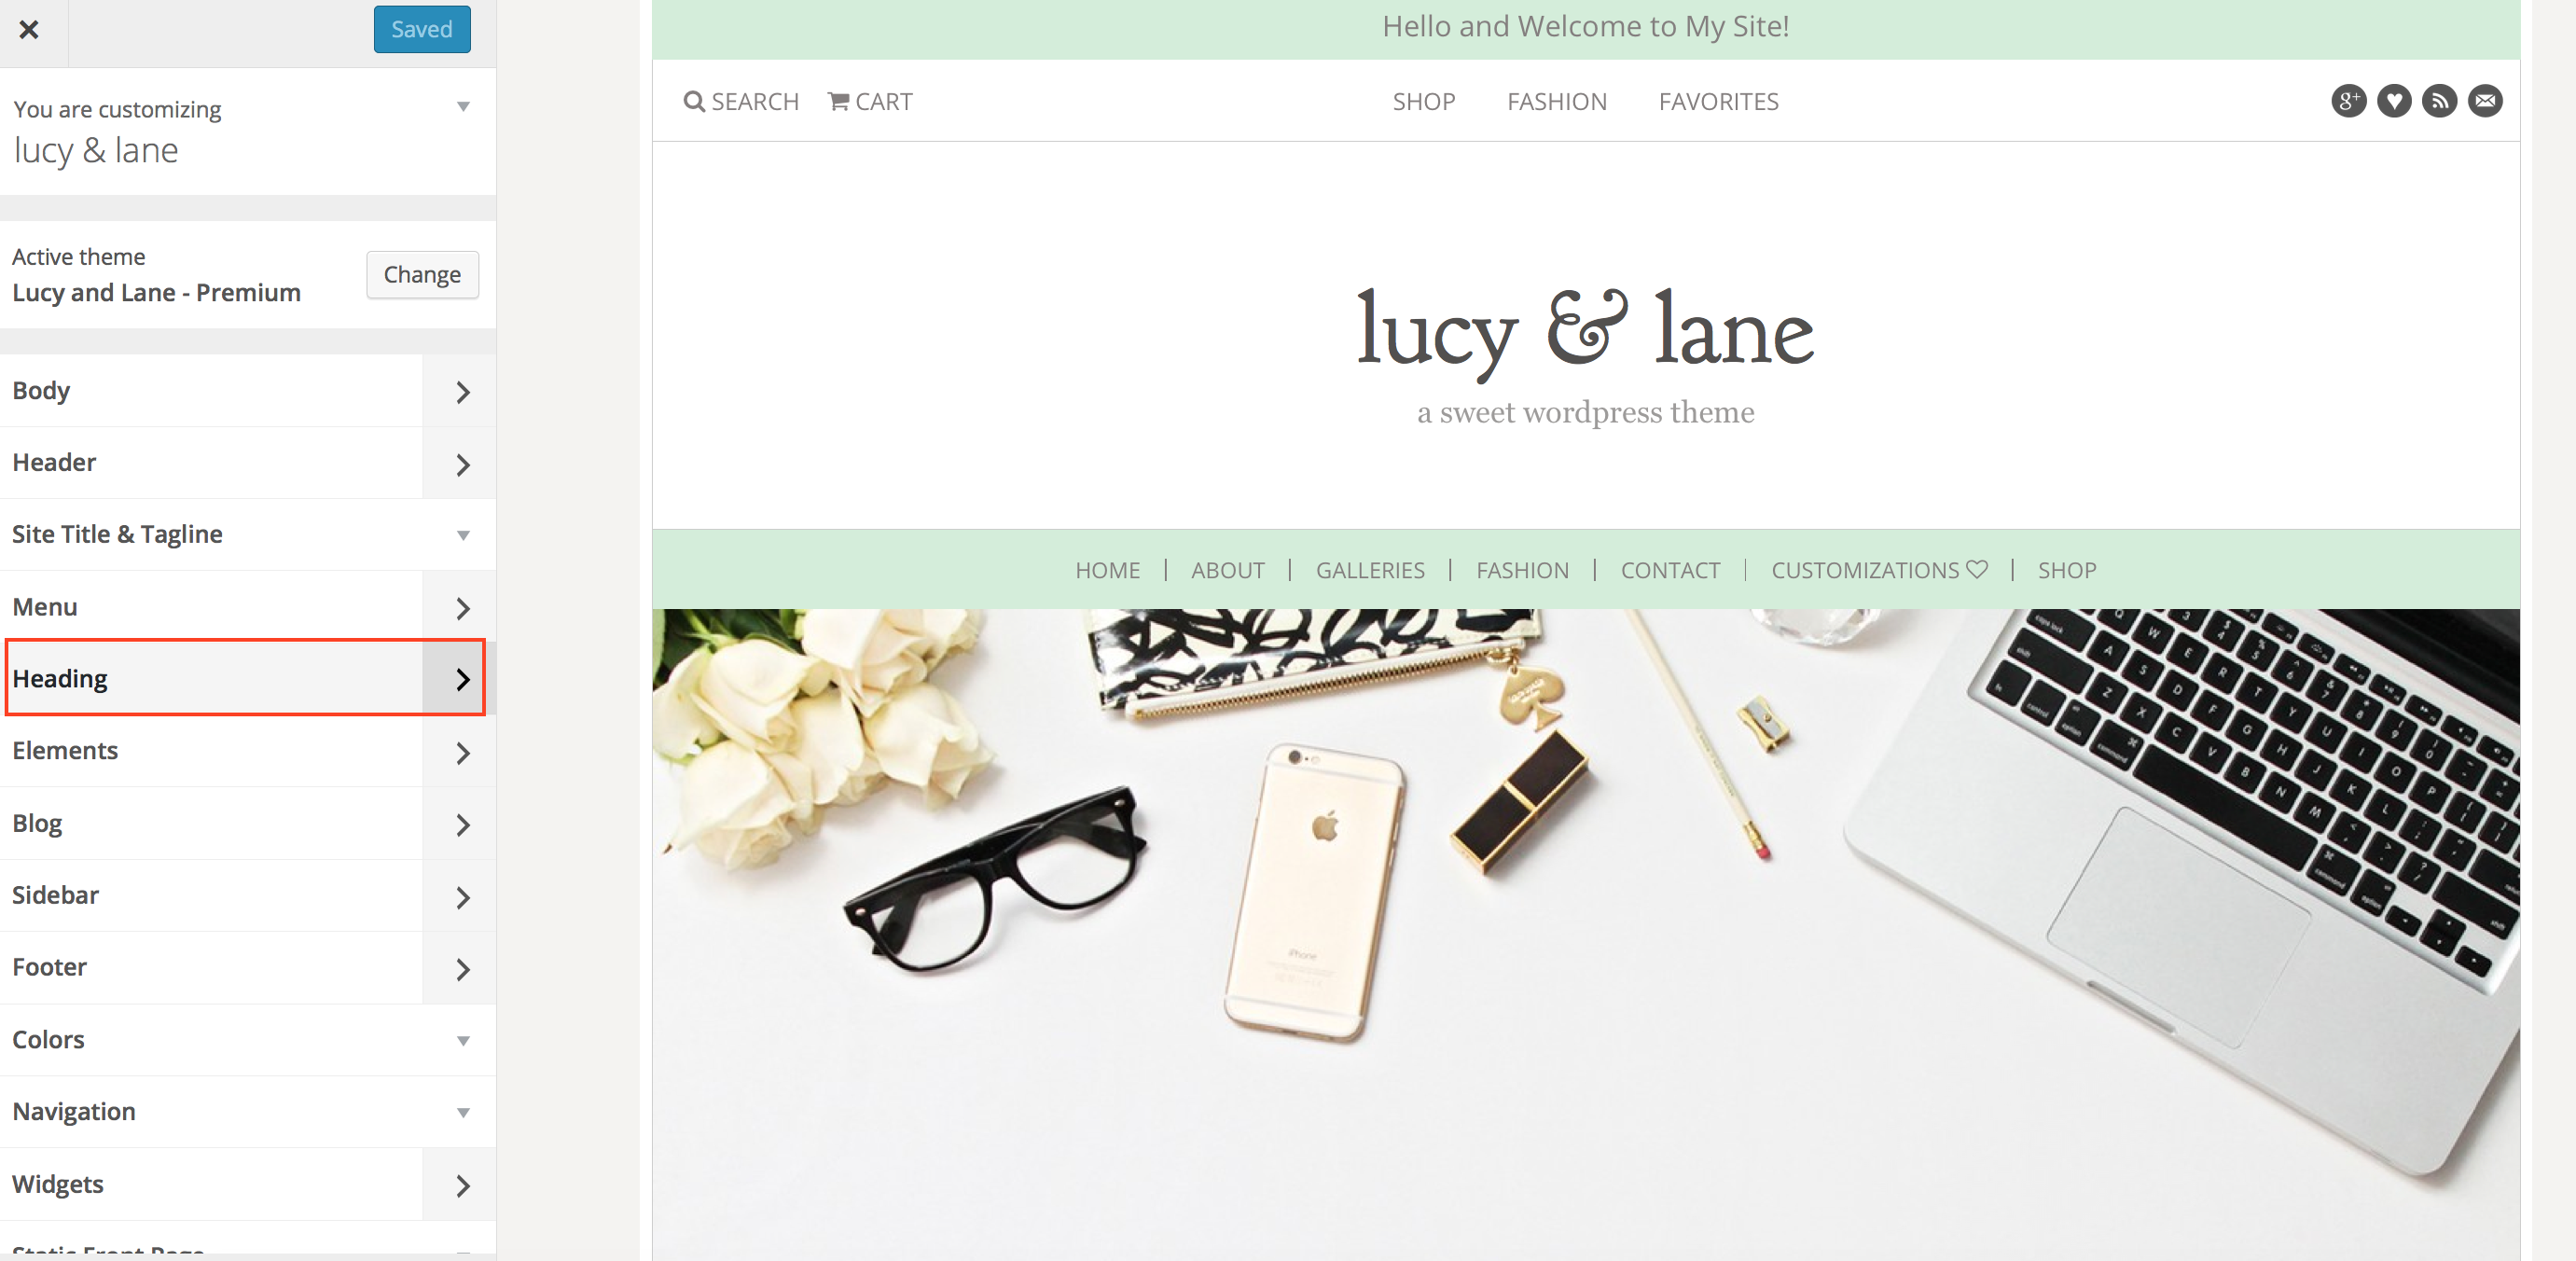
Choose to upload your own header logo image. We recommend sizing it no taller than 500px.

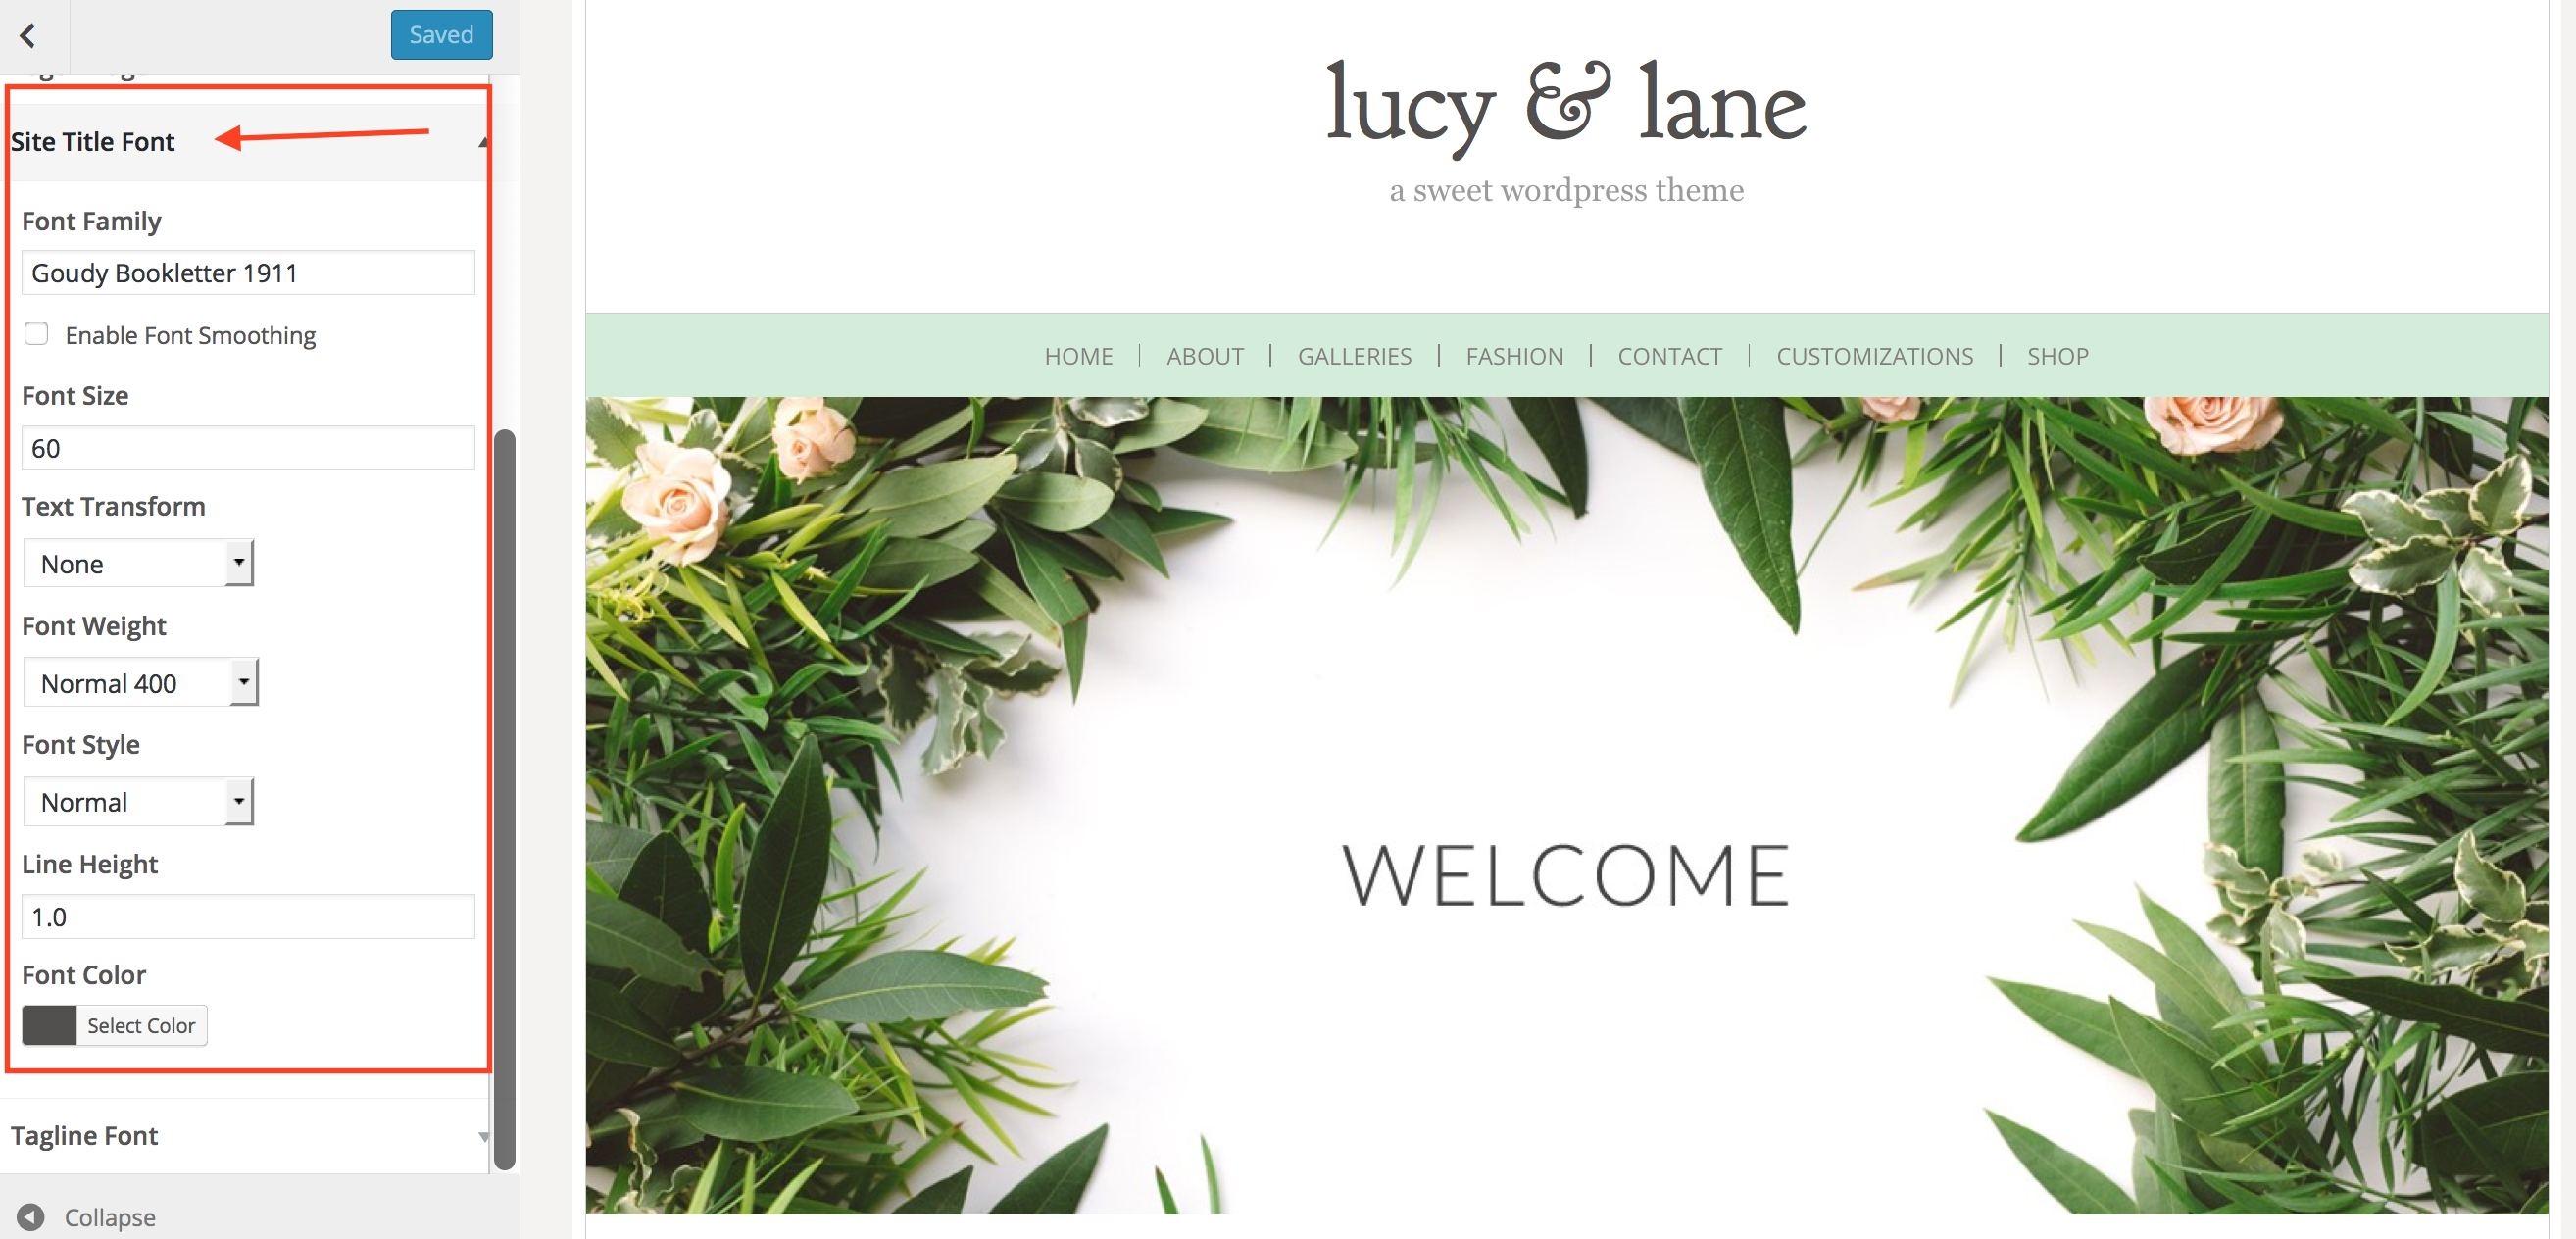
Feel free to change your site title font under the Site Title Font tab. Of course, you can always upload and use your own custom fonts as well.
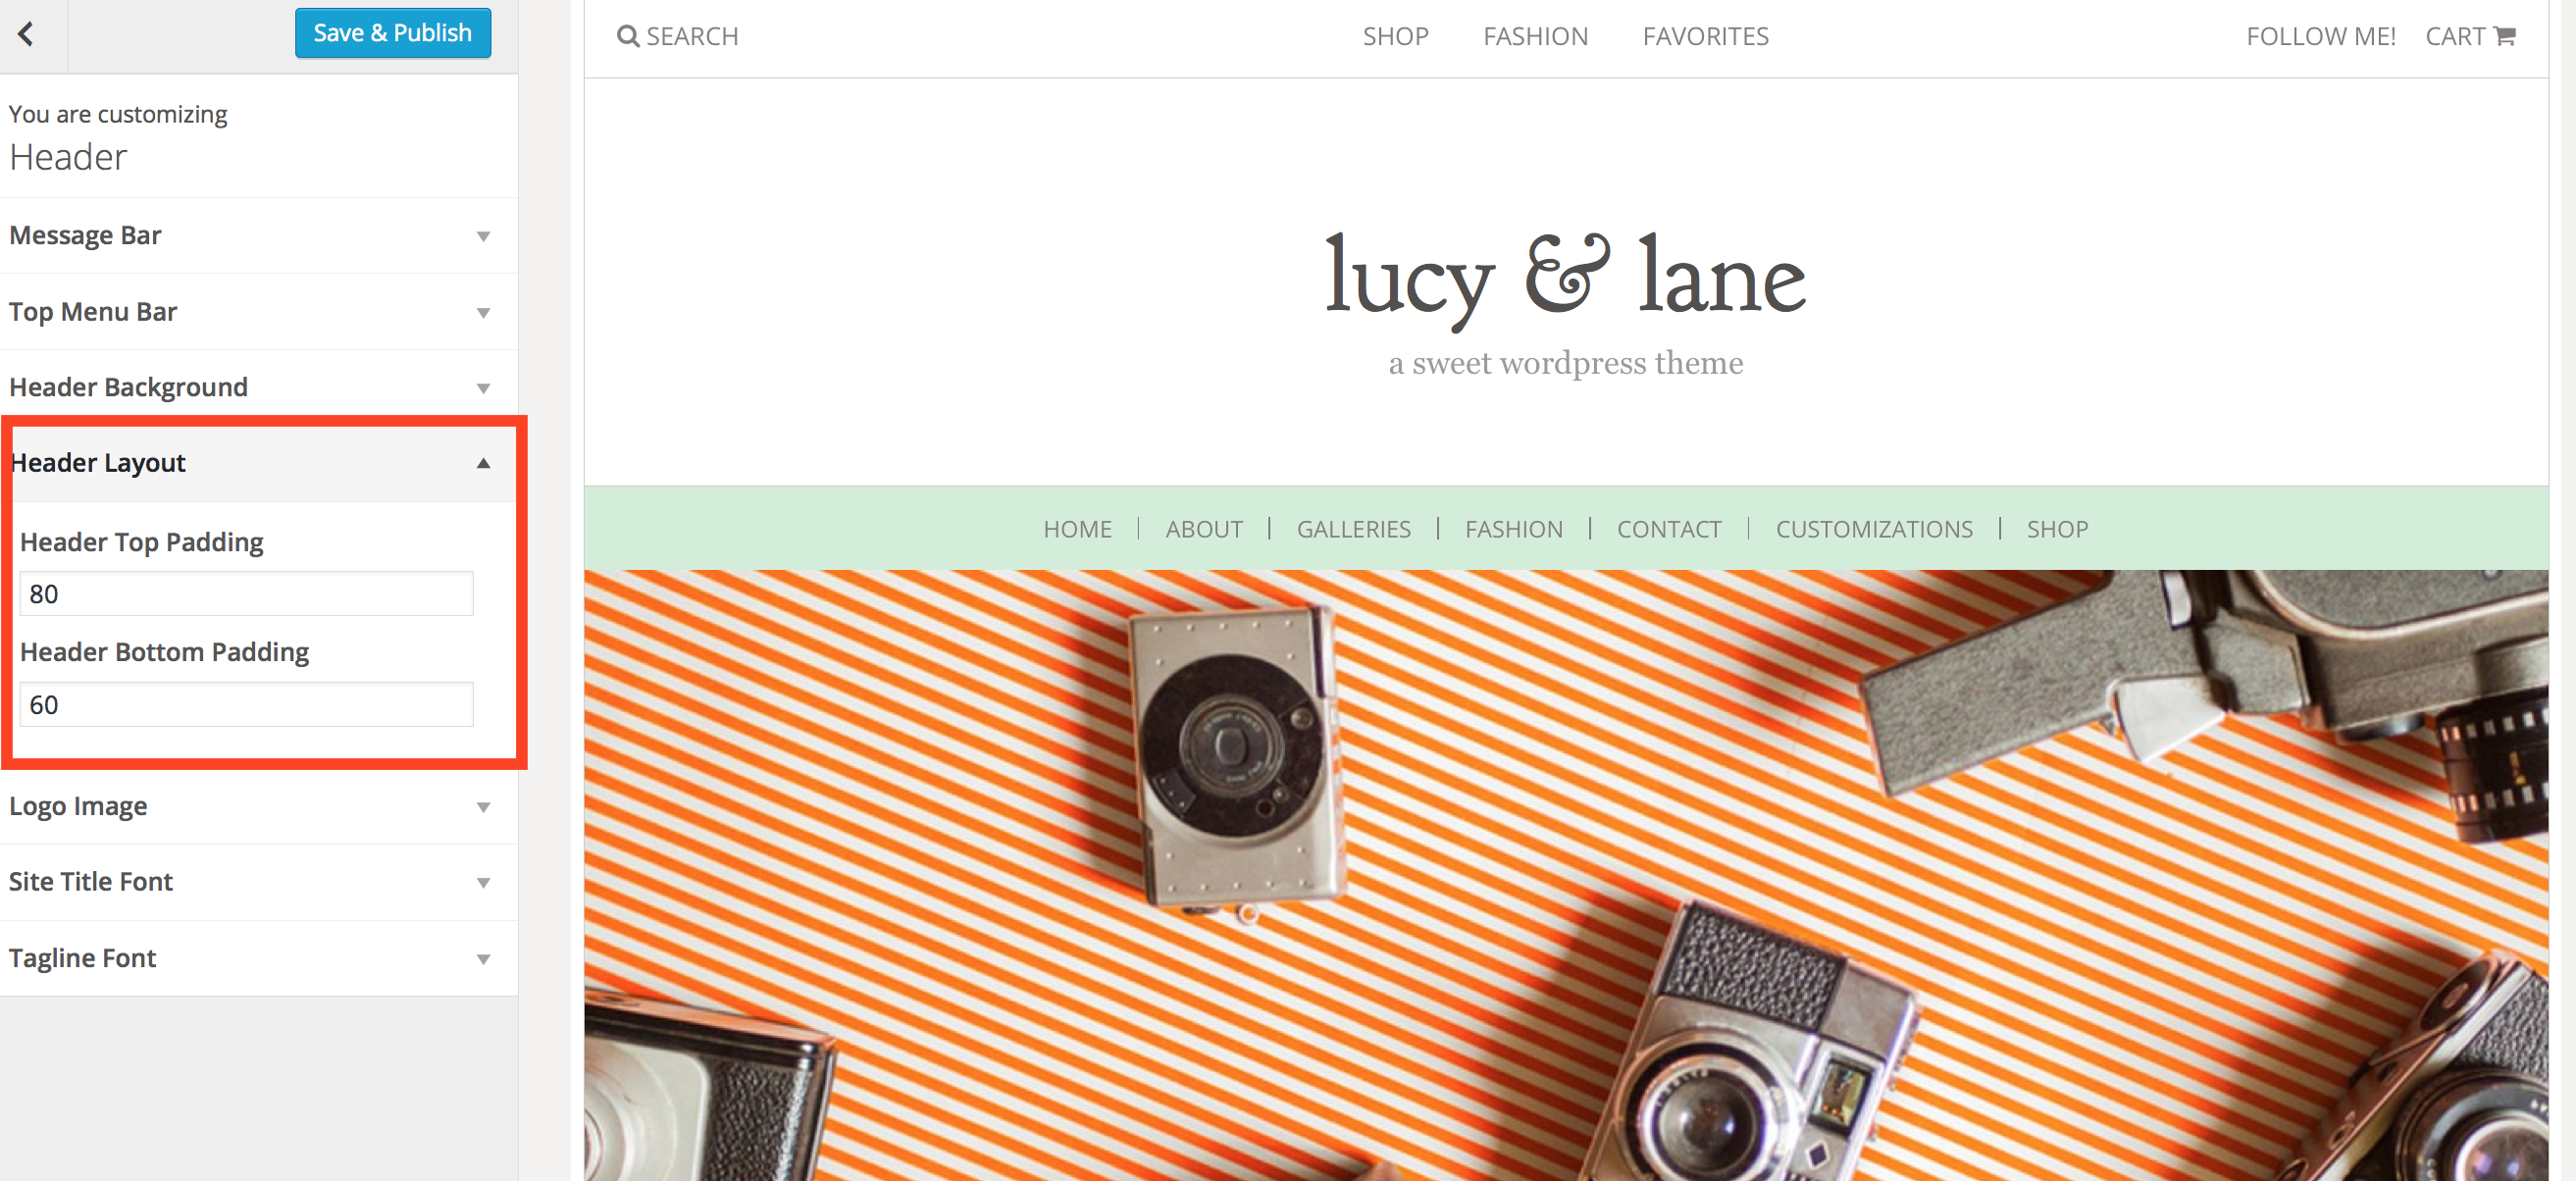
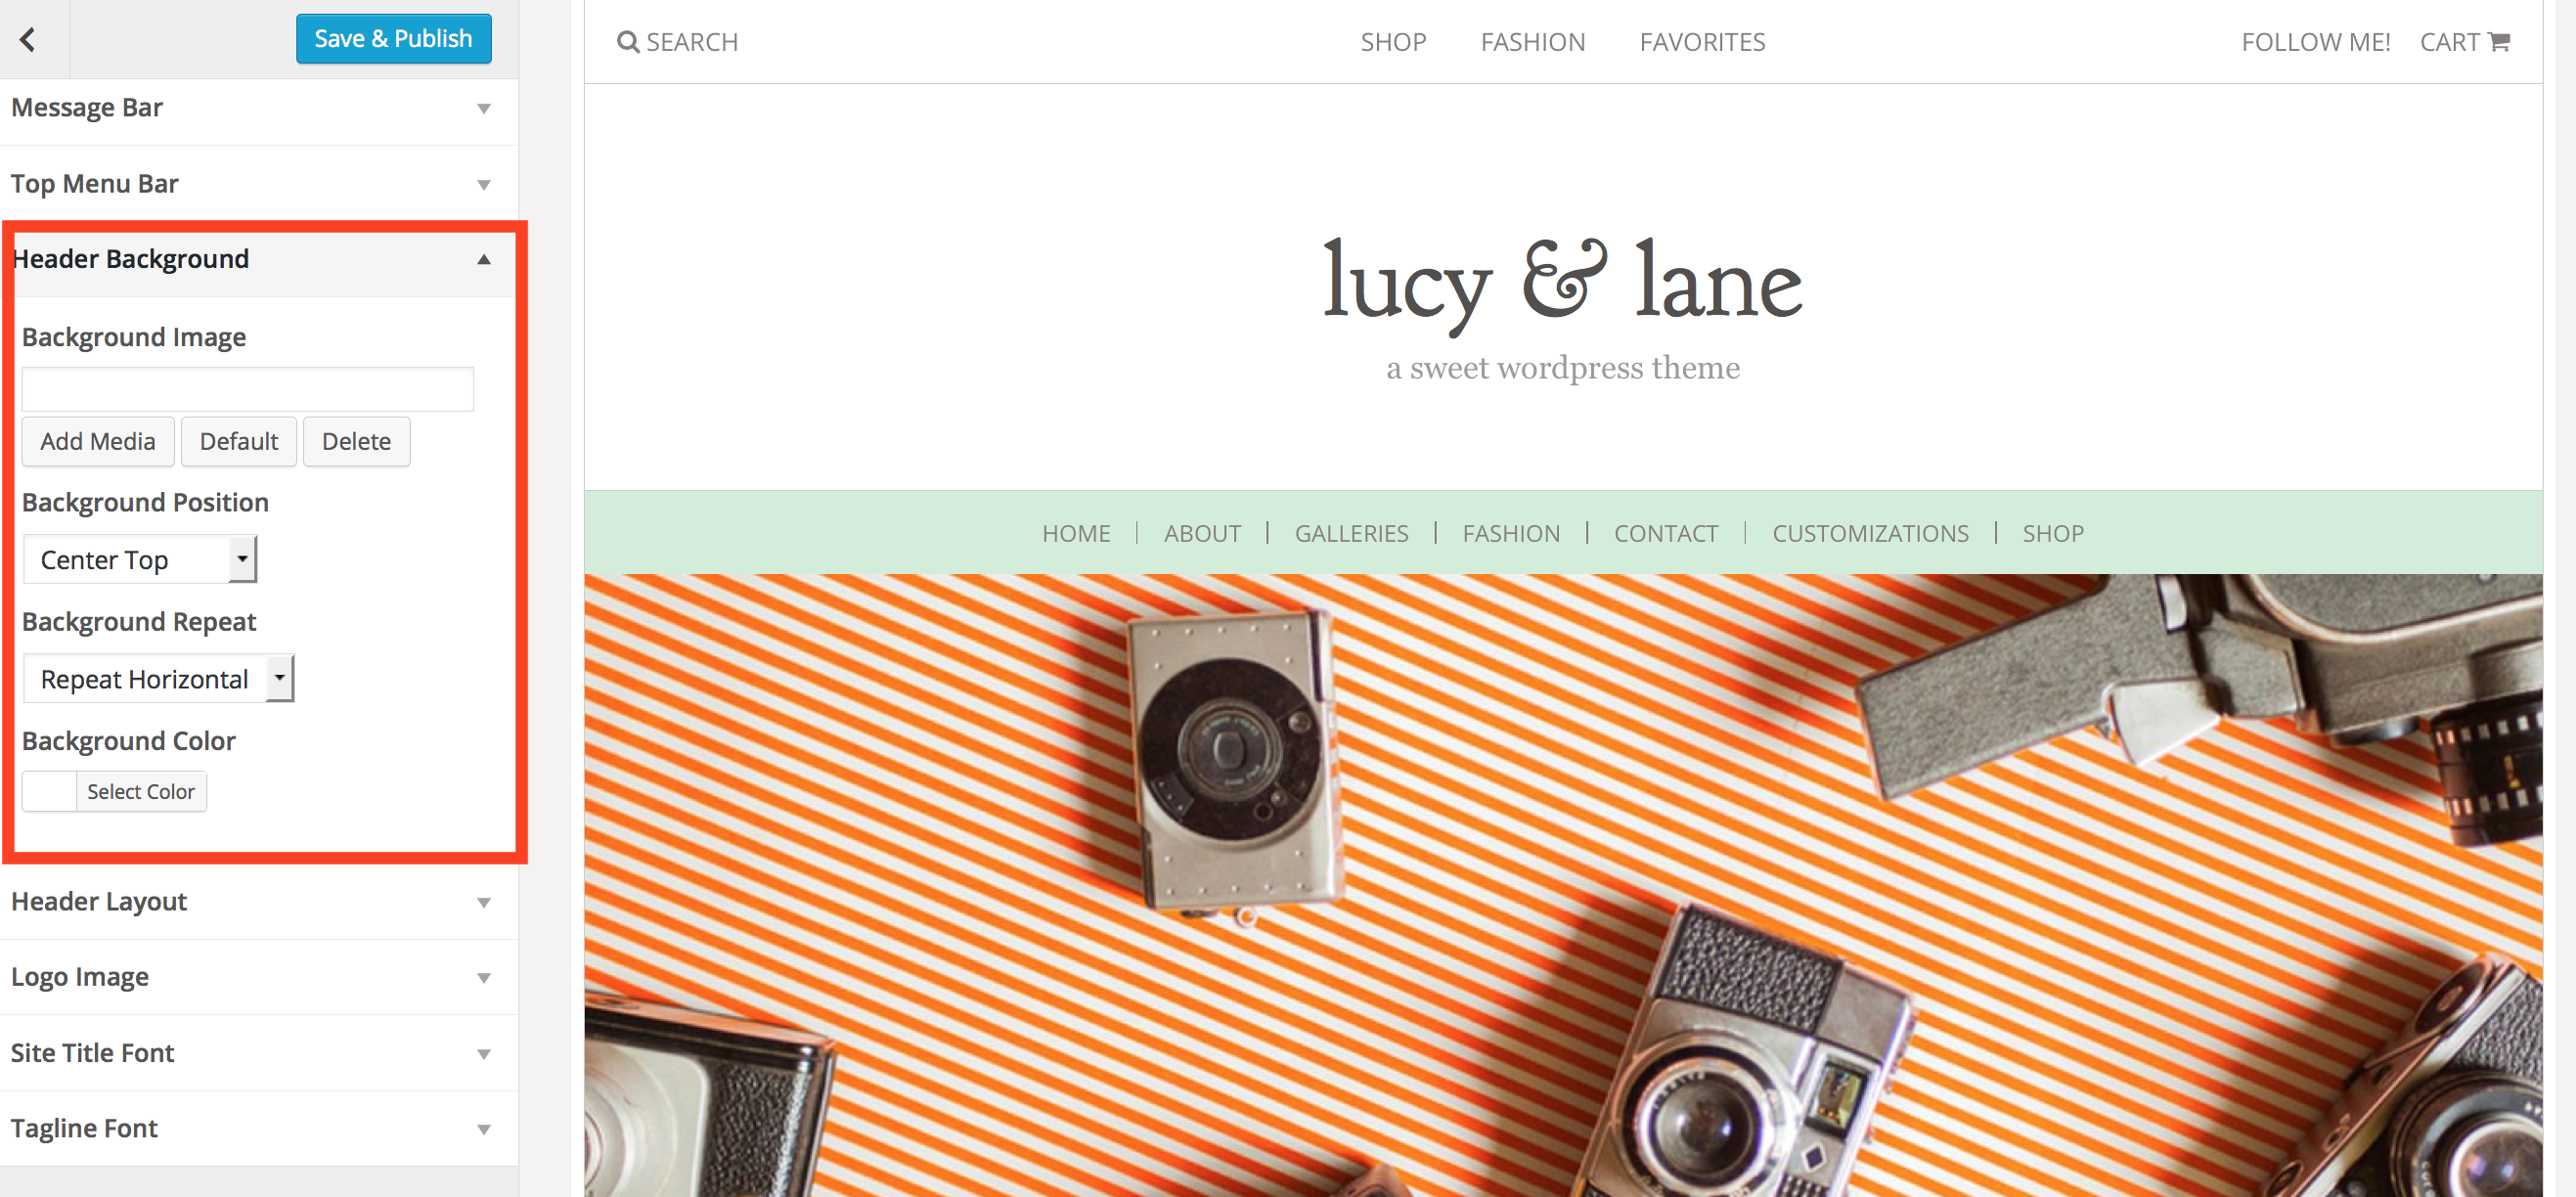
Step 2
Adjust your top / bottom padding in your header or upload a custom header background image.
Step 3
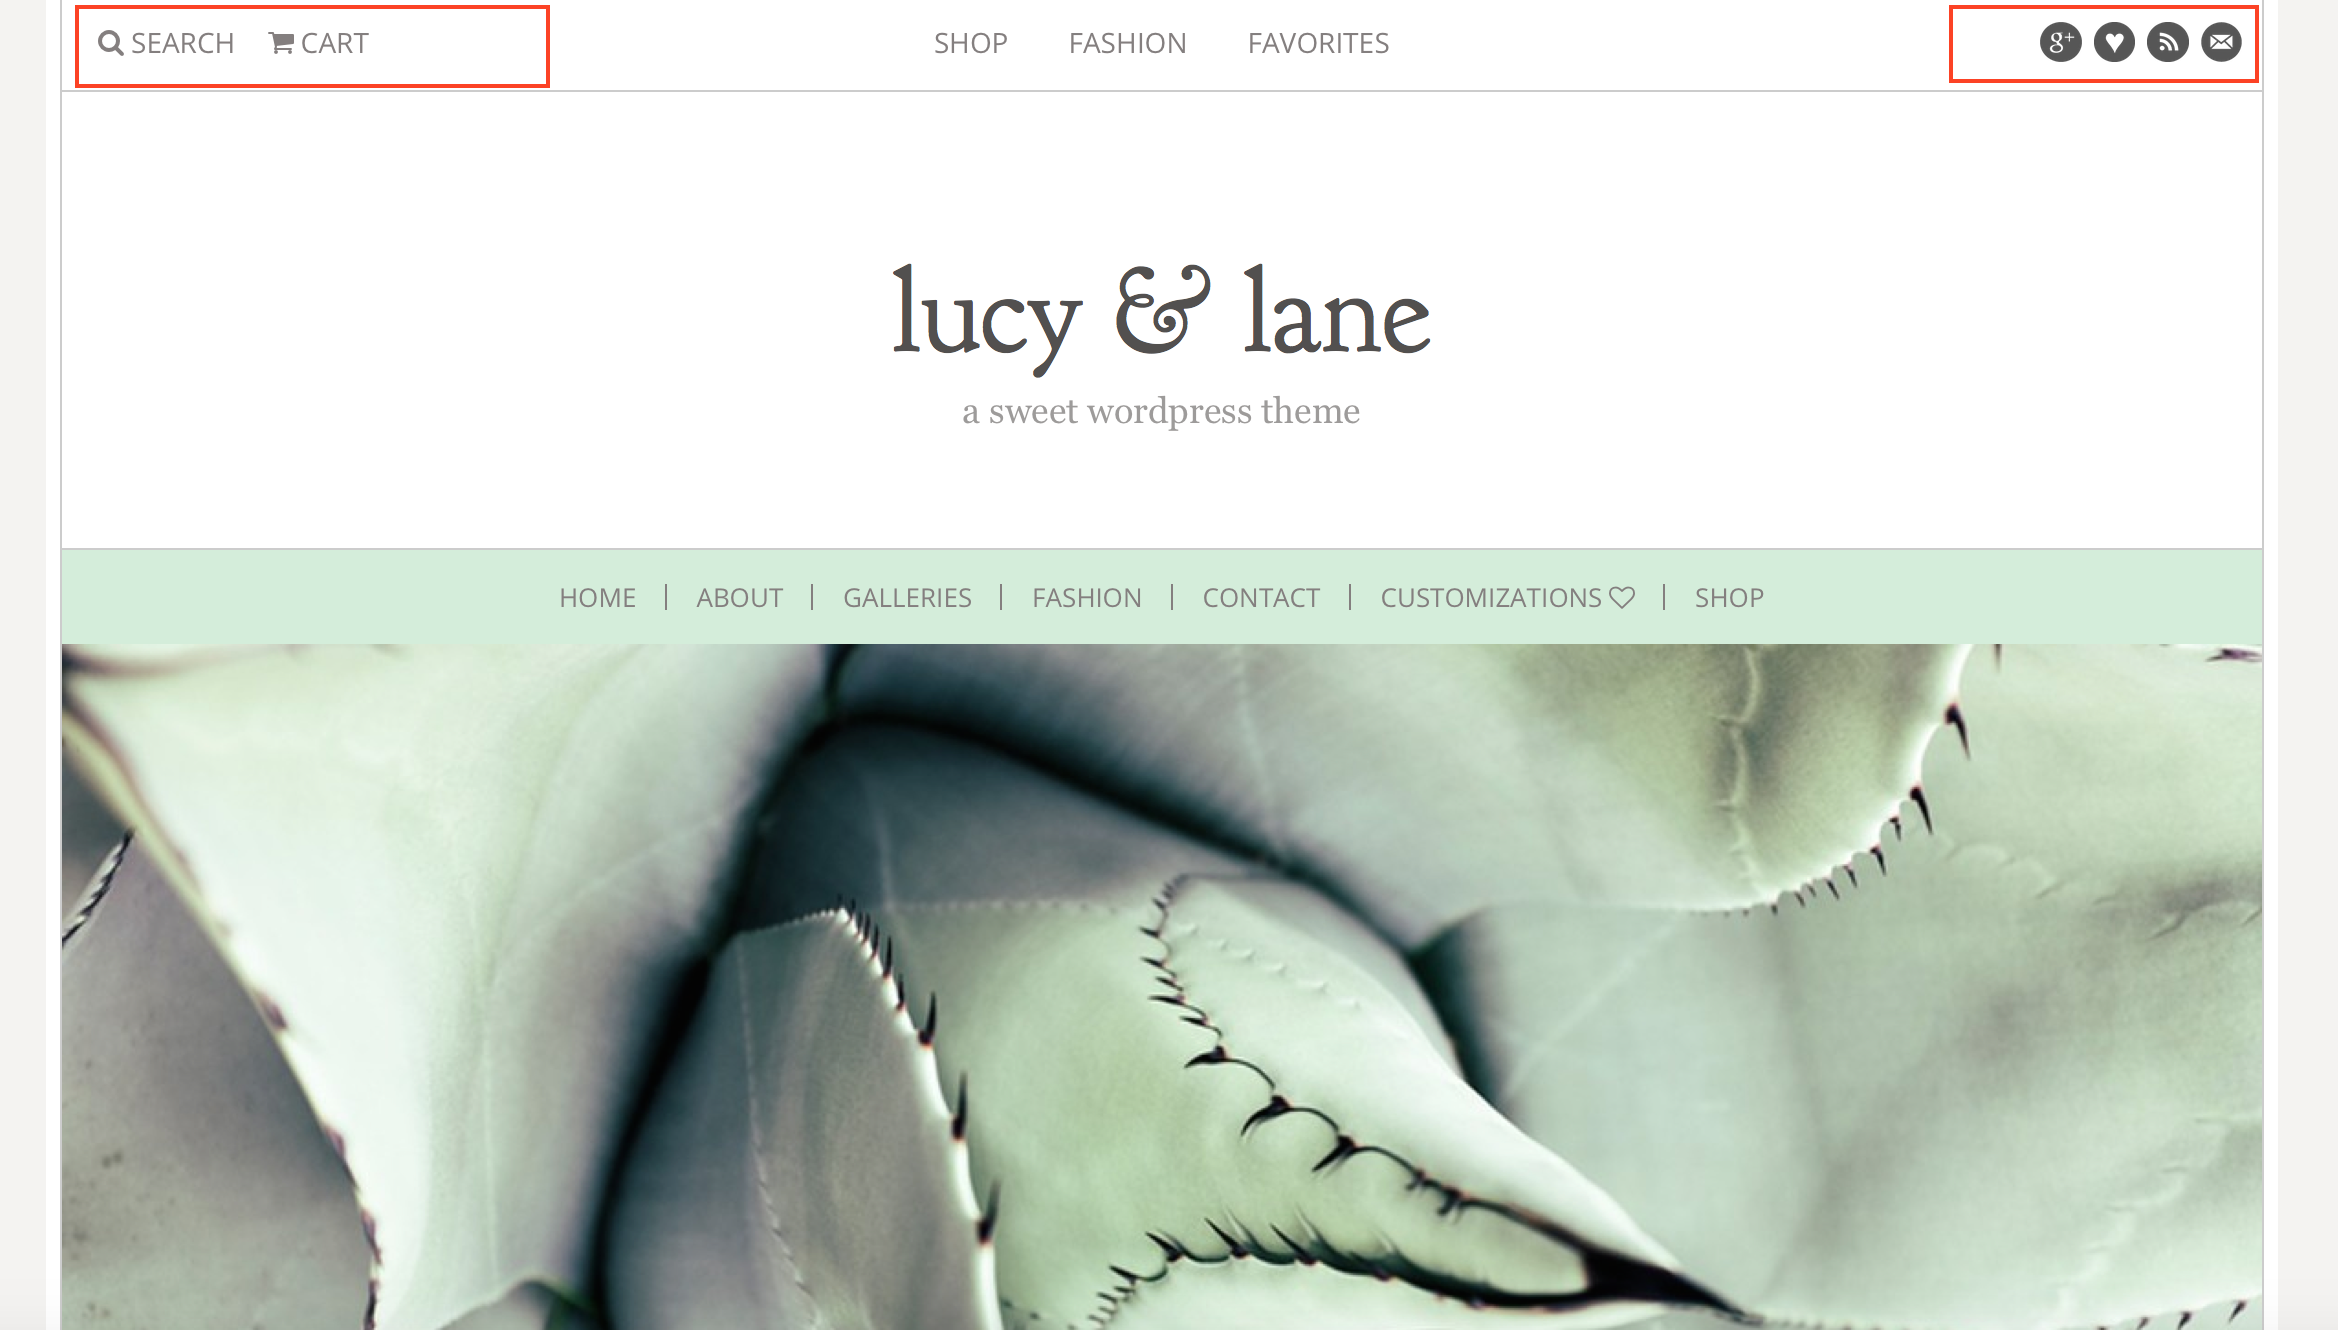
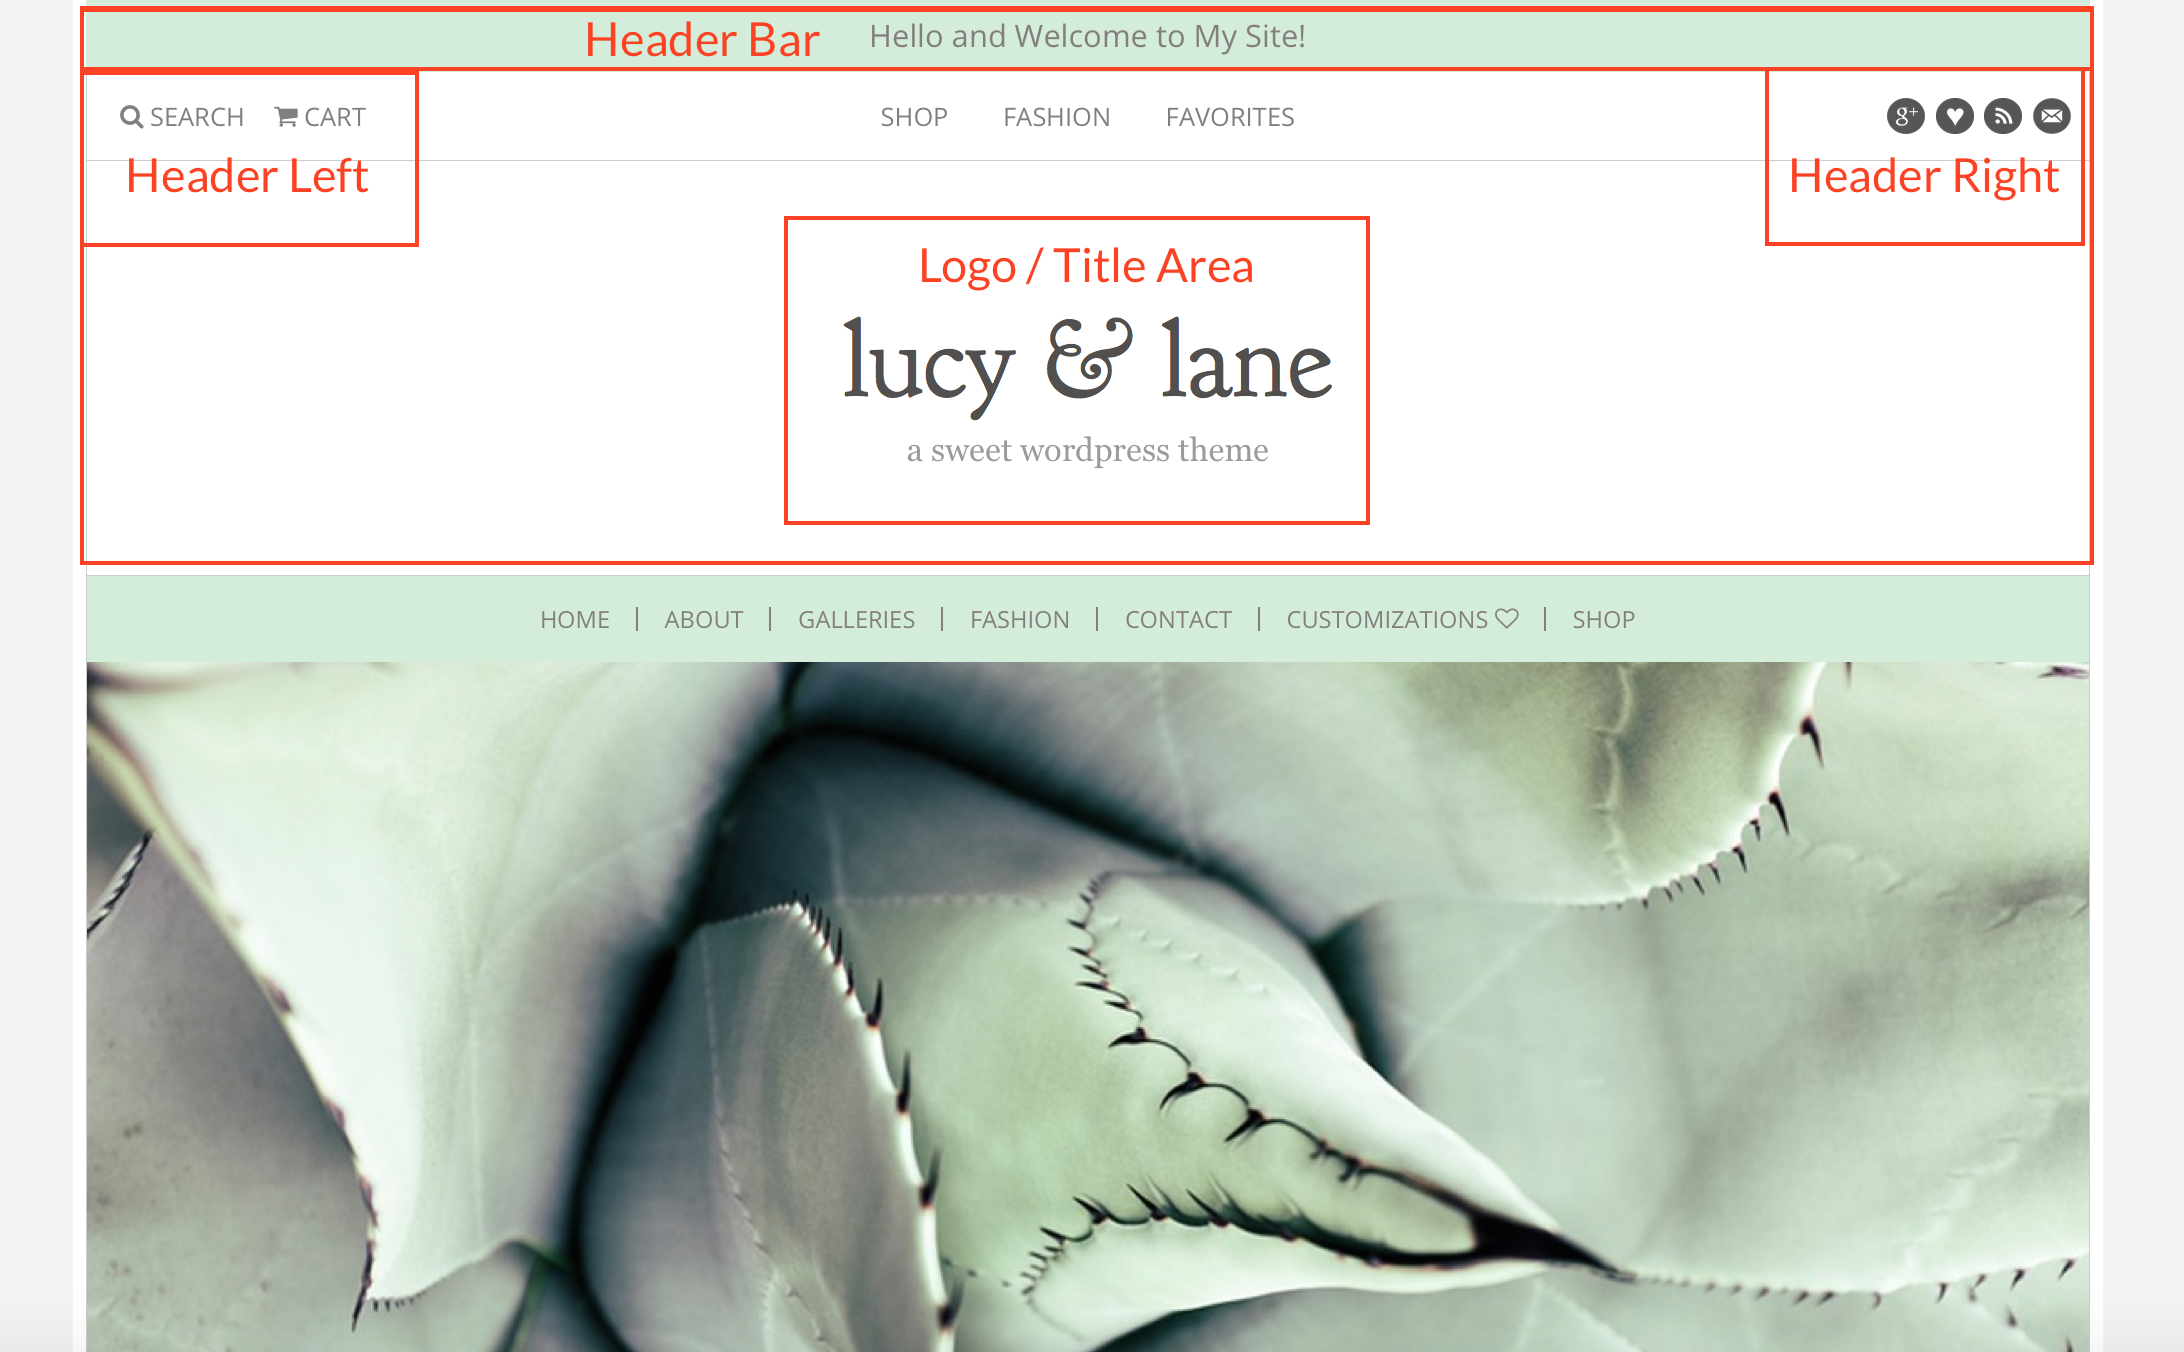
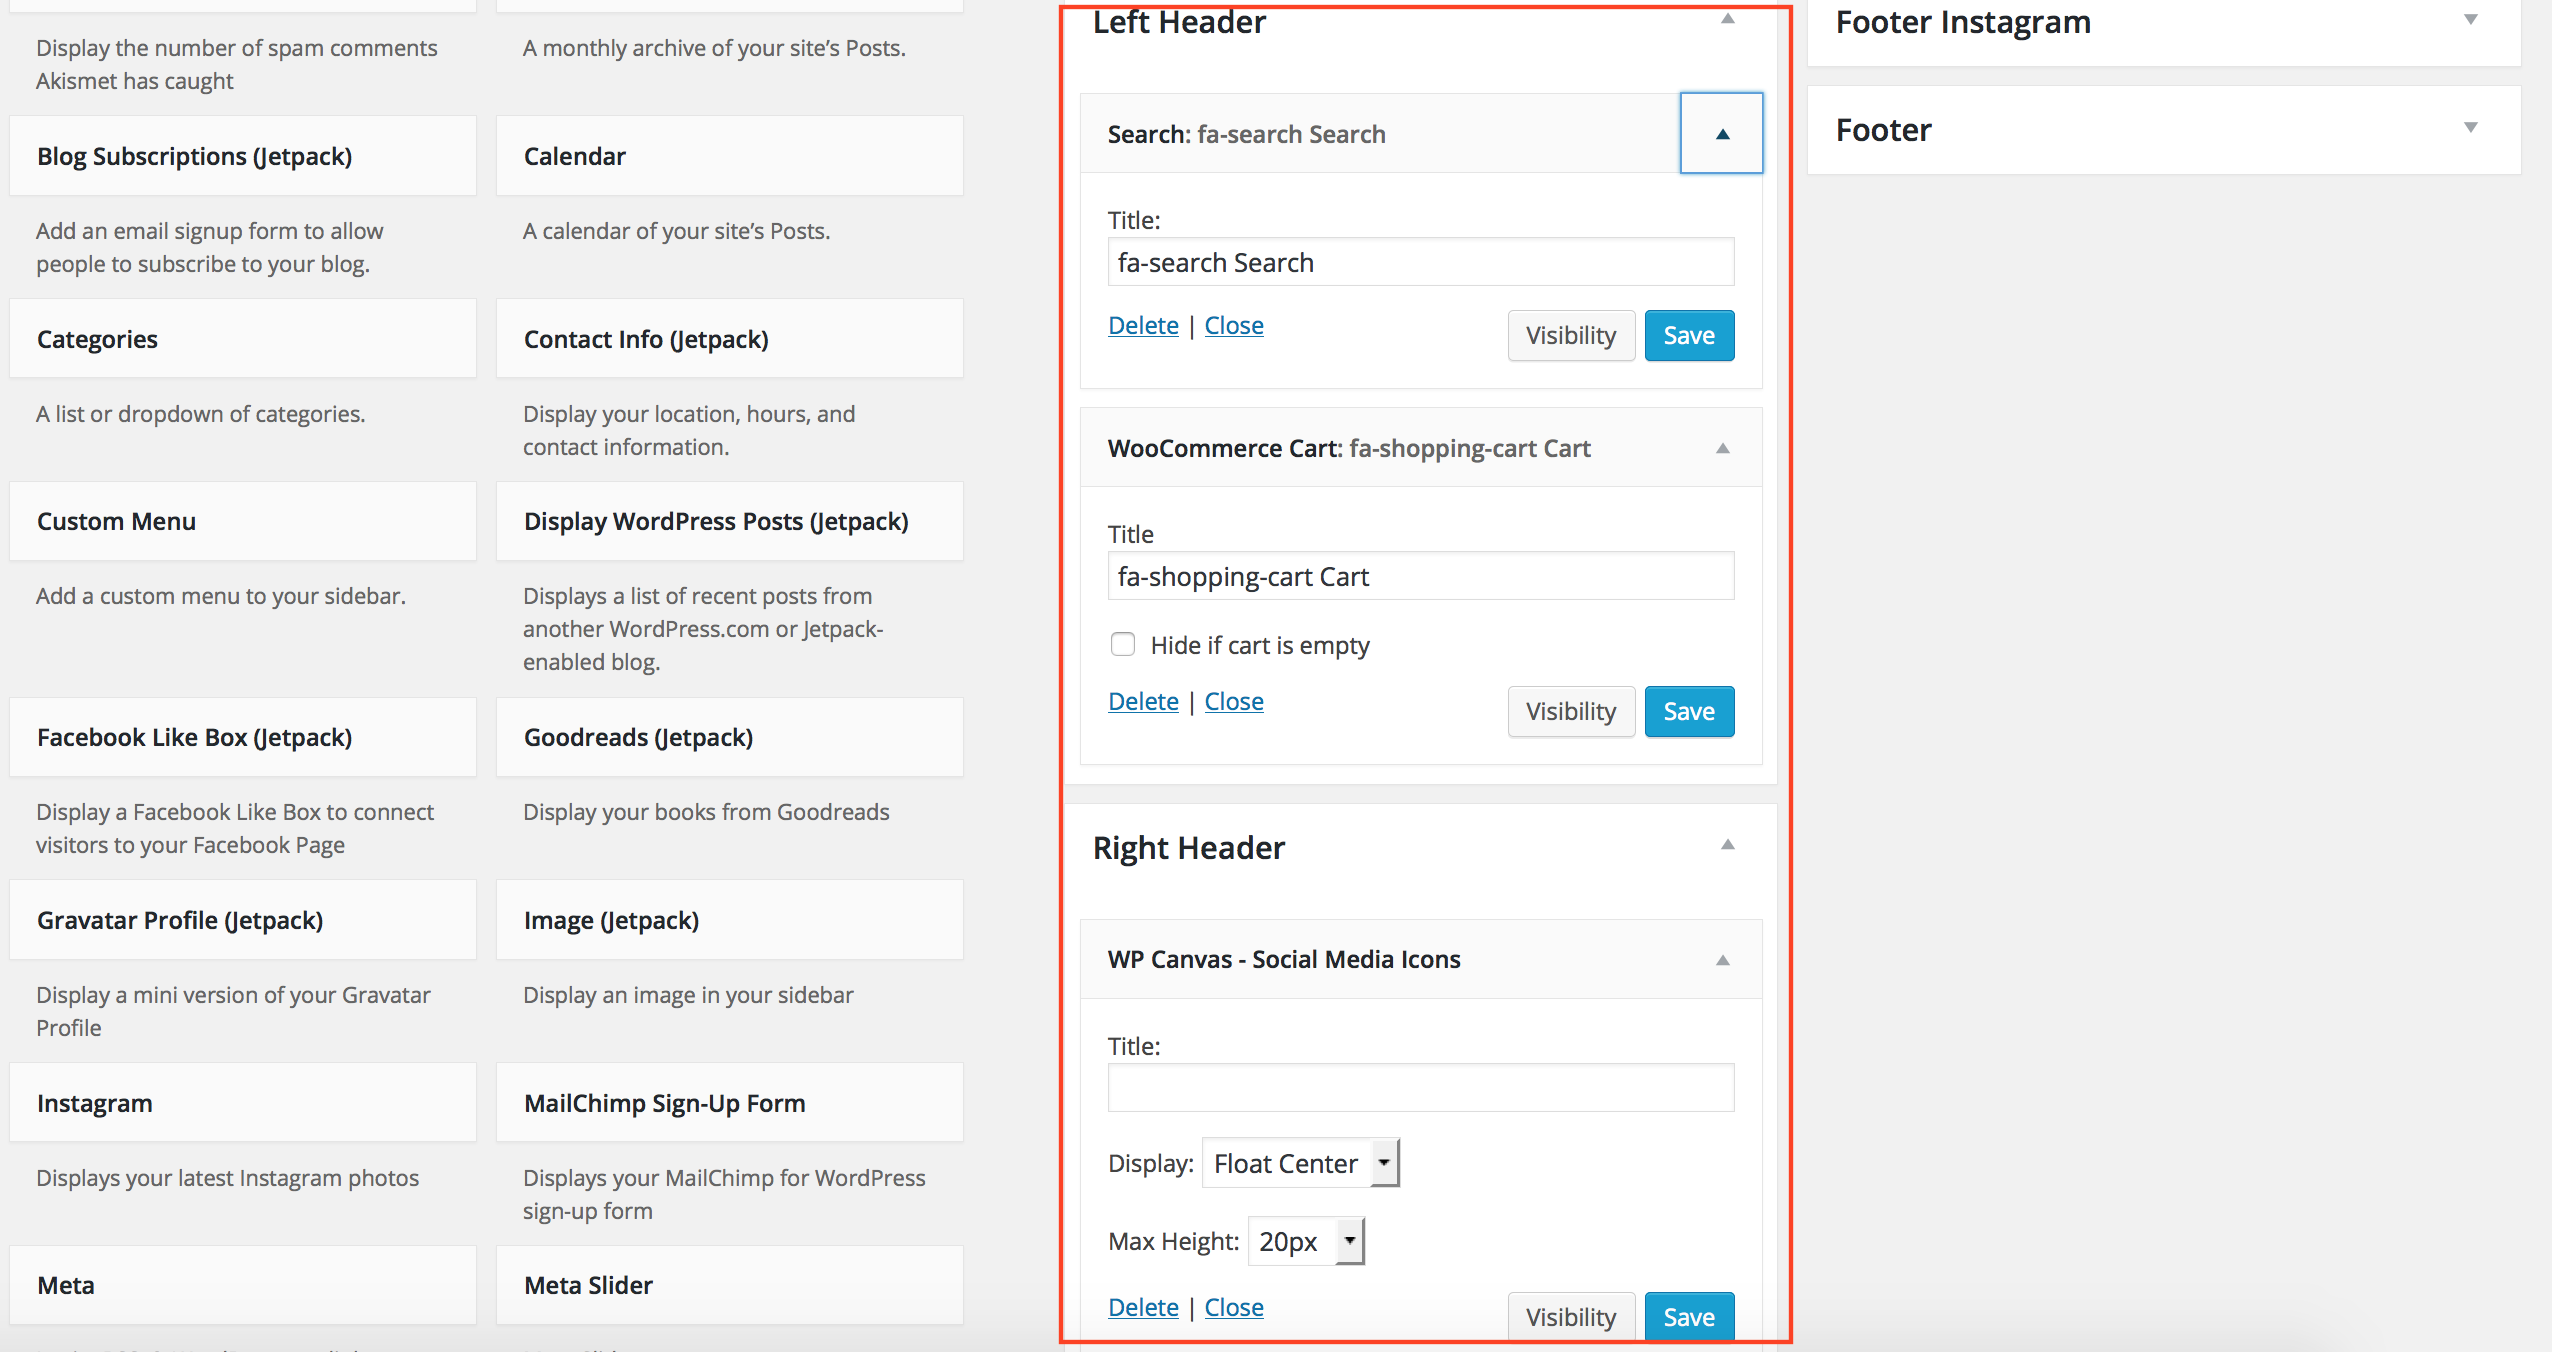
To set up the search area, cart, and your social icons in the header bar area, go to Appearance / Widgets. You can drag widgets into the sections marked Left Header and Right Header.
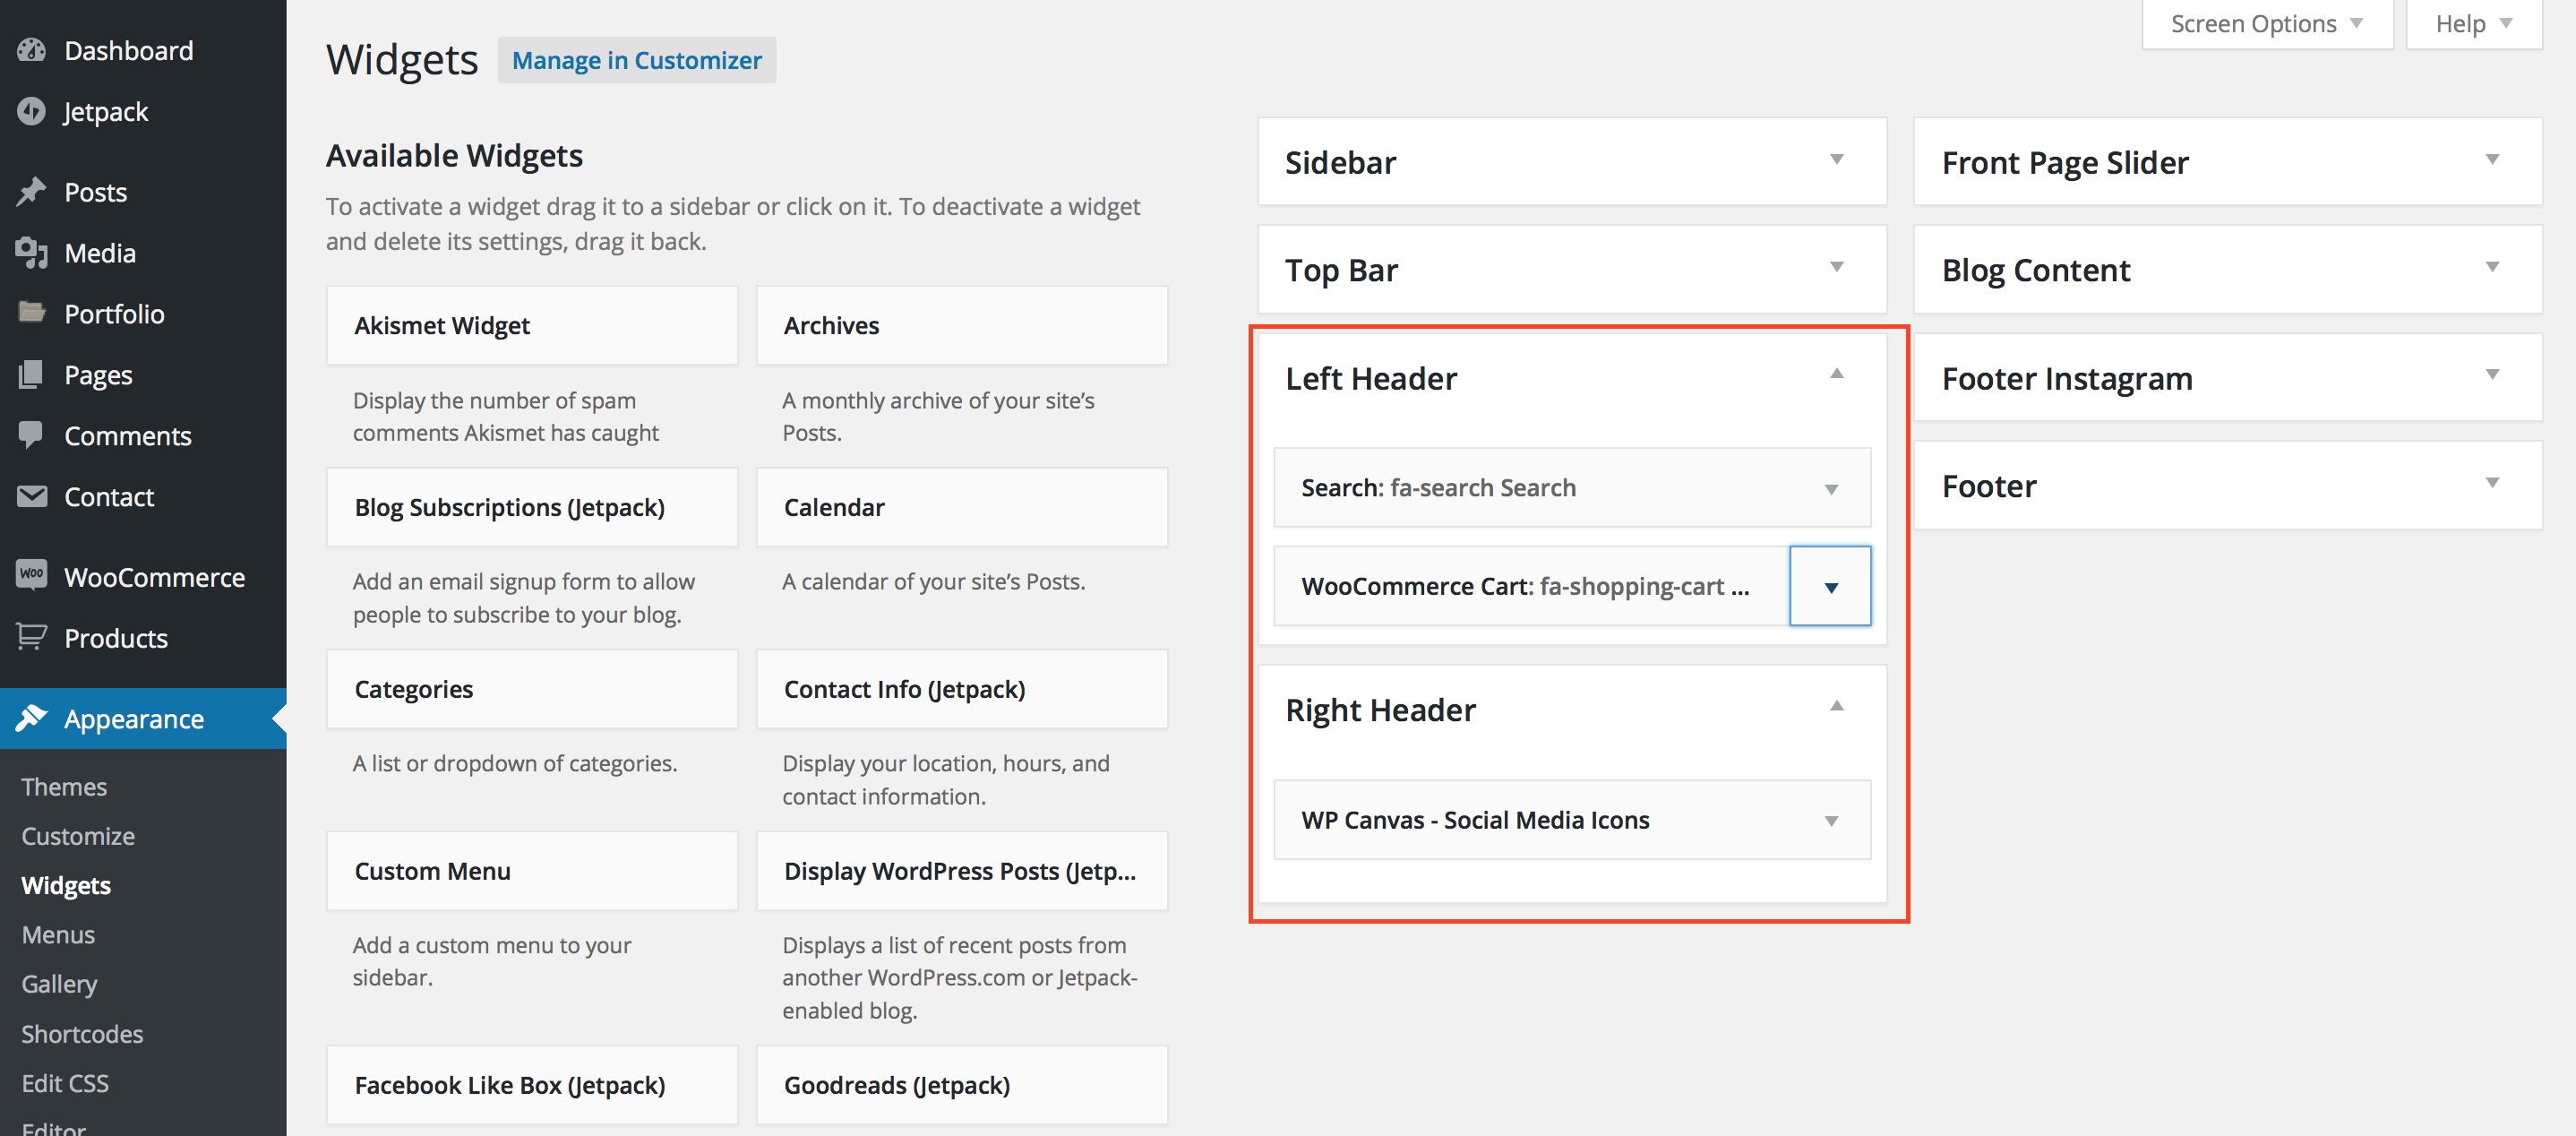
Here are the widgets and settings we used in our demo site. We put icons into the Widget title. Here’s how to add icons to your widgets titles / menu titles.
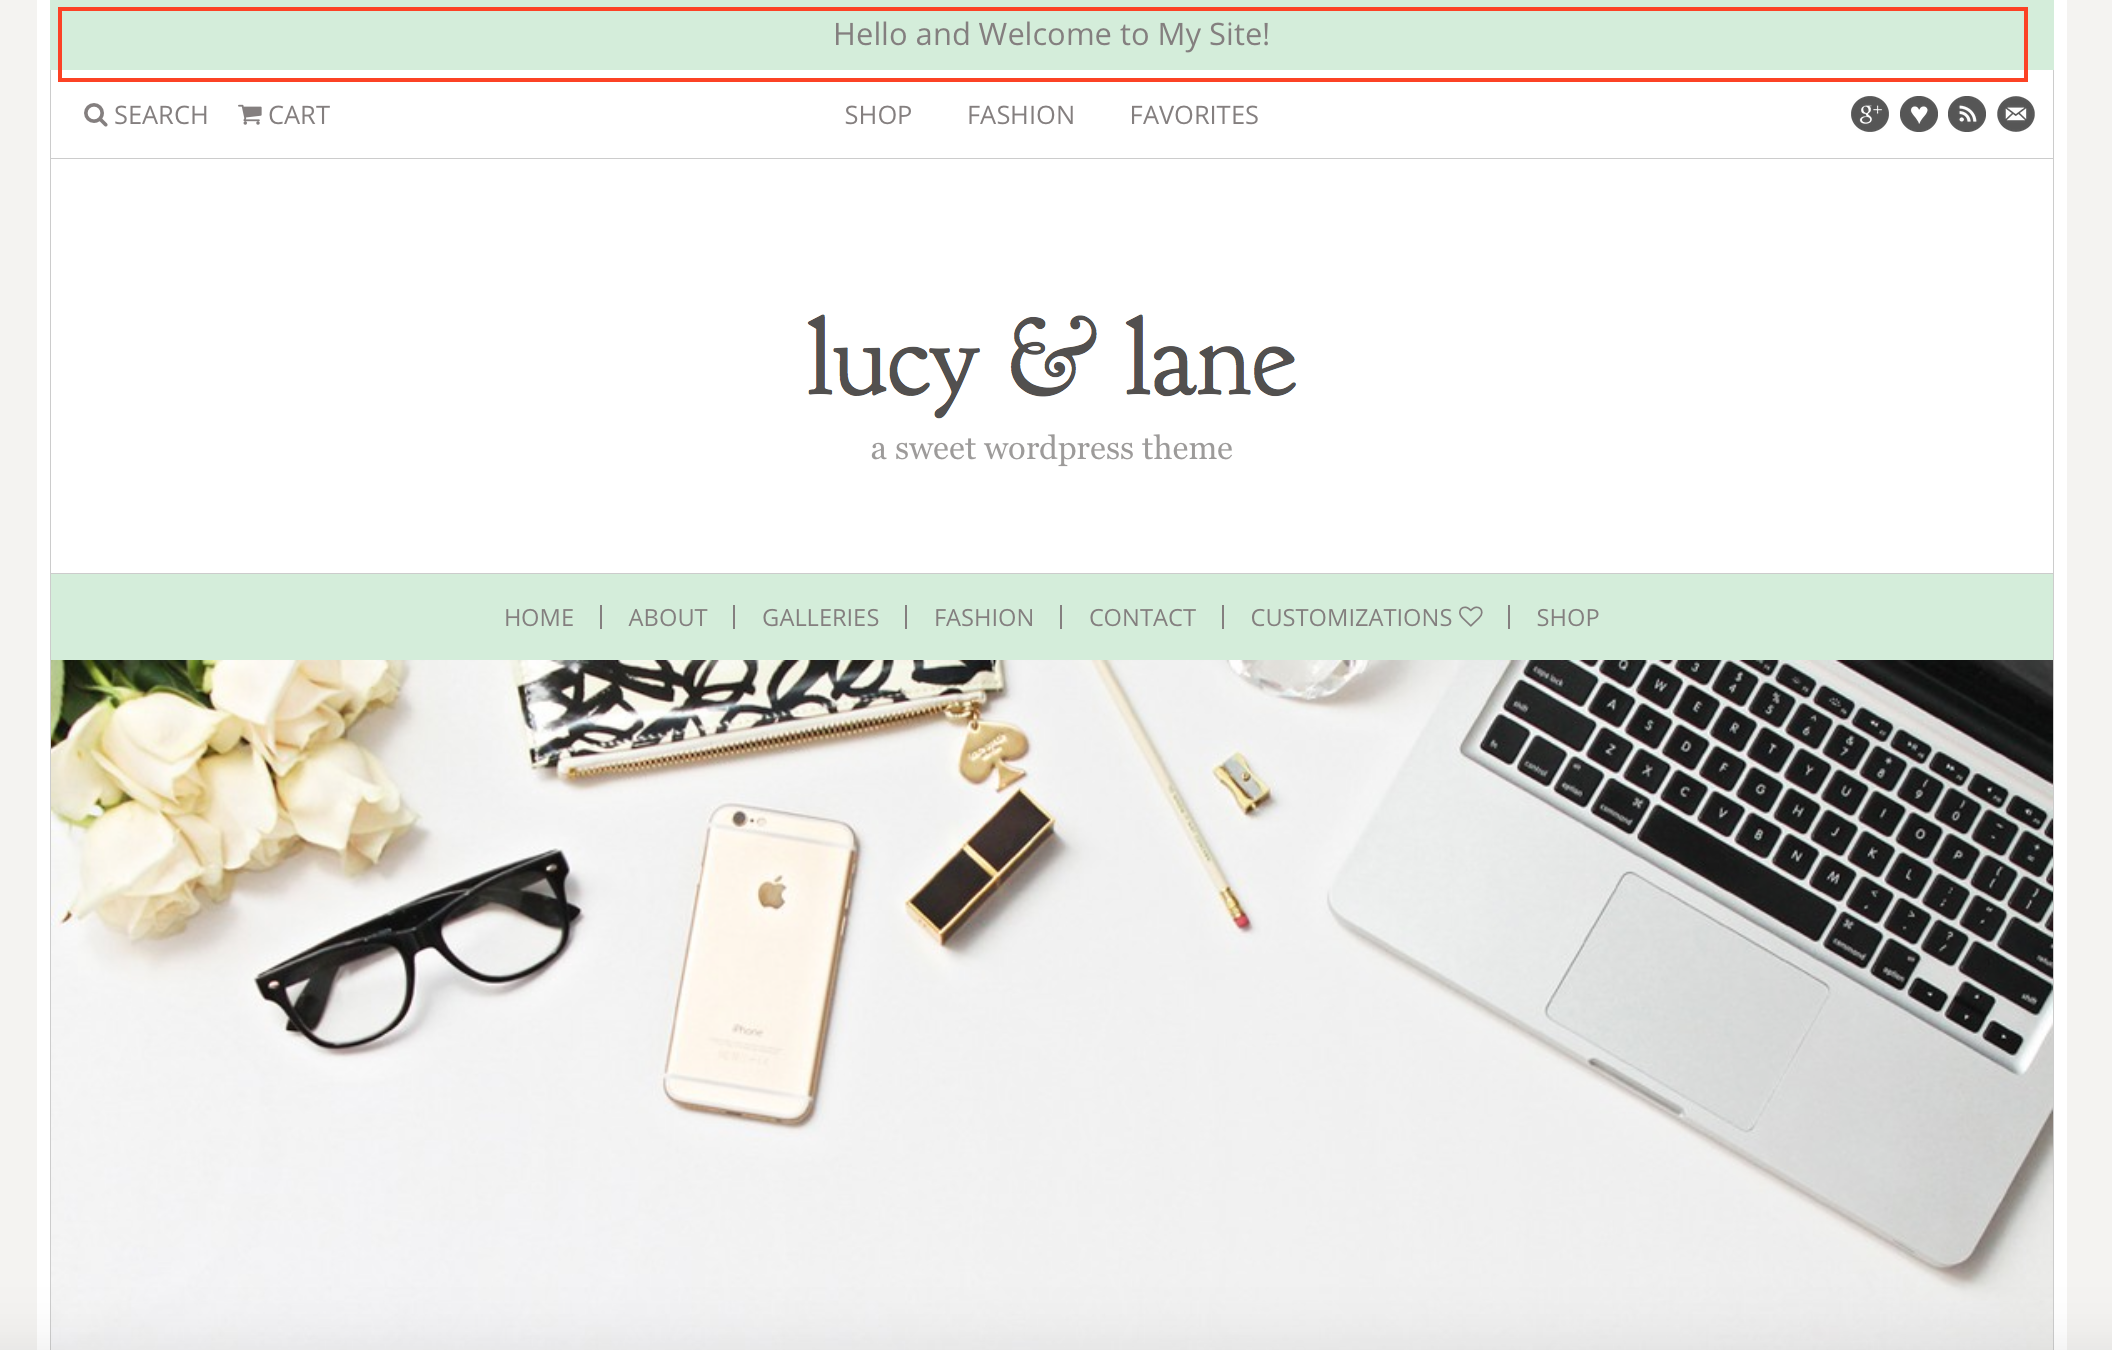
Keep in mind, you can also insert widgets ABOVE this area by dragging widgets into your Top Bar Widget section. Here’s where those will appear.
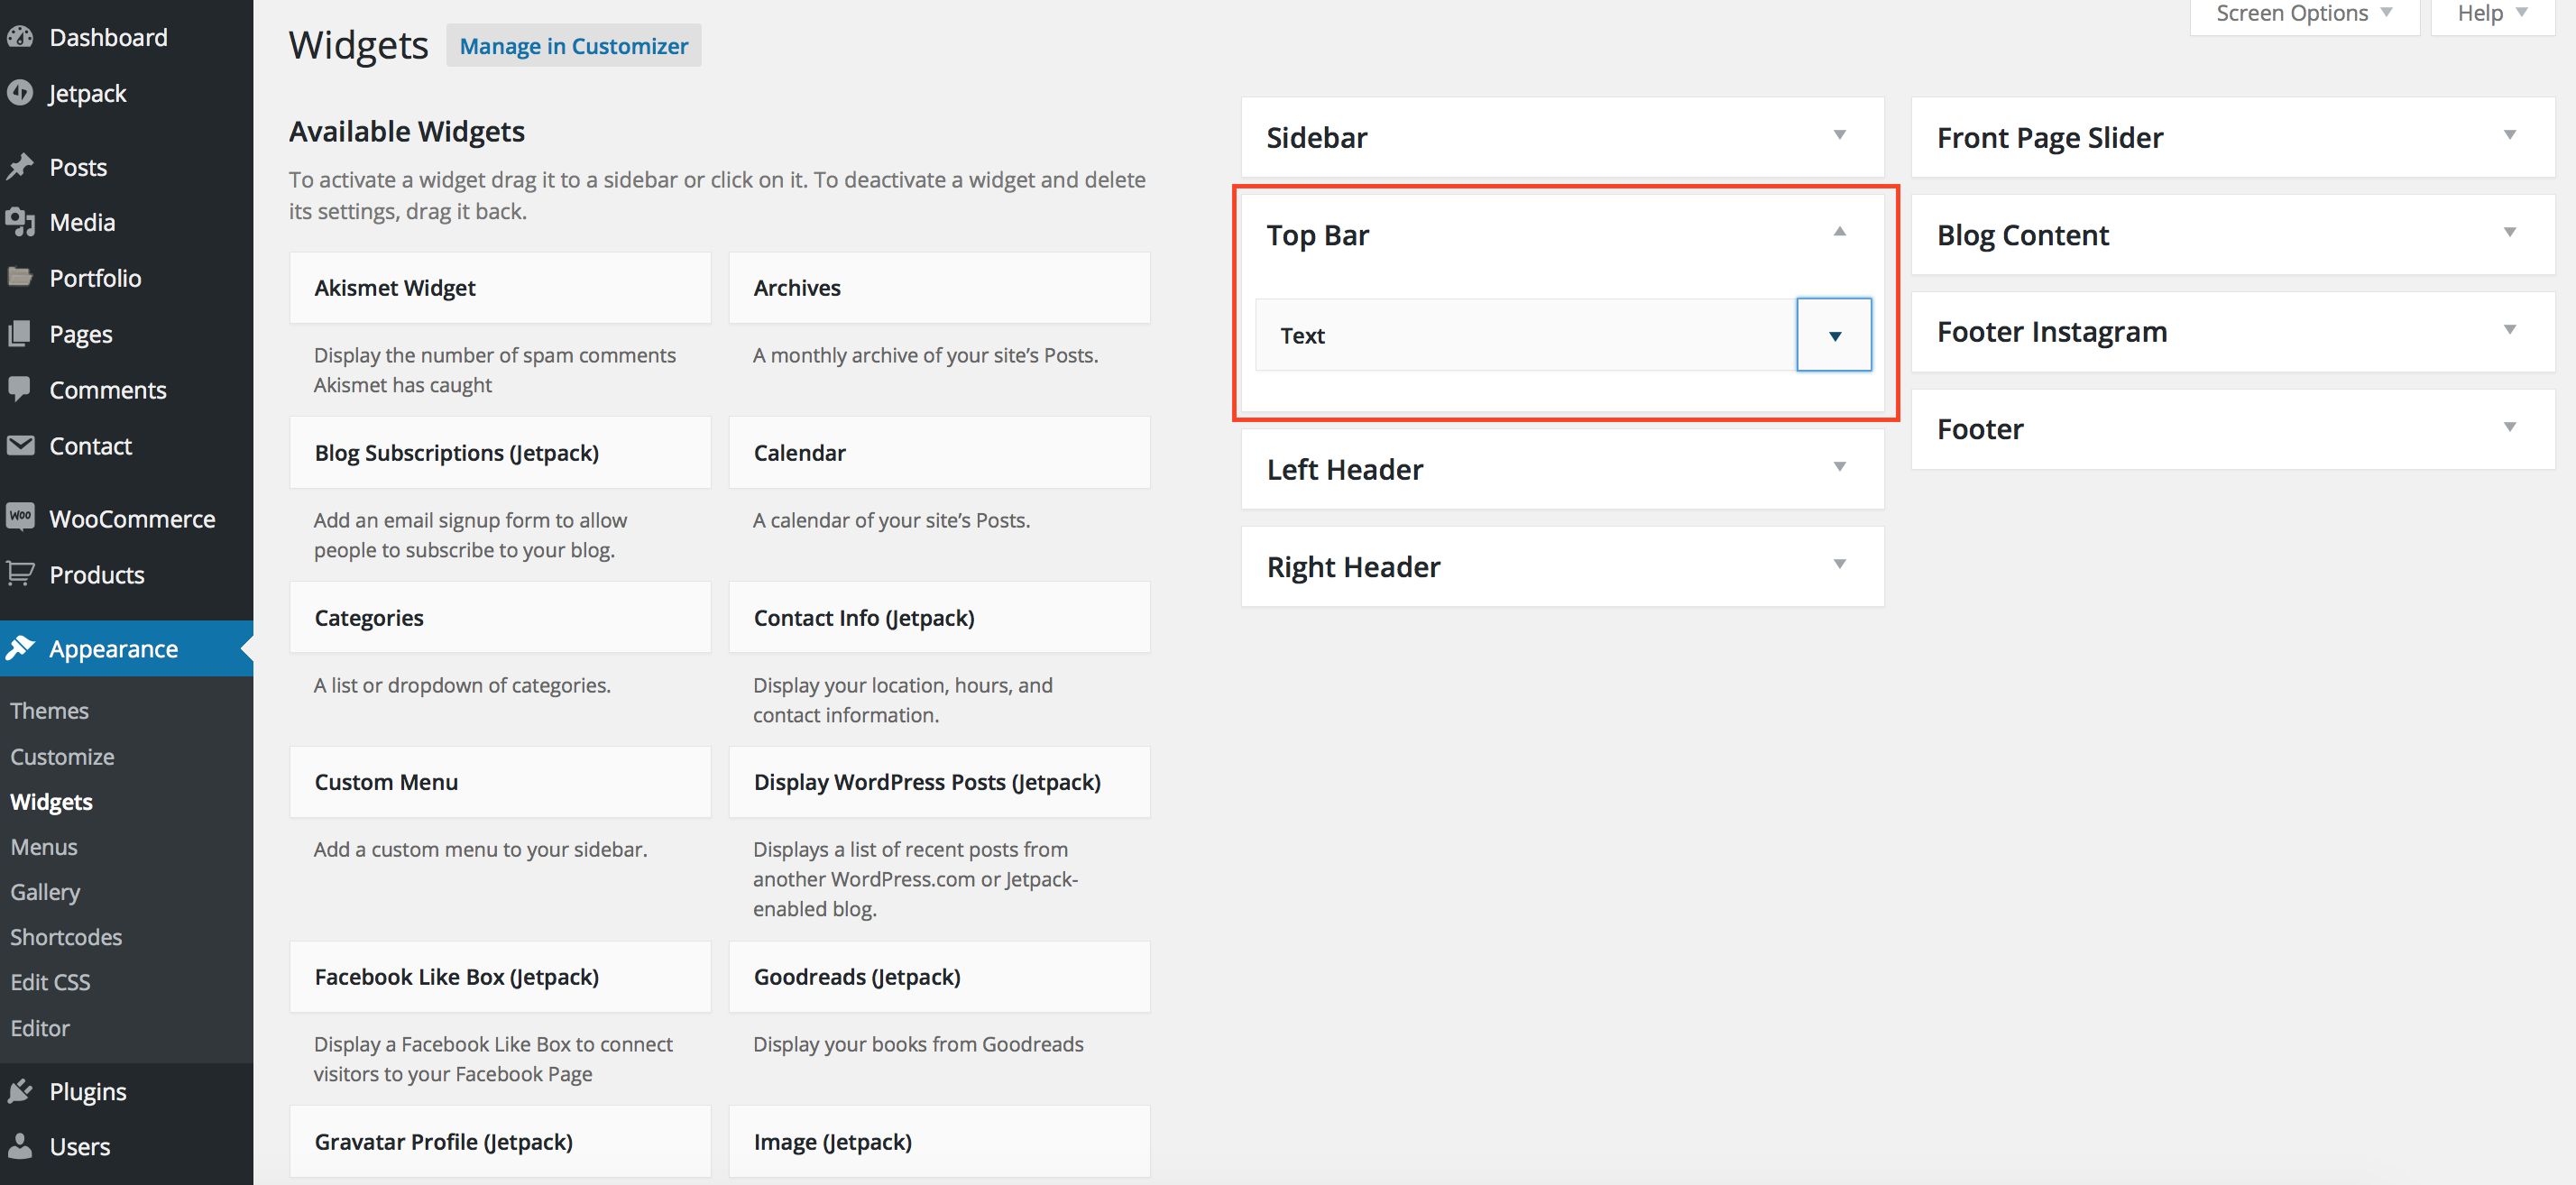
We used a simple text widget to insert text at the top of our site. You can drag whatever widget you like to appear at the very top of your header section.