
First, make sure you have your theme, plugins, and WordPress, updated to the latest versions.
Then, install and activate Loco Translate WordPress plugin.
Now check the translation file for your theme.

If you have an error or warning
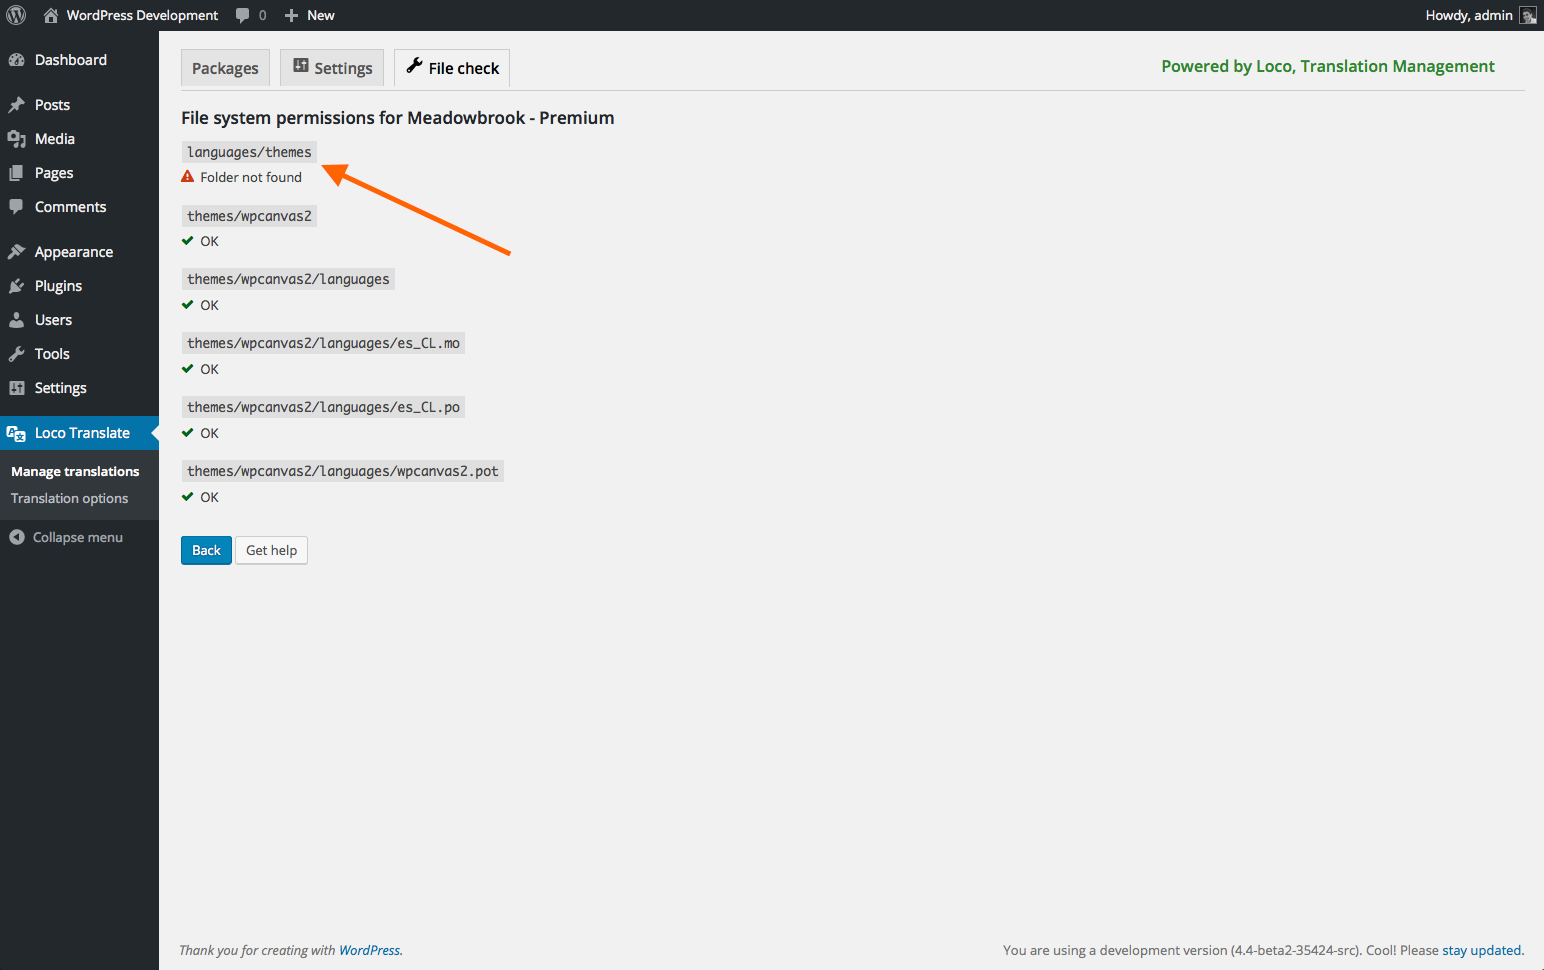
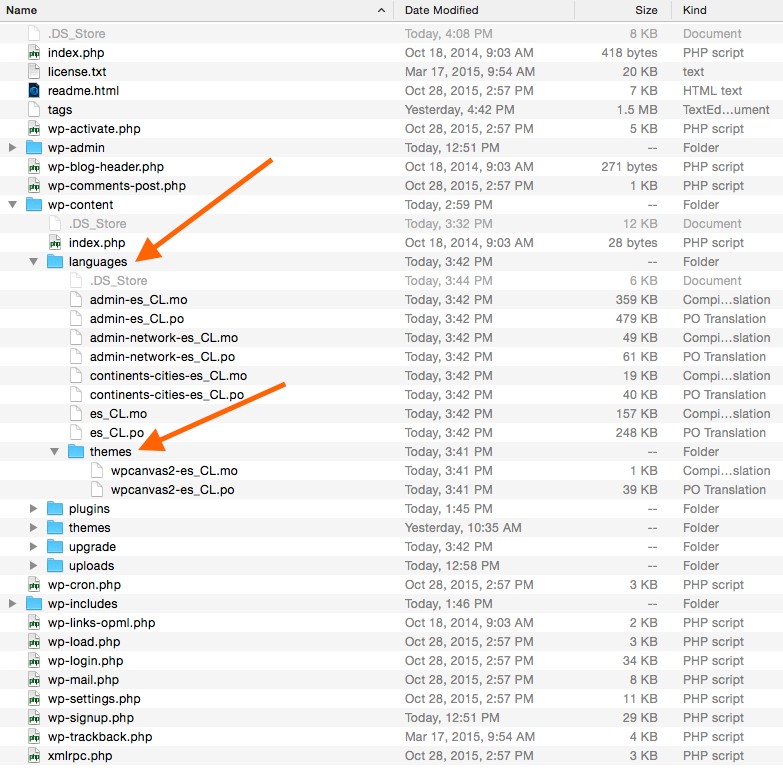
Then, update your file and folder permissions, and create a languages/themes folder inside your wp-content directory. You will need to FTP into your web server to do this.
Technically, you can create a translation file inside your theme file without having to FTP inside your web server and create the languages/themes path. But if you update your theme through the dashboard, you will lose your translation files.
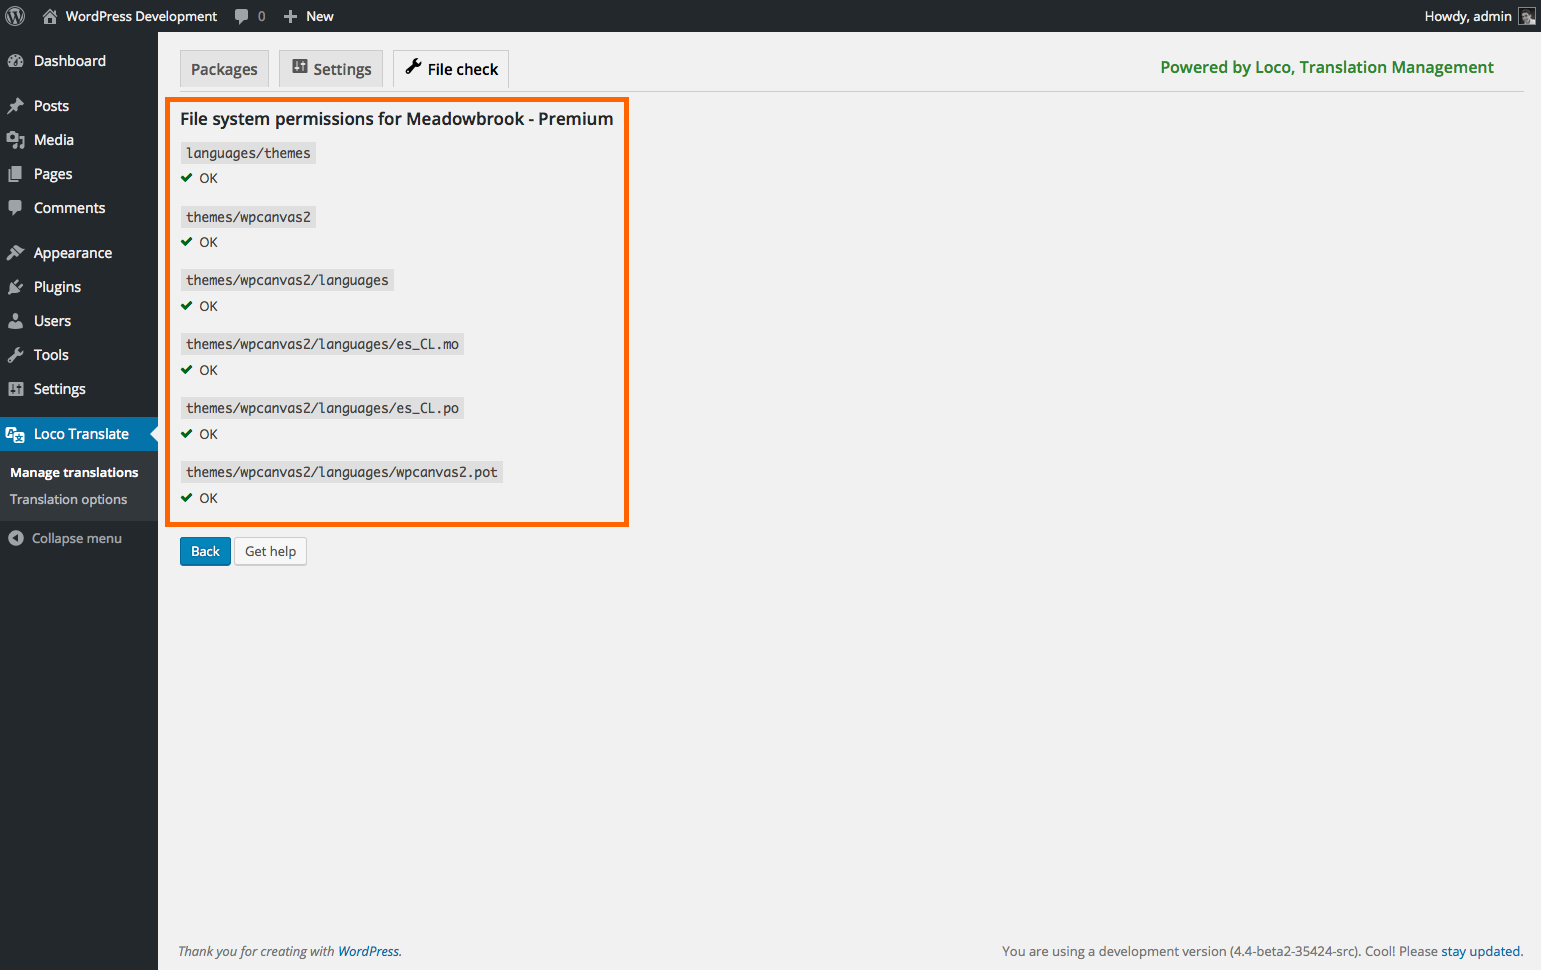
If you are successful in creating languages/themes, you will see this success page.
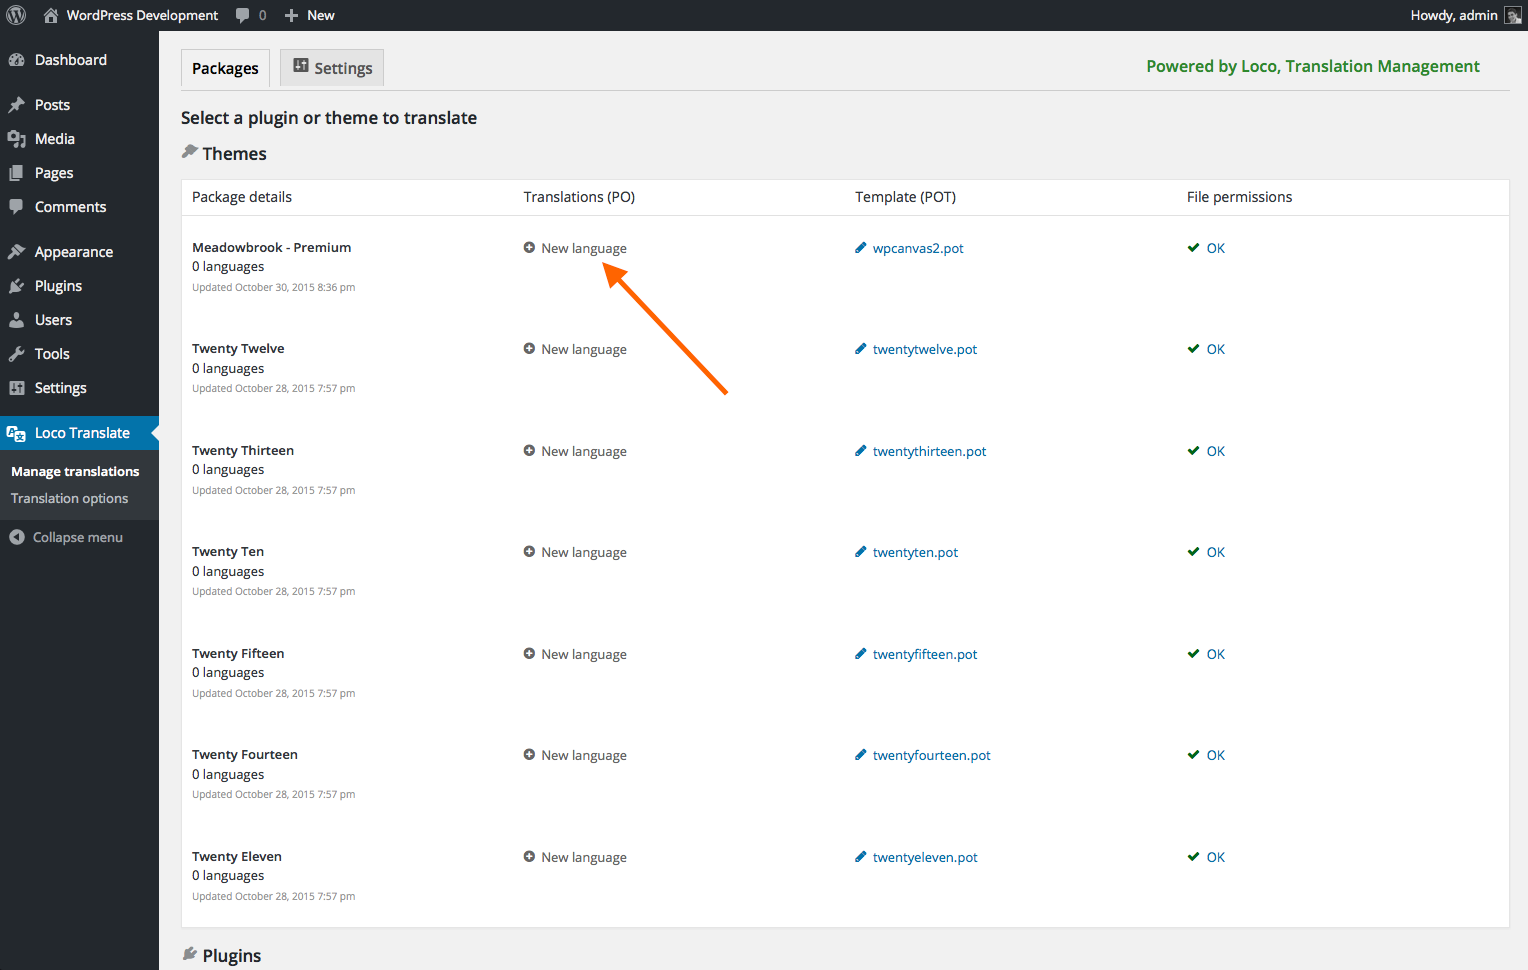
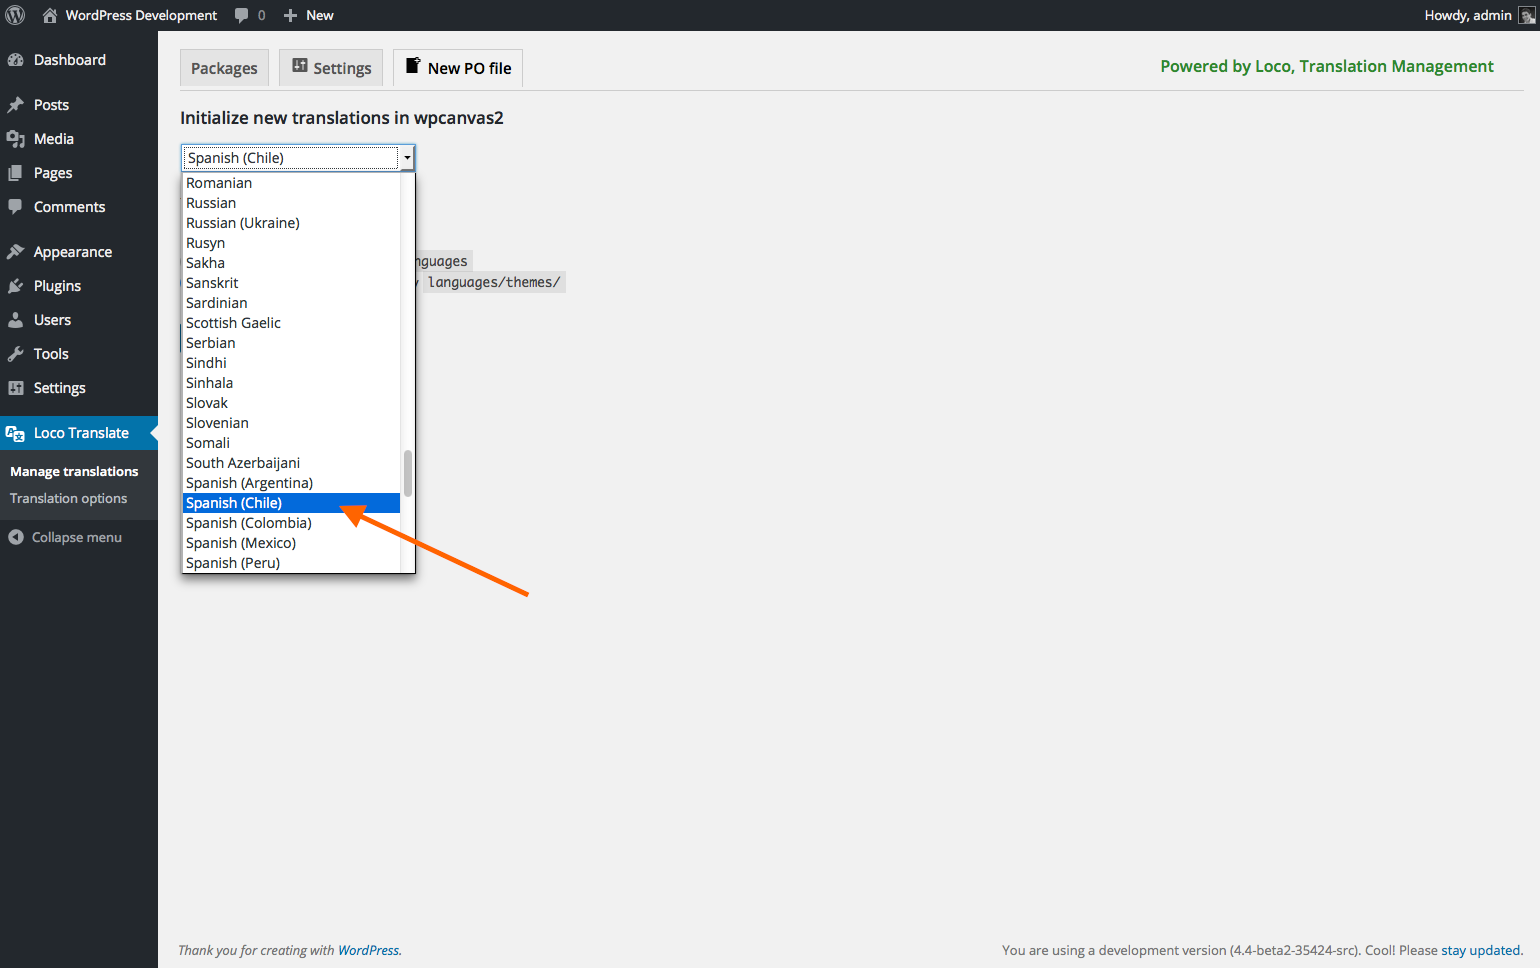
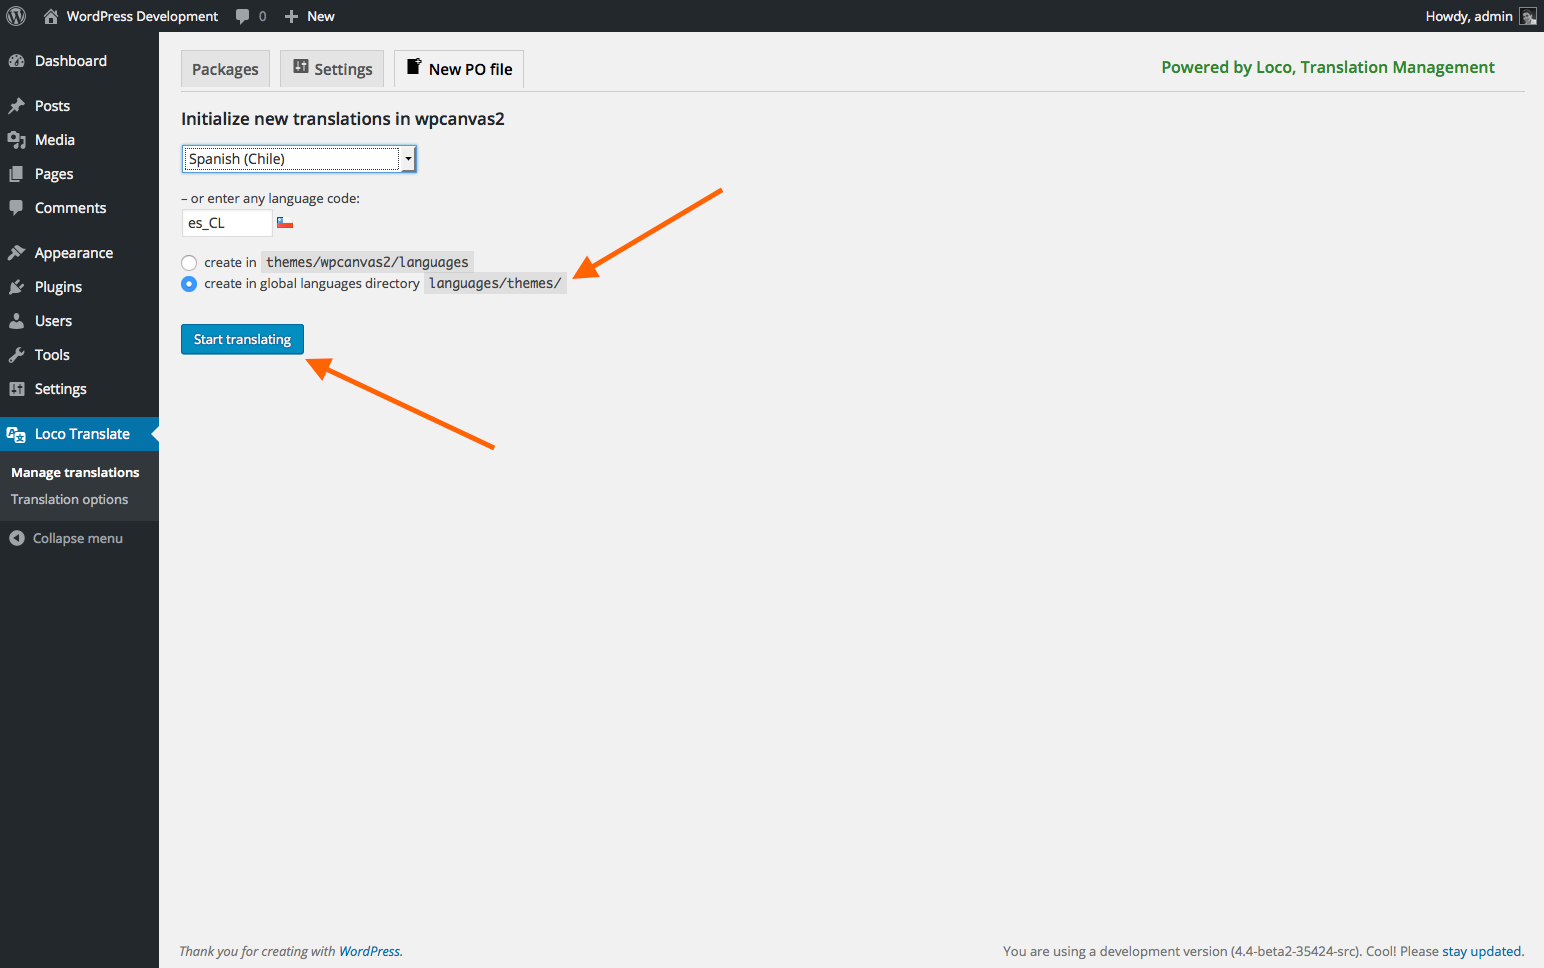
Now, create a new language.
Now you are ready to translate.
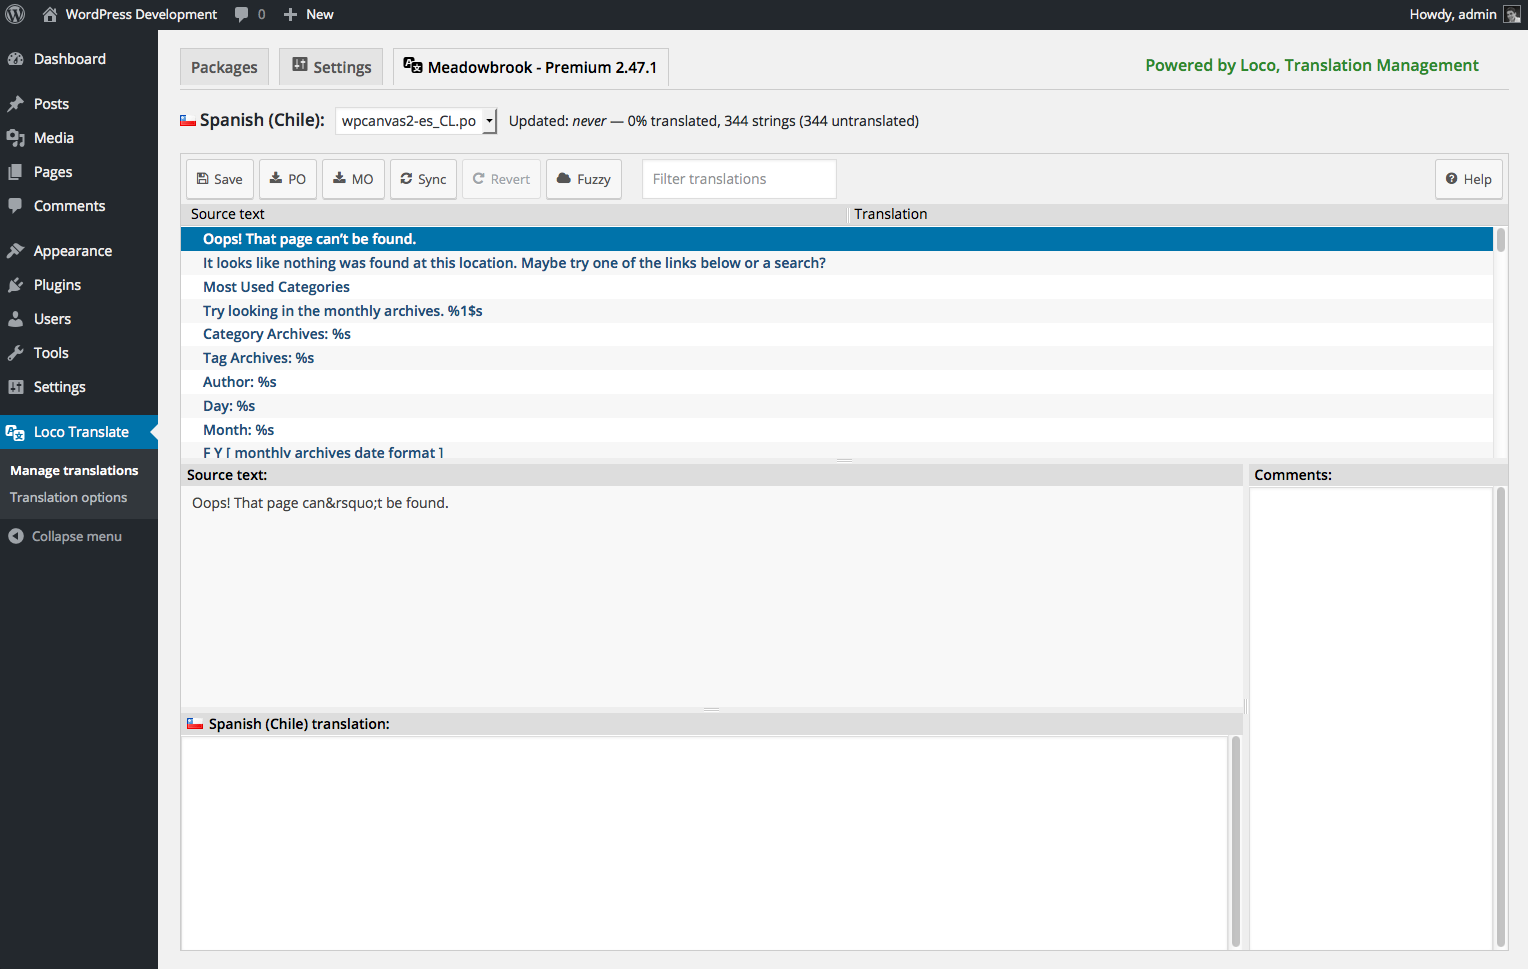
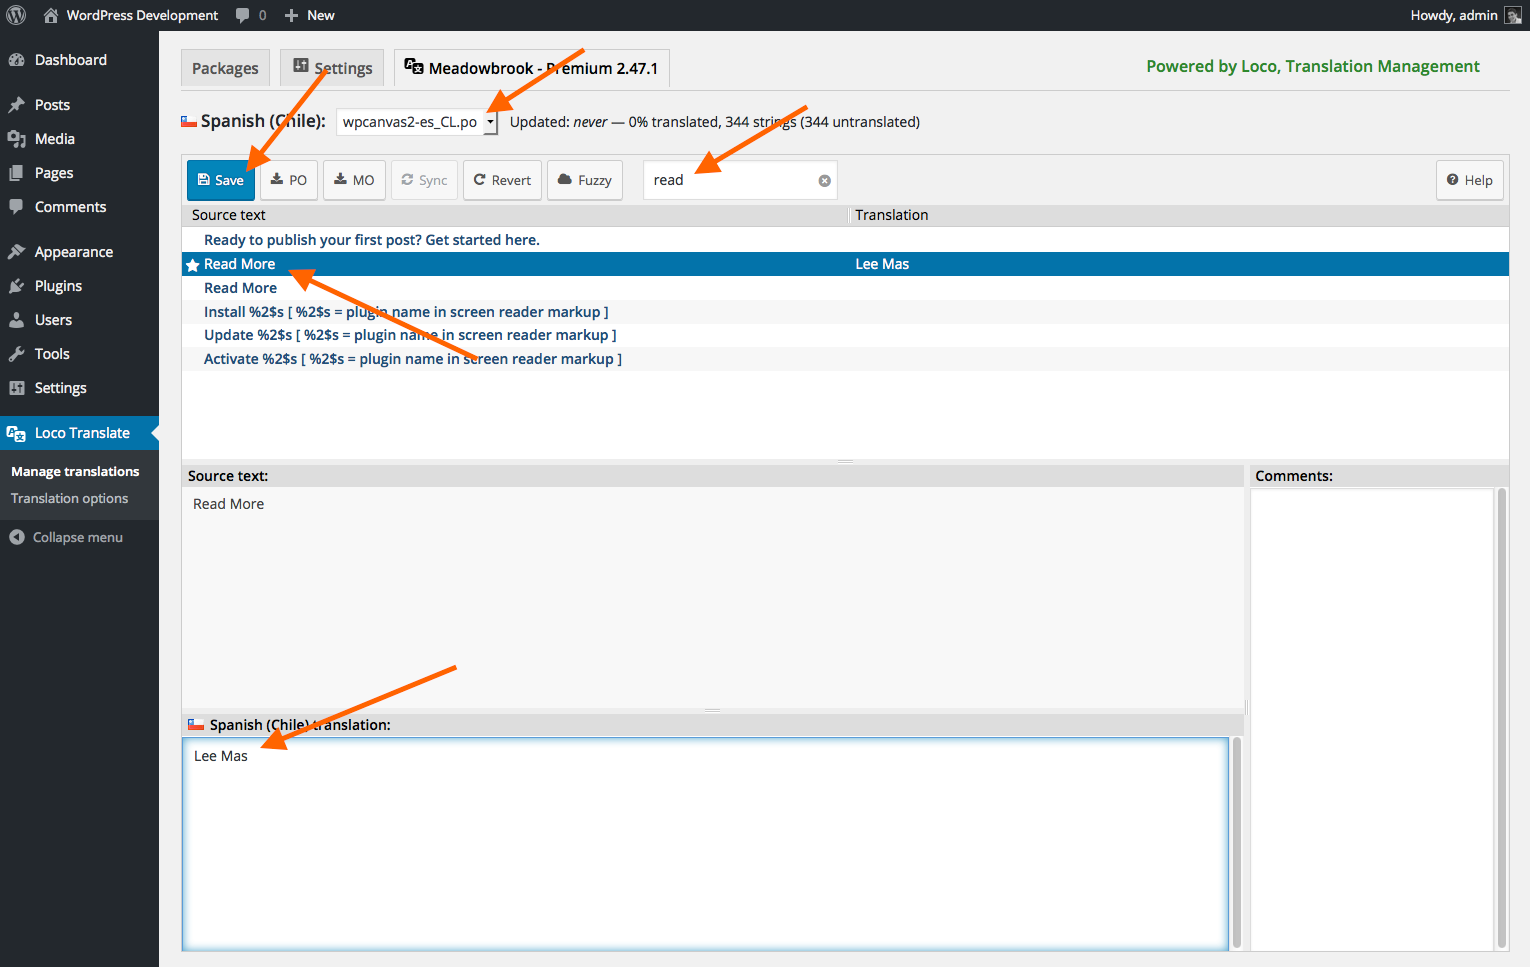
We are going to translate the Read More button text.
Search for “read”, select the source text, add your translation, and save.
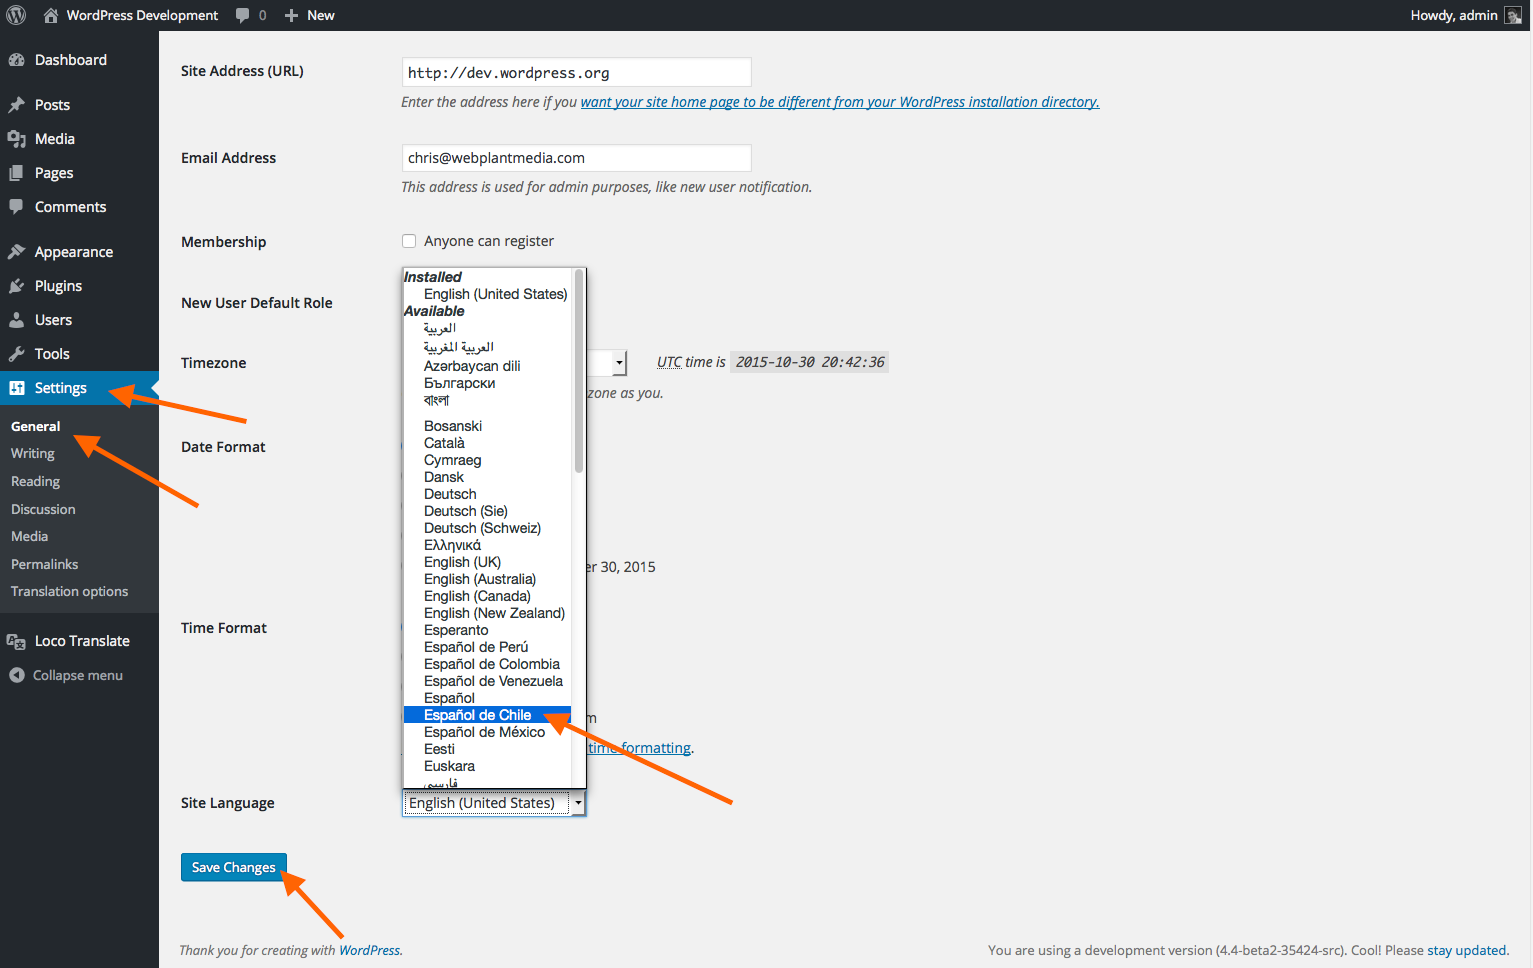
Now set your language preference in Settings => General
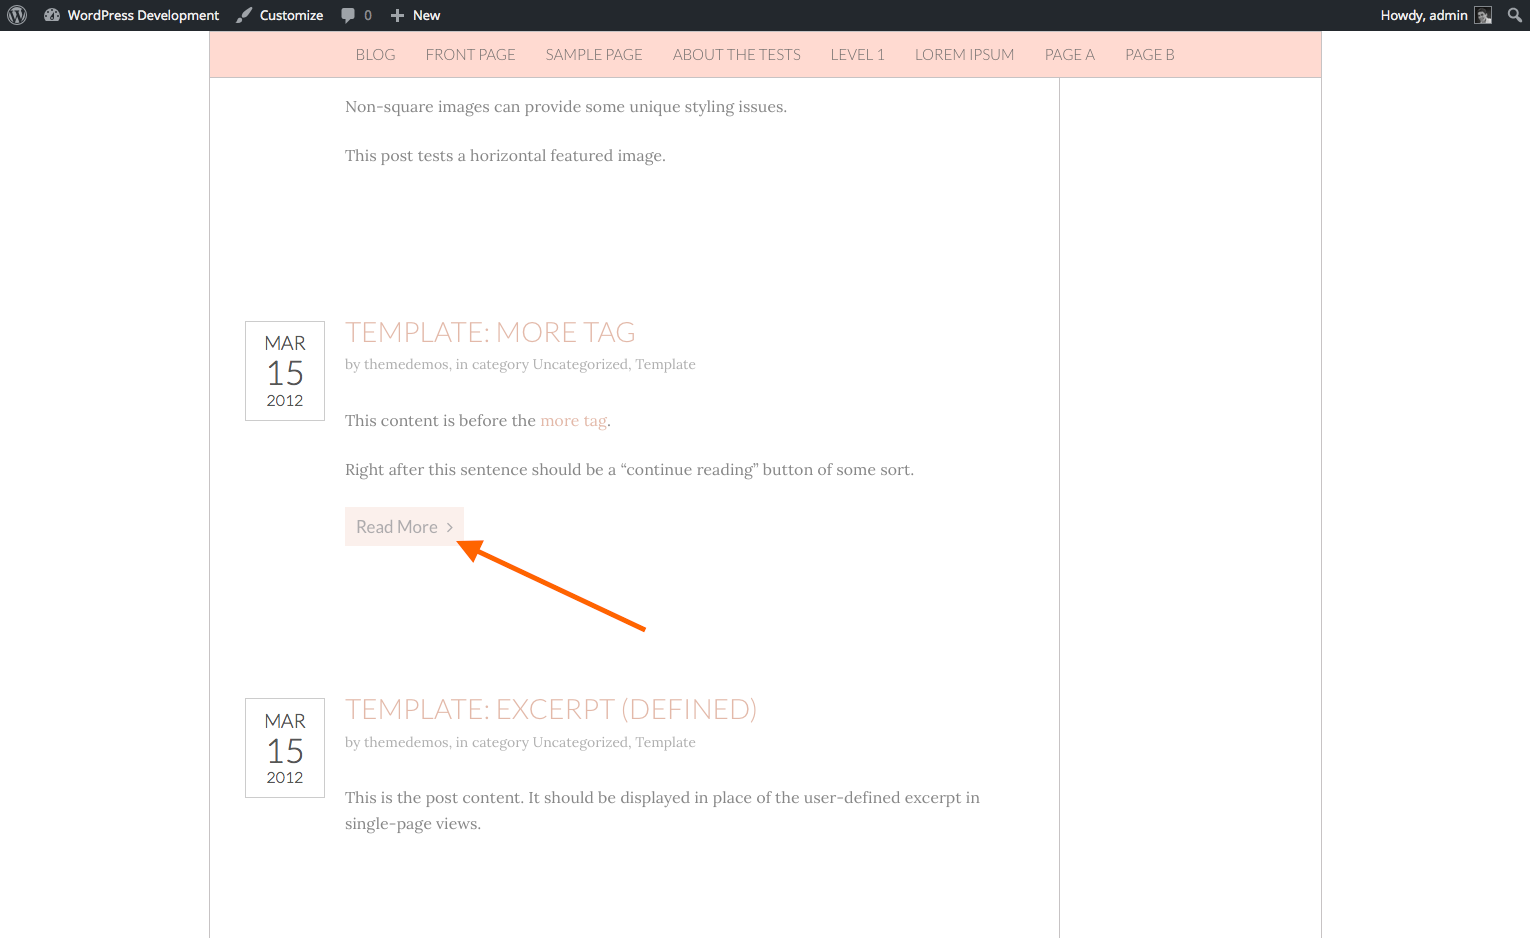
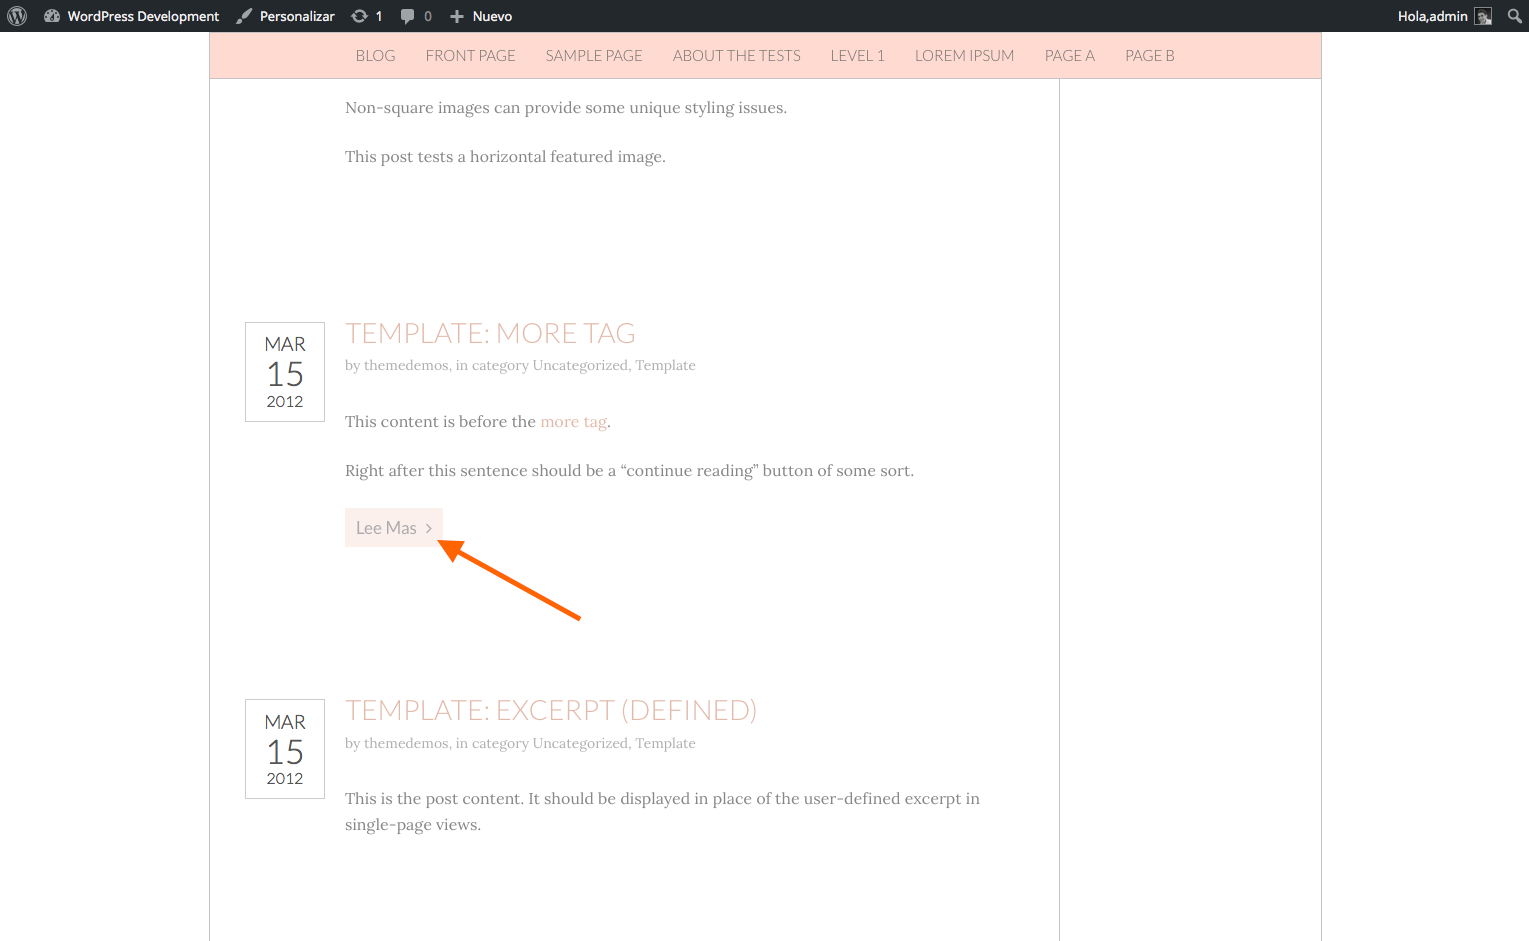
Your page should now display your translated Read More text.
Now, you just need to translate the rest of the text.